


- Aug 09, 2017
 0
0- by A2 Marketing Team
These days, many websites need some sort of social media presence if they want to expand their reach and stay in touch with their users. The problem is this usually involves creating and managing multiple accounts, which can be quite cumbersome and time-consuming.
There are plenty of available tools to help you to manage your social media accounts from a single platform. However, few of them integrate seamlessly with WordPress, which means you would still need to schedule new post shares, set all of the hashtags, and handle other miscellaneous tasks. The logical solution is to find a tool that can deal with all of this for you.
In this article, we’re going to talk about the upsides of managing your social media presence from WordPress, and introduce you to a plugin that can help you do it. Then we’ll teach you how to use it in three simple steps. Let’s jump in!
Why You’d Want to Manage Your Social Media From WordPress
When we talk about ‘managing’ your social media, we’re not referring to a single action. We’re talking about creating publications, scheduling them, keeping up with interactions across your accounts, and more. In most cases, these tasks shouldn’t take too much time, but they can add up quickly.
If you’re an efficiency nut like us, you’ll want to find the best way to save time while still getting everything done. With that in mind, managing your social media from WordPress can be a good decision for the following reasons:
- You only need to use a single dashboard. Instead of having to jump between accounts, you can use a centralized dashboard to handle all of your duties.
- It enables you to share your WordPress content more quickly. There are plenty of tools that enable you to link WordPress with your social media accounts, but few of them can handle all the major options simultaneously.
- You get to save a lot of time. This one is rather self-explanatory!
Now that we’ve established the benefits of using WordPress to manage your social media, let’s talk about one tool that can help you do it.
An Introduction to the Social Web Suite Plugin

This newly-released plugin caught our attention because it enables you to save lots of time when it comes to managing your social media. To do this, it links your WordPress installation with its own dashboard, then provides you with the tools to automate sharing your content on social media (such as new blog posts). For now, the service only supports Twitter, Facebook, and LinkedIn, but it’s more than enough to get started with.
Finally, it’s worth noting that, despite this being a new plugin, we didn’t find any glaring issues during our testing. However, it’s always common for new tools to have a glitch or two, so we recommend you test it on your own before adopting it for the long-term.
Key Features:
- Integrates WordPress with Twitter, Facebook, and LinkedIn.
- Automates and schedules your content-sharing duties.
- Customizes your publications for each platform.
- Previews all of your messages before sending them.
Price:
For now, the Social Web Suite plugin and its platform remain free to use, but some of their documentation suggests they’ll implement premium tiers moving forward, so plan accordingly!
How to Manage Your Social Media Presence From WordPress (In 3 Steps)
As you might imagine, we’re going to use the Social Web Suite plugin to make this happen. To get started, go ahead and install and activate the plugin on your WordPress site. When that’s done, move on to the first step.
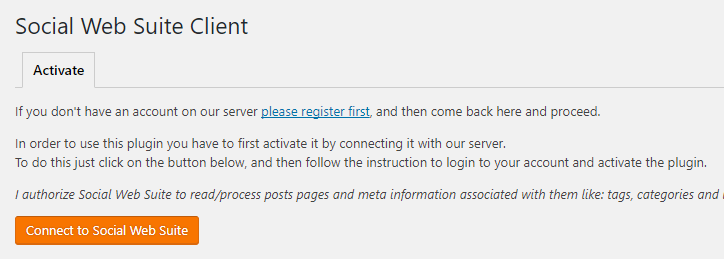
Step #1: Create a Social Web Suite Account and Link It to WordPress
Once you activate the plugin, you’ll automatically come to a tab that includes an option to register an account on the Social Web Suite website. In case you miss it, here’s the link you need to visit. Once you’ve registered, return to WordPress, and click on the Connect to Social Web Suite button:
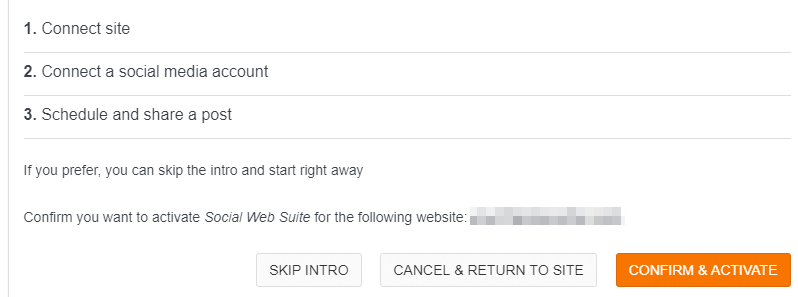
Doing so will redirect you to the Social Web Suite platform. You’ll need to connect it with WordPress by clicking on the Confirm & Activate button:
When you’re done, move on to step number two.
Step #2: Configure Your Sharing Settings
After confirming the connection between WordPress and the platform, you’ll see an option to configure your website’s settings on your new dashboard:
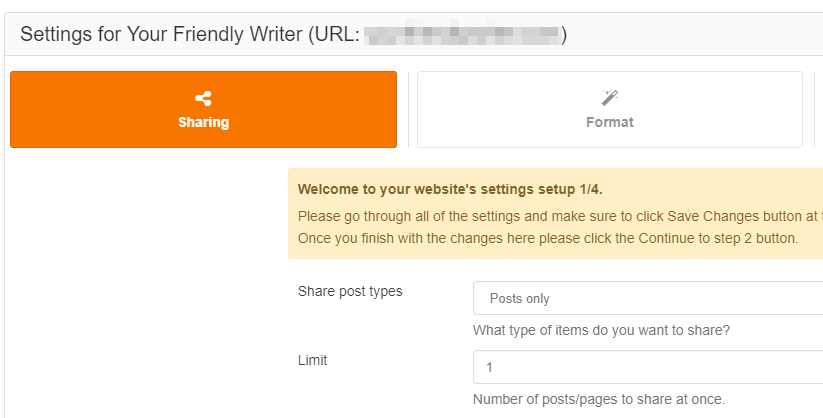
This is a step-by-step process, and you’ll first want to choose which post types should be shared automatically:
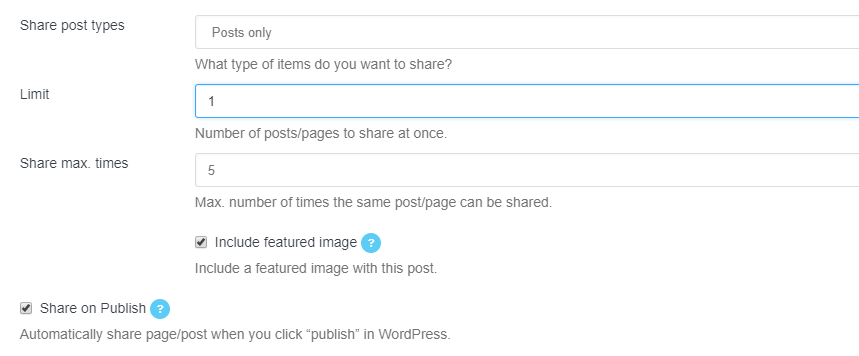
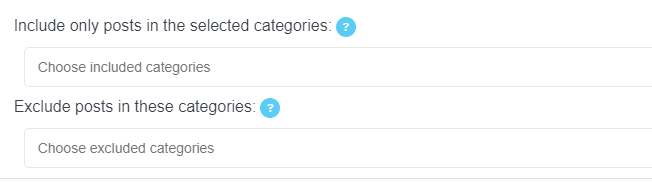
By default, the platform will only share your posts up to five times when they’re published on WordPress. As far as we’re concerned, these settings are ideal. However, feel free to tweak them if you want to, and jump to the Categories tab. Here, you’ll be able to choose if you want to share posts only for specific categories on your site:
Moving on, the last settings screen enables you to exclude specific posts from being shared on your social media. All you have to do is tick the corresponding box for any post you want to ban:
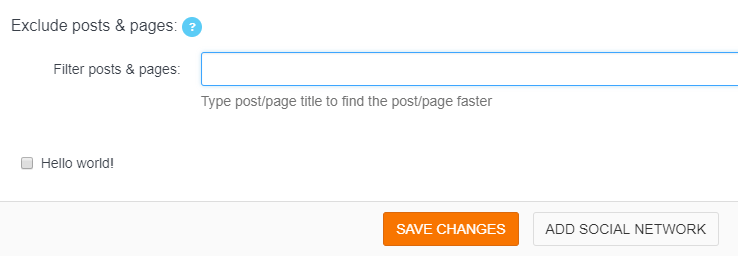
When you’re ready, click on the Save Changes button at the bottom of your screen, then on Add Social Network, which brings us to the final step.
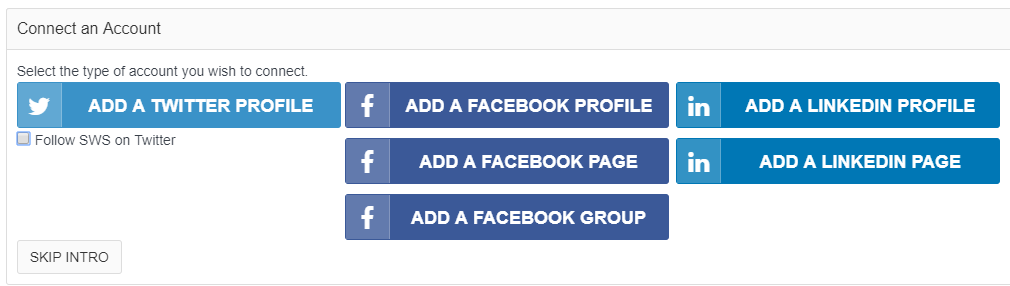
Step #3: Connect Your Social Media Accounts and Start Sharing Your Content
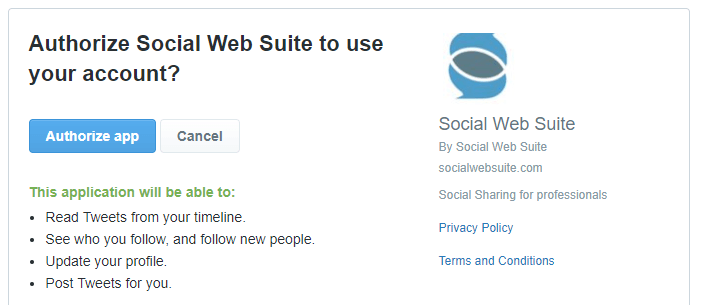
Now the platform will prompt you to link the social media accounts you want to use. You can connect up to three accounts for Facebook accounts, two for LinkedIn, and one for Twitter:
The process for each is the same – just click on the relevant connection button, and the platform will ask you to give Social Web Suite access to your account:
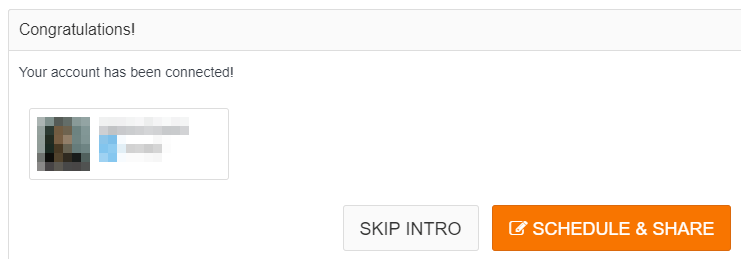
When you’ve linked to all of the accounts you want to use, you’ll be able to start scheduling more publications for them by clicking on the Schedule & Share button:
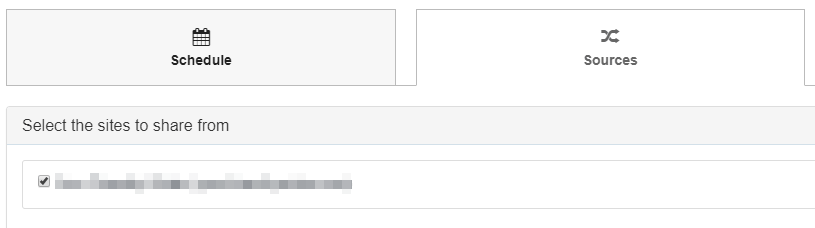
Once you do that, you’ll find yourself on the main Social Web Suite dashboard. From here, open the Sources tab and activate your site for your social media accounts:
Now that your social media accounts are configured, return to WordPress and get back to working on more content. If you copied our settings, each of your new posts should be shared automatically on all your linked accounts without you having to lift a finger.
Conclusion
Learning how to manage your social media accounts effectively is an excellent way to get your content in front of as many eyes as possible. Plus, it can provide you with several opportunities to engage with your followers and get interesting conversations going.
One of the most efficient ways to handle your WordPress site’s social media accounts is to use the Social Web Suite plugin and follow these three steps:
- Create a Social Web Suite account and link it to WordPress.
- Configure your Social Web Suite sharing settings.
- Connect your social media accounts and share your content.
Image credit: Pixabay.
