How to manage users in the Customer Portal
This article describes how to set up and manage users for your A2 Hosting account in the Customer Portal.
User management in the Customer Portal
The User Management feature enables you to invite new users and then grant them access to specific areas of your account. For example, you might allow one user to access billing-related items, while another user can only access products and services.
The following permissions are available for user accounts:
- Modify Master Account Profile: With this permission, users can access and modify the account owner's profile.
- View & Manage Contacts: With this permission, users can access and manage contacts.
- View Products & Services: With this permission, users can access products, services, and addons.
- View & Modify Product Passwords: With this permission, users can reset passwords.
- Perform Single Sign-On: With this permission, users can use single sign-on to access services.
- View Domains: With this permission, users can view domain registrations.
- Manage Domain Settings: With this permission, users can manage domain settings (for example, nameservers, transfers, etc.).
- View & Pay Invoices: With this permission, users can view and pay invoices.
- View & Accept Quotes: With this permission, users can view and accept quotes.
- View & Open Support Tickets: With this permission, users can view, open, manage, and respond to support tickets.
- View & Manage Affiliate Account: With this permission, users can view and manage affiliate accounts.
- View Emails: With this permission, users can view the account's email history.
- Place New Orders/Upgrades/Cancellations: With this permission, users can place new orders, initiate upgrades, and cancel products and services.
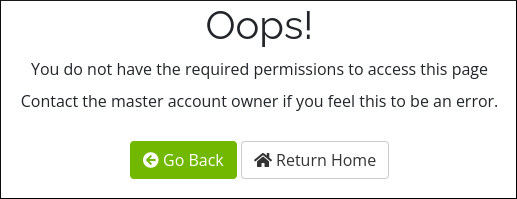
If a user tries to access an area for which they do not have permission, they receive the following message:
Inviting new users
To invite a new user to access your account, follow these steps:
- Log in to the Customer Portal.If you do not know how to log in to the Customer Portal, please see this article.
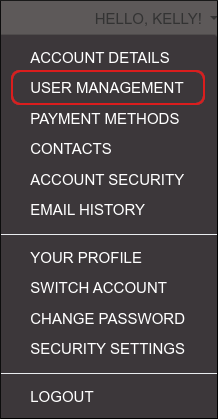
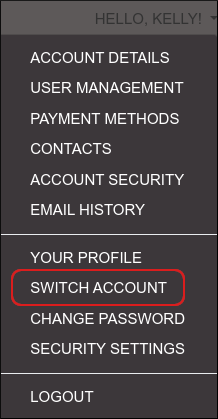
- On the menu bar, click HELLO, NAME!, where NAME is your first name:

- Click :
Scroll down to the Invite New User section:
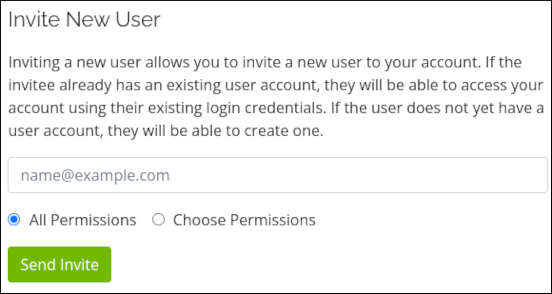
In the [email protected] text box, type the email address of the person you want to invite.
If the person already has an A2 Hosting user account with that email address, they will be able to access your account using their existing login credentials. If the person does not yet have an A2 Hosting user account, they must create one after accepting the invitation.- If you want to grant the person all permissions to your account, click All Permissions. Otherwise, click Choose Permissions, and then select the permissions you want to grant.
- Click .
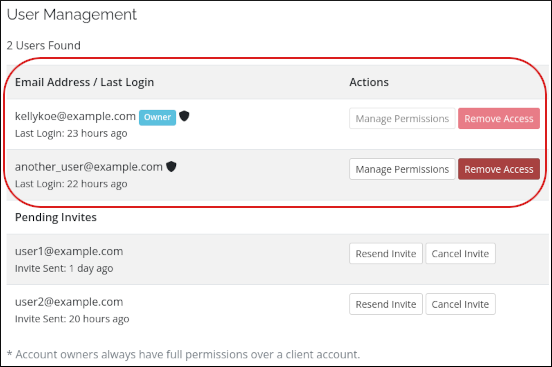
The invited user appears in the User Management section under Pending Invites:
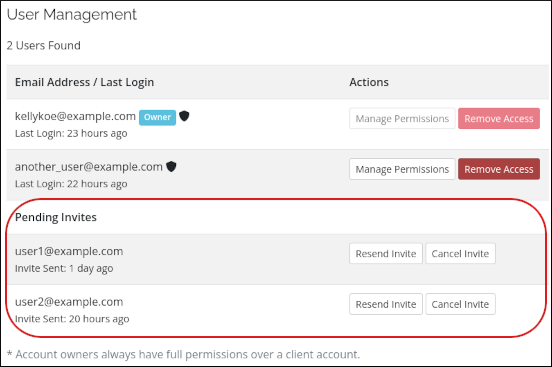 To resend the invitation, click Resend Invite. To cancel the invitation, click Cancel Invite.
When the invited user clicks Accept invitation in their invitation, they are redirected to the Customer Portal. After they click Accept Invite, they appear in the list of active users:
Managing user permissions
You can add or remove permissions for existing users at any time. To do this, follow these steps:
- Log in to the Customer Portal.If you do not know how to log in to the Customer Portal, please see this article.
- On the menu bar, click HELLO, NAME!, where NAME is your first name:
- Click :
In the User Management section, locate the user for which you want to add or remove permissions, and then click Manage Permissions:
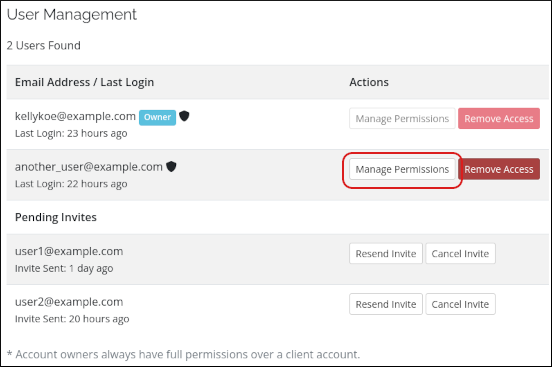 As the owner of an account, you cannot change permissions for yourself.
- Select the permissions you want for the account, and then click Save Changes.
Removing user access
If a user no longer requires access to your account, you can remove their account. To do this, follow these steps:
- Log in to the Customer Portal.If you do not know how to log in to the Customer Portal, please see this article.
- On the menu bar, click HELLO, NAME!, where NAME is your first name:
- Click :
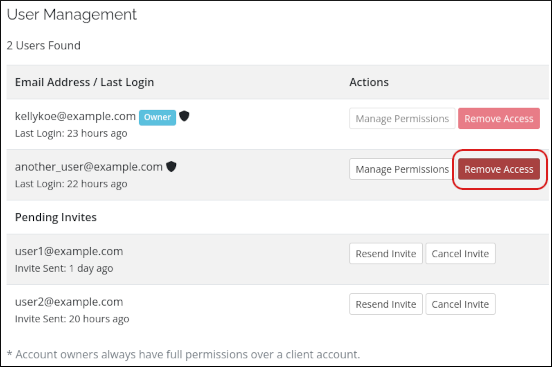
In the User Management section, locate the user you want to delete, and then click Remove Access:
In the Remove Access dialog box, click Confirm:
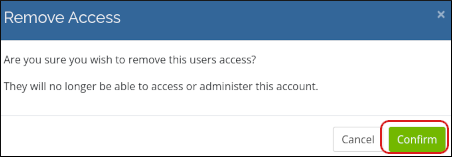
The Customer Portal removes the user from your account.
Switching accounts
If you have user access to multiple accounts, you can switch between them. When you do this, it is just as if you had logged in to that account using your associated username and password.
To do this, follow these steps:
- Log in to the Customer Portal.If you do not know how to log in to the Customer Portal, please see this article.
- On the menu bar, click HELLO, NAME!, where NAME is your first name:
- Click :
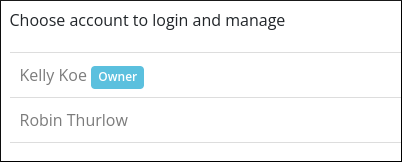
A list of accounts for which you have user access appears. Click the name of the account that you want to access:
You are now logged in to that account.
Article Details
- Product: All accounts
- Level: Beginner
Grow Your Web Business
Subscribe to receive weekly cutting edge tips, strategies, and news you need to grow your web business.
No charge. Unsubscribe anytime.
Did you find this article helpful? Then you'll love our support. Experience the A2 Hosting difference today and get a pre-secured, pre-optimized website. Check out our web hosting plans today.