Basic domain management using the Customer Portal
This article describes how to use the A2 Hosting Customer Portal to do basic domain management tasks, such as changing the domain's name servers and setting the registrar lock.
Viewing domain information
To view basic information about your domain, such as payment and registration dates, follow these steps:
- Log in to the Customer Portal.If you do not know how to log in to the Customer Portal, please see this article.
- On the menu bar, click , and then click :
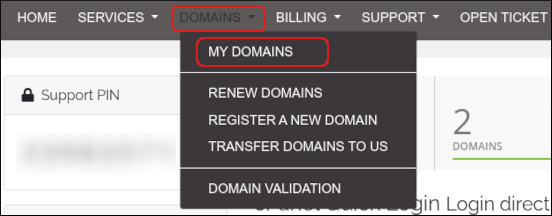
Click the domain you want to configure.
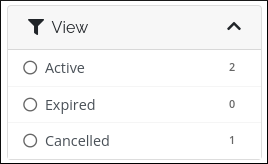
You can filter the list of domains to only display active, expired, cancelled, or expiring domains. To do this, in the View sidebar, click the type of domain status you want to view:
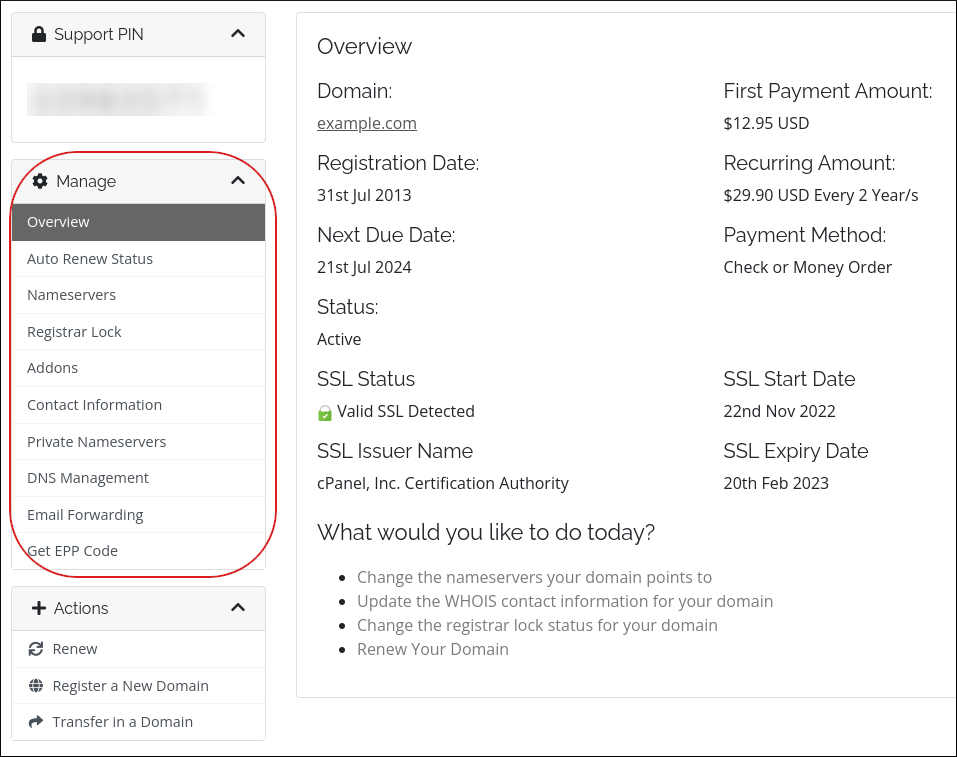
Information about your domain appears. The Manage sidebar lists management actions you can do for the domain:
Viewing and changing the name servers for a domain
To change the name servers for a domain, or to just see the current name servers set for a domain, follow these steps:
- Log in to the Customer Portal.If you do not know how to log in to the Customer Portal, please see this article.
- On the menu bar, click , and then click :
Click the domain you want to configure.
You can filter the list of domains to only display active, expired, cancelled, or expiring domains. To do this, in the View sidebar, click the type of domain status you want to view:
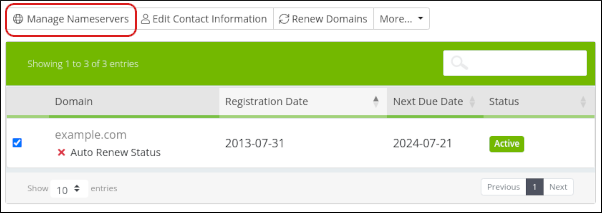
Click Manage Nameservers:
To use the default name servers, click Use default nameservers.
To manage DNS settings using the A2 Hosting Customer Portal, you must use the default name servers.To use custom name servers, click Use custom nameservers, and then type the name server names in the text boxes.
If you use custom name servers, you cannot manage DNS settings using the A2 Hosting Customer Portal.Click .
DNS changes can take up to 24 hours to fully propagate. For information about how to access your web site before DNS propagation is complete, please see this article.
Setting the registrar lock for a domain
For security reasons, you should keep your domain locked to prevent unauthorized transfers. To do this, follow these steps:
- Log in to the Customer Portal.If you do not know how to log in to the Customer Portal, please see this article.
- On the menu bar, click , and then click :
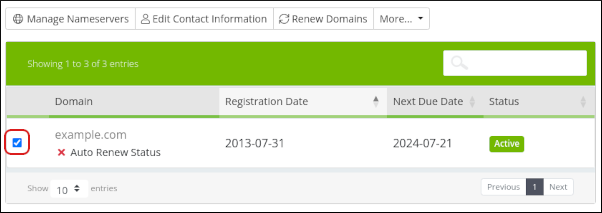
Select the check box next to the domain you want to configure:
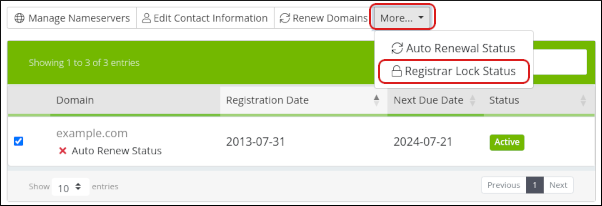
Click More, and then click Registrar Lock Status:
The renewal status for the domain appears:
- To enable the registrar lock, click .
- Although it is not recommended, you can disable the lock. To do this, click .
Article Details
- Product: All accounts
- Level: Beginner
Grow Your Web Business
Subscribe to receive weekly cutting edge tips, strategies, and news you need to grow your web business.
No charge. Unsubscribe anytime.
Did you find this article helpful? Then you'll love our support. Experience the A2 Hosting difference today and get a pre-secured, pre-optimized website. Check out our web hosting plans today.