How to view and change settings for shared hosting accounts
This article describes how to use the A2 Hosting Customer Portal to view and change settings for a shared hosting account. In addition to changing the login settings, you can do many common administrative tasks right from the Customer Portal interface.
Viewing and changing account login settings
You can use the A2 Hosting Customer Portal to view the username and password for your shared hosting account. You can also use it to change the password.
To view or change your shared account login settings:
- Log in to the Customer Portal.If you do not know how to log in to the Customer Portal, please see this article.
- On the menu bar, click , and then click :
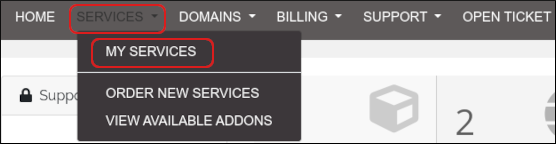
- In the list of products and services, locate what you want to change, and then click it.
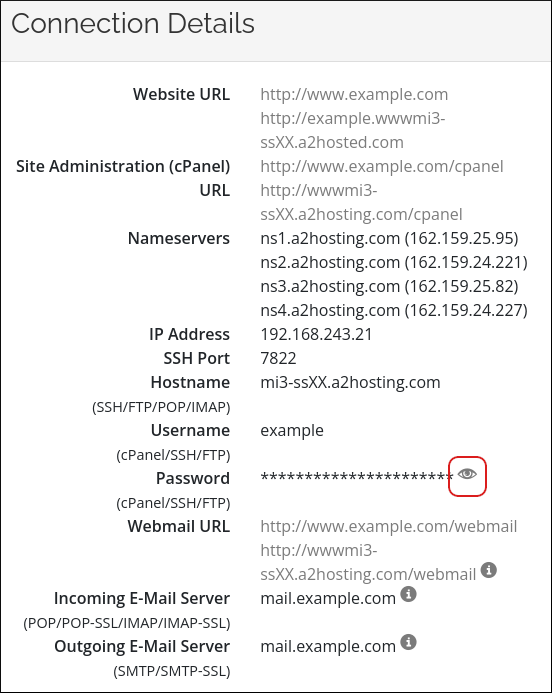
To view your current password, under Connection Details, click the eye icon next to Password:
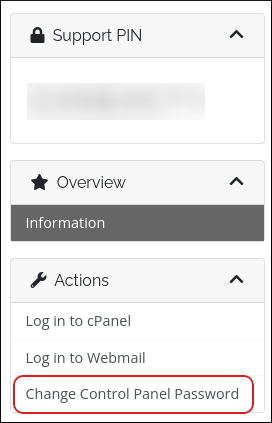
To change your password, in the Actions sidebar, click :
To change your password, type the new password in the New Password text box.
Make sure you choose a strong password. The slider bar updates as you to type to indicate the current password's strength. Alternatively, click Generate Password, and the Customer Portal generates a strong, random password for you.- In the Confirm New Password text box, re-type the new password.
- Click .
Using Quick Shortcuts
The Quick Shortcuts feature enables you to do many common administrative tasks right from the Customer Portal interface.
To access Quick Shortcuts, follow these steps:
- Log in to the Customer Portal.If you do not know how to log in to the Customer Portal, please see this article.
- On the menu bar, click , and then click :
- In the list of products and services, locate what you want to change, and then click it.
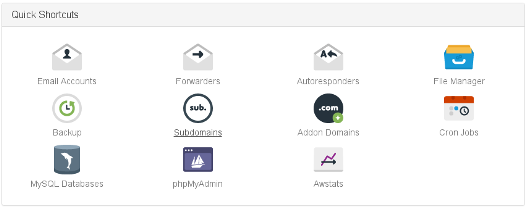
In the Quick Shortcuts section, click the feature you want to use:
The Customer Portal automatically logs you in to cPanel.
You can also create an e-mail account directly from the Customer Portal interface. To do this, follow these steps:
- In the Quick Create Email Account section, in the Yourname text box, type a username for the account.
- In the Desired Password text box, type a password for the account.
- Click . The Customer Portal creates the e-mail account.
Viewing usage statistics
You can also view the following usage statistics for your account:
- Disk usage.
- Bandwidth usage.
To do this, follow these steps:
- Log in to the Customer Portal.If you do not know how to log in to the Customer Portal, please see this article.
- On the menu bar, click , and then click :
- In the list of products and services, locate what you want to change, and then click it.
- In the Usage Statistics section, view your account usage statistics.
Article Details
- Product: Reseller Hosting Shared Hosting
- Level: Beginner
Grow Your Web Business
Subscribe to receive weekly cutting edge tips, strategies, and news you need to grow your web business.
No charge. Unsubscribe anytime.
Did you find this article helpful? Then you'll love our support. Experience the A2 Hosting difference today and get a pre-secured, pre-optimized website. Check out our web hosting plans today.