How to use the Plesk spam filter
This article describes how to use the Spam Filter in Plesk to reduce the amount of unwanted e-mail (spam) in your e-mail accounts. Spam Filter is an automated filtering system that uses a variety of techniques to identify and filter spam messages.
Spam Filters
Spam can be a major annoyance, with messages filling up users' inboxes. Additionally, spam messages can contain virus attachments or malicious links.
When you enable Spam Filters, it scores various characteristics of a message to determine if it is spam. You can manage messages that Spam Filters marks as spam in a number of ways. For example, you can route messages marked as spam to specific folders, or you can automatically delete them.
Enabling Spam Filters
Spam Filter is configured by the account administrator unless the 'Configure spam filter' permission is set for the the e-mail user. If the e-mail user has permissions, the Spam Filter tab will appear when they log into the email user control panel. Configuration is the same as for the administrator as shown below.
To enable Spam Filters in Plesk, follow these steps:
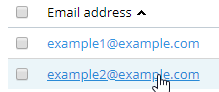
- In the management area of the Plesk home screen, click Email Addresses to go to the Mail page.

On the Mail page, click the e-mail address to be protected with spam filters.
On the email account page, click the Spam Filter tab.

Check the box Switch on spam filtering for this email address to turn on spam filtering.
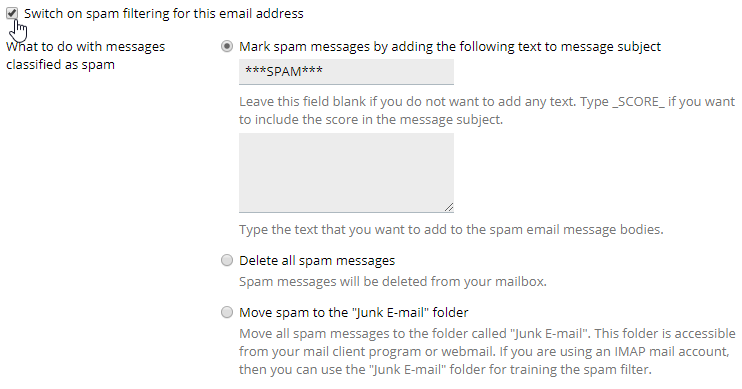
Select one of the options under What to do with messages classified as spam.
- Mark spam messages by adding the following text to message subject
The default text is ***SPAM*** but can be changed as desired. There is also the possibility to add text to the body of the message. Both of these things can be useful when setting up automated mail handling in an e-mail client. - Delete all spam messages
This is not recommended as you cannot recover a message that was incorrectly marked as spam. - Move spam to the “Junk E-mail” folder or Move spam to the Spam folder.
This option allows recovery of messages incorrectly marked as spam. this folder can become large over time and consume substantial disk space. It should be regularly reviewed and emptied.
- Mark spam messages by adding the following text to message subject
- Click to save your settings and return to the Mail page or click to save your settings and return to the General tab for the user.
Advanced Spam Filter Settings
You can customize the parameters to control how Spam Filters examines incoming messages. You can also define whitelists (trusted senders) and blacklists (known spammers) and other options.
To customize Spam Filters in Plesk, Follow these steps:
- Click Show Advanced Settings on the Spam Filter tab. The following advanced settings can be configured:

- Filter Sensitivity
Change the number in the Spam filter sensitivity text box to filter more or less spam. Scoring ranges from 1 to 10. Using higher scores means more messages will be marked as spam. However, this also means you may miss some legitimate messages and need to check your junk mail folder more often. - White List
Enter domains or e-mail addresses of trusted senders in the White list textbox. Domains and addresses entered in the box will always pass the spam filter. - Black List
Enter domains or e-mail addresses of spam senders in the Black list textbox. Domains and addresses entered in the box will never pass the spam filter.
- Filter Sensitivity
- Click to save your settings and return to the Mail page or click to save your settings and return to the General tab for the user.
Disabling Spam Filters
You can disable Spam Filters whenever you want. For example, if you are unable to receive a non-spam e-mail message, you can disable Spam Filters and ask the sender to resend the message so it reaches your account.
To disable Spam Filters in Plesk, follow these steps:
- In the management area of the Plesk home screen, click Email Addresses to go to the Mail page.
- On the Mail page, click the e-mail address where spam filters will be removed.
- On the email account page, click the Spam Filter tab.
- Un-check the box Switch on spam filtering for this email address to turn off spam filtering.
- Click to save your settings and return to the Mail page or click to save your settings and return to the General tab for the user.
Article Details
- Operating System: Linux Hosting
- Control Panel: Plesk
- Product: Managed WordPress with Plesk
- Level: Beginner
Grow Your Web Business
Subscribe to receive weekly cutting edge tips, strategies, and news you need to grow your web business.
No charge. Unsubscribe anytime.
Did you find this article helpful? Then you'll love our support. Experience the A2 Hosting difference today and get a pre-secured, pre-optimized website. Check out our web hosting plans today.