How to restore your data using Dropmysite
This article describes how to use the Dropmysite cPanel plugin to restore the following items:
- Website backups.
- Database backups.
- E-mail backups.
For information about how to create these types of backups using Dropmysite, please see this article.
Table of Contents
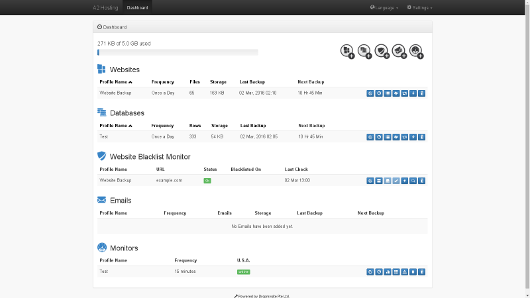
Website backups
To restore a Dropmysite website backup, follow these steps:
- Log in to cPanel.If you do not know how to log in to your cPanel account, please see this article.
- Open Dropmysite:
- If you are using the Jupiter theme, on the Tools page, in the Software section, click Dropmysite:

- If you are using the Paper Lantern theme, in the SOFTWARE section of the cPanel home page, click Dropmysite:

- If you are using the Jupiter theme, on the Tools page, in the Software section, click Dropmysite:
- Under Websites, locate the site backup you want to restore, and then click the Restore Files (
 ) icon. The Restore Files page appears.
 - In the Date list box, select the date of the backup that you want to restore.
- You can restore specific files, or all of the files in a backup:
- To restore specific files, select the check box next to the file or files that you want to restore.
You can click a folder name to open it and list the files and subdirectories it contains.
- To restore all of the files in the backup, select the Select All check box.
- To restore specific files, select the check box next to the file or files that you want to restore.
- Click the Restore Files () icon.
- On the Create Restore page, select the By checking this box, I agree to replace any existing files selected with this restore check box.
- Click . Dropmysite restores the selected file or files.
Database backups
To restore a Dropmysite database backup, follow these steps:
- Log in to cPanel.If you do not know how to log in to your cPanel account, please see this article.
- Open Dropmysite:
- If you are using the Jupiter theme, on the Tools page, in the Software section, click Dropmysite:
- If you are using the Paper Lantern theme, in the SOFTWARE section of the cPanel home page, click Dropmysite:
- If you are using the Jupiter theme, on the Tools page, in the Software section, click Dropmysite:
- Under Databases, locate the database backup you want to restore, and then click the Restore Database () icon. The Database Restore page appears.
To restore a database successfully, it must already exist on your account. Additionally, there must be a database user associated with the database that has the same name as the one that originally created the backup. If the database or database user does not exist, you can create them in cPanel and then do the database restore.
- In the Backup date list box, select the date of the backup that you want to restore.
- Click .
- On the Create Restore page, select the By checking this box, I agree to overwrite the existing database with this restore check box.
- Click . Dropmysite restores the selected database.
E-mail backups
To restore a Dropmysite e-mail backup, follow these steps:
- Log in to cPanel.If you do not know how to log in to your cPanel account, please see this article.
- Open Dropmysite:
- If you are using the Jupiter theme, on the Tools page, in the Software section, click Dropmysite:
- If you are using the Paper Lantern theme, in the SOFTWARE section of the cPanel home page, click Dropmysite:
- If you are using the Jupiter theme, on the Tools page, in the Software section, click Dropmysite:
- Under Emails, locate the e-mail backup you want to restore, and then click the Restore Emails () icon. The Restore Files page appears.
- In the Date list box, select the date of the backup that you want to restore.
- You can restore specific files, or all of the files in a backup:
- To restore specific files, select the check box next to the file or files that you want to restore.
- You can click a folder name to open it and list the files and subdirectories it contains.
- To restore a specific e-mail message, you must know which IMAP folder it is in (such as cur, new, or tmp). For more information about IMAP directory structure, please visit https://en.wikipedia.org/wiki/Maildir.
- To restore all of the files in the backup, select the Select All check box.
- To restore specific files, select the check box next to the file or files that you want to restore.
- Click the Restore Files () icon.
- On the Create Restore page, select the By checking this box, I agree to replace any existing emails selected with this restore check box.
- Click . Dropmysite restores the selected file or files.
More Information
For more information about Dropmysite, please visit https://www.dropmysite.com.
Article Details
- Product: Shared Hosting
- Level: Beginner
Grow Your Web Business
Subscribe to receive weekly cutting edge tips, strategies, and news you need to grow your web business.
No charge. Unsubscribe anytime.
Did you find this article helpful? Then you'll love our support. Experience the A2 Hosting difference today and get a pre-secured, pre-optimized website. Check out our web hosting plans today.