How to use FTP with Linux hosting accounts
This article describes how to connect to your A2 Hosting account using an FTP (File Transfer Protocol) client.
For general information about what FTP is and when you might use it, please see this article.
Using an FTP client
There are numerous FTP clients available, and many of them support SFTP (Secure FTP) and FTPS (FTP Secure) as well. A2 Hosting recommends FileZilla, a free program that you can download here. It supports all three protocols (FTP, SFTP, and FTPS), and runs on Microsoft Windows, Apple Mac OS X, and Linux. In the following procedures, we show how to use FileZilla to connect to your account and transfer files.
You do not have to use FileZilla. If you want to use a different FTP client, however, you will need the following information to connect to your account:
- Domain name: Your web site's domain name.
- FTP account username:
- For SFTP, you must use your cPanel username. Make sure you do not include your domain name. For example, type username, do not type [email protected].
- For FTPS, you can use either your cPanel username, or the username for an FTP user you have created in cPanel (for example, [email protected]).
- For FTP, you can use either your cPanel username, or the username for an FTP user you have created in cPanel (for example, [email protected]).
- Password: The password for the account you are using.
- Port number: For SFTP connections, use port 7822 instead of the default port 22.
Connecting to your account
To connect to your account using FileZilla, follow these steps:
- Start FileZilla.
- On the menu, click :
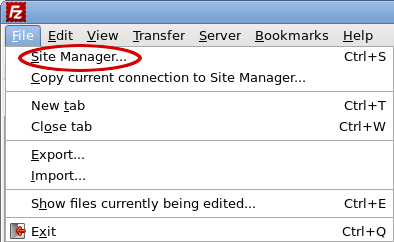
The Site Manager dialog appears:
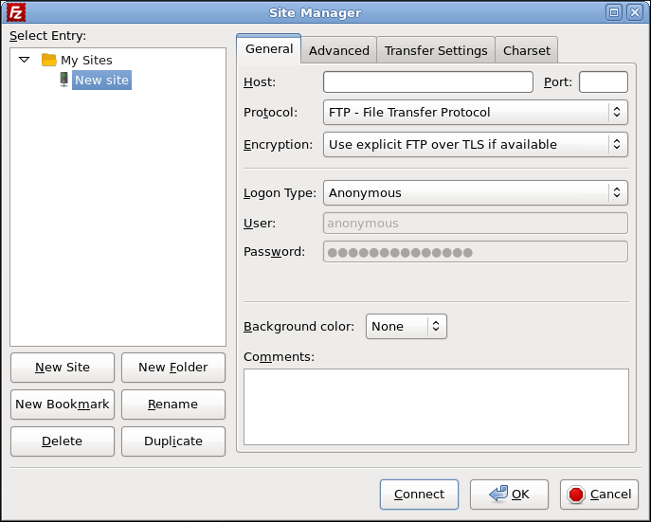
- Click , type a name for the site, and then press Enter.
In the Host text box, type your site's domain name. Alternatively, you can type the server hostname instead.
For information about how to determine your account's server name, please see this article.If you want to connect using SFTP, type 7822 in the Port text box. Otherwise, leave the Port text box blank.
The default port for SFTP is 22. However, A2 Hosting uses a different port for security reasons.In the Protocol list box, select the protocol you want to use:
- To use SFTP, select SFTP - SSH File Transfer Protocol.
- To use FTPS, select FTP - File Transfer Protocol, and then in the Encryption list box, select Require explicit FTP over TLS.
- To use regular FTP, select FTP - File Transfer Protocol, and then in the Encryption list box, select Only use plain FTP (insecure).
A2 Hosting strongly recommends that you use SFTP or FTPS whenever possible. Regular FTP sends usernames and passwords in unencrypted plaintext, and is not secure.
- In the Logon Type list box, select Normal.
In the User text box, type the account username you want to use:
- If you are using SFTP, you must use your cPanel username. Make sure you do not include your domain name. For example, type username, do not type [email protected].
- If you are using FTPS or a regular FTP connection, you can use either your cPanel username, or the username for an FTP user you have created in cPanel (for example, [email protected]).
In the Password text box, type the password for the account you specified in step 8.
Your account password is not the same as your Customer Portal password. To view the password for your hosting account in the Customer Portal, follow these steps:
- In the Customer Portal, on the menu bar, click , and then click .
- Locate your hosting package and then click .
- Under Connection Details, next to Password, click the eye icon to display your password.
Optionally, you can specify a default directory for FileZilla to open on the remote server after it connects. For example, many people prefer to have an FTP client access the website document root directory by default. To do this, follow these steps:
- Click the Advanced tab.
- In the Default remote directory text box, type /home/username/public_html, where username represents your A2 Hosting account (cPanel) username.
- Click . After a few seconds, FileZilla establishes the connection.
Transferring files
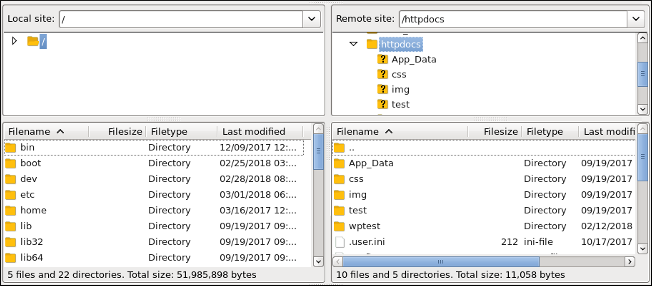
After FileZilla establishes a connection between your local computer and the A2 Hosting server, you can transfer files. FileZilla has a Local site pane that displays files on your local computer, and a Remote site pane that displays files in your account on the A2 Hosting server:
To transfer files using FileZilla, follow these steps:
- Navigate through folders in the Local site and Remote site panes just as you would in Windows Explorer or the Mac OS X Finder. To open a folder, double-click it.
- To upload a file to the server, drag the file from the Local site pane to the Remote site pane. After the file transfer is complete, the file appears in the Remote site pane.
To upload a file, you can also double-click it in the Local site pane.
- To download a file to the local computer, drag the file from the Remote site pane to the Local site pane. After the file transfer is complete, the file appears in the Local site pane.
To download a file, you can also double-click it in the Remote site pane.
- You can also transfer entire folders at once:
- To upload a folder to the server, drag the folder from the Local site pane to the Remote site pane.
- To download a folder to the local computer, drag the folder from the Remote site pane to the Local site pane.
FTP logging
All FTP activity is monitored and recorded in our server FTP log files. If you need information from the log files, please open a support ticket at https://my.a2hosting.com. Alternatively, if you use a managed VPS or dedicated server, you can check the FTP logs located at /var/log/messages.
More Information
To view the official FileZilla documentation, please visit http://wiki.filezilla-project.org/Documentation.
Article Details
- Operating System: Linux Hosting
- Level: Beginner
Grow Your Web Business
Subscribe to receive weekly cutting edge tips, strategies, and news you need to grow your web business.
No charge. Unsubscribe anytime.
Did you find this article helpful? Then you'll love our support. Experience the A2 Hosting difference today and get a pre-secured, pre-optimized website. Check out our web hosting plans today.