- Mar 20, 2018
 0
0- by A2 Marketing Team
When you’re selling a product or a service online, you need every edge you can get to convert more visitors into customers. That means using outstanding screenshots, setting the right prices, and even asking past clients for their input so you can share it with visitors.
Client testimonials are a smart strategy, since they’re a proven way to show potential clients that you’re the real deal. Not only do they show that people appreciate your services, but they also (hopefully!) paint you in a positive light. With some luck, you may even be able to get testimonials from well known figures, which can provide a nice boost to your sales.
In this article, we’re going to talk a bit more about what client testimonials are and why you should use them. Then we’ll teach you two ways to implement them in WordPress using plugins. Let’s get to it!
What Client Testimonials Are (And Why You Need Them)

Client testimonials are very popular these days. After all, it’s easy to reach out to past customers and ask what they thought about your work. Then, with their permission, you can share their responses with potential customers on your website. This is something we do on our own site. In fact, we have an entire page dedicated to customer testimonials.
This technique may sound like a sales gimmick at first, but client testimonials or reviews are one of the most important tools you have for drumming up more business. Let’s discuss why:
- They help build trust. Testimonials show users you can be trusted, and prove how happy your current customers are with your services or products.
- It shows that you’re capable of delivering completed projects. Purchasing online services is still scary for many people. Testimonials prove that you’ve successfully completed projects or delivered services in the past.
- You can show off your client roster. If your clients are well known websites or companies, dropping their names can increase visitor trust.
Overall, client testimonials are an excellent way to increase conversions on a budget. You’ll need to spend some time reaching out to clients to ask if they will rate your service and if you can share their reviews, but placing the testimonials on your site couldn’t be simpler.
How to Add Client Testimonials to WordPress (In 2 Ways)
If you have experience customizing WordPress themes, you should be able to create your own customer testimonial sections. However, we’re partial to using plugins for this particular feature, since they’re easier to set up and customize. Plus, some of them enable you to manage your testimonials in bulk, which can come in handy. Let’s take a look at our two top picks.
1. Use the Strong Testimonials Plugin for Quick and Elegant Testimonials
There are plenty of plugins you can use to create stylish testimonials for your WordPress website. The Strong Testimonials plugin is one of our favorites, because it offers a very clean, simple look:

This plugin’s minimalistic style makes it a great fit for most websites. It’s not the perfect option if you want to customize every aspect of how your testimonials look. Still, Strong Testimonials really shines when it comes to testimonial management, which makes it ideal for websites that do a lot of business.
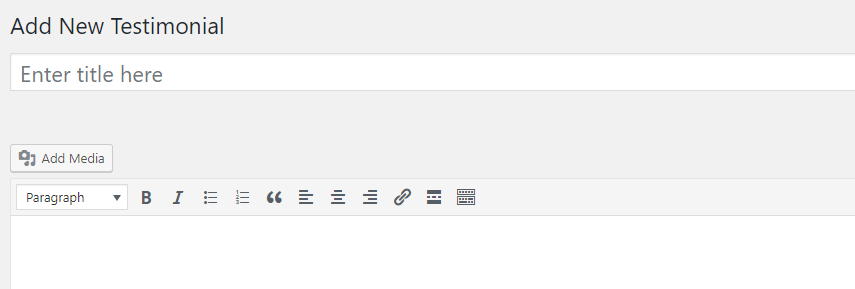
To create a new testimonial, you just have to install and activate the plugin, then go to Testimonials > Add New in your dashboard:

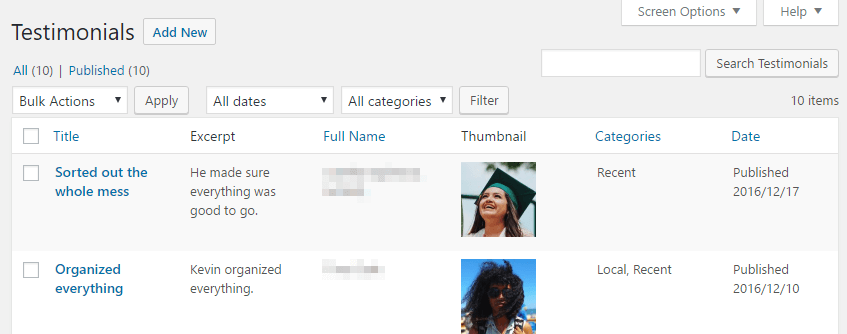
Inside, you’ll find a regular WordPress text editor with a few custom widgets to add client details and excerpts. Once you save a testimonial, you’ll be able to review it from the Testimonials > All Testimonials tab:

Once you have a testimonial ready to go, you can display it anywhere you want on your website using this shortcode:
[testimonial_view id=1]
That example, of course, will only work for your first testimonial. You’ll need to update the ID number depending on which review you want to display. Alternatively, you can also show all of them at once by placing the [testimonial_view] shortcode wherever you want.

As far as testimonial plugins go, you won’t find a much simpler tool. However, if you want to have a bit more control over how your elements look, you should check out our second recommendation.
2. Using the Testify Plugin for More Customization Options
If you want more options when it comes to customizing your testimonials, the Testify plugin will be right up your alley. It integrates with all the major contact form plugins, letting you use them to set up custom testimonials easily:

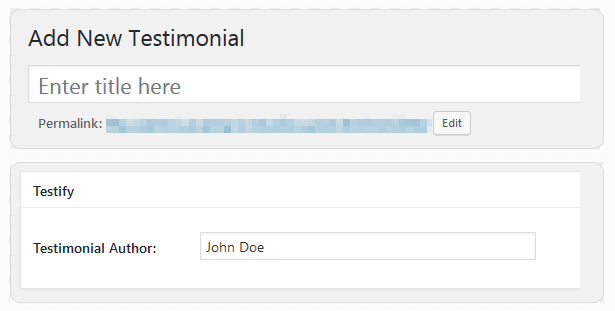
To get started with Testify, install and activate it, then go to the Testify > Add New Testimonial tab. Inside, you’ll be able to set a title and author for your new testimonial:

For the body of the testimonial itself, you’ll use a regular WordPress editor to add your client reviews. Just remember to set a featured image for your testimonial before you publish it.
This plugin works best if you want to add several testimonials on the same page or post. Once you’ve set up a few reviews, open the page where you want to add your testimonials using the WordPress editor. Look for the Insert Testify Testimonials shortcode button at the top of the screen:

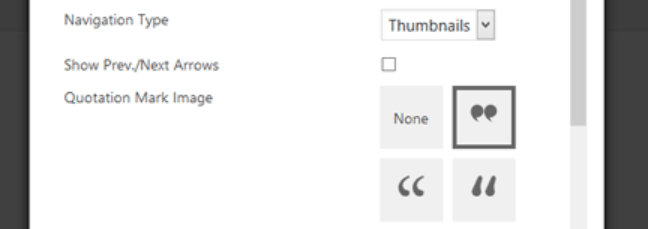
Now a window will pop up, including a broad range of settings for your testimonials section. These include what type of quotation marks you want them to display, the size of the thumbnail images, and more:

After you’re done configuring your testimonials section, click on the Insert button, and a new shortcode will appear within your editor:

If you take a look at the page on your website’s front end, you’ll see all your testimonials side by side:

You can also customize your testimonials’ style even further if you go to the Testify > Customize tab. Inside, you’ll be able to tweak the fonts your testimonials use, their colors, and more. So take your time to perfect your testimonial section’s style before you call it a day!
Conclusion
Client testimonials are a popular element on service and e-commerce websites, and that’s because they work. With a few lines and a nice photo, you can reassure potential clients that you’re the real deal and prove that you consistently deliver on your promises. Of course, chasing up past clients for testimonials can be a bit of work, but the rewards are well worth the effort.
When it comes to WordPress, there are lots of ways you can go about adding client testimonials. However, we’re partial to using plugins because of how simple it can be to customize their style. Here are our two top picks:
- Strong Testimonials: A simple solution for implementing elegant testimonial sections on your website.
- Testify: If you want full control over your testimonials’ style, this is the plugin you’ll want to check out.
Image credit: Pixabay.


