- Apr 07, 2020
 0
0- by A2 Marketing Team
Installing software, especially something challenging such as a Java servlet, can be intimidating. You’ll need to ensure that you follow the process correctly, or else you may end up crashing your computer or wind up with a buggy program.
While there are many ways you can set up Apache Tomcat, it fortunately comes with its own Windows Installer. That can ease the process for you, and enables you to focus on diving straight into the software.
In this article, we’ll first offer a brief introduction to what Apache Tomcat is. Then we’ll go through the steps of installing the application on your website. Let’s get started!
An Introduction to Apache Tomcat
Even today, Java remains a highly popular language in programming. One of the main reasons is because it can be used across multiple platforms and still work effectively.
Apache Tomcat is an open-source Java application web server. All that means is that it enables you to run Java on your Operating System (OS). It’s also an effective tool that can aid in your deployment of the web pages you create.
If you’re looking for a Java web servlet, Apache Tomcat is a solid choice. It’s adaptable, and you can configure it to meet your needs. Plus, it’s more stable than many other options, as Tomcat can keep running even if Apache crashes. This prevents you from losing precious data.
You also have choices when deciding how you want to download the software. Fortunately, it’s easy to set up Tomcat via the program’s Windows Service Installer.
How to Install Apache Tomcat (In 4 Steps)
When setting up a new tool, it pays to take your time and make sure you’re starting off on the right foot. With the following four steps, you can feel confident as you launch Apache Tomcat.
Step 1: Download the Prerequisite Software
Before you start downloading Tomcat, you will first need either Java Development Kit (JDK) or Java Runtime Environment (JRE). These tools can help you add Java to your Windows environment variables, and thus enable you to use Apache Tomcat.
Once you’ve finished the download, head over to the Apache Tomcat home page. There, you’ll find options to download various versions of the software:
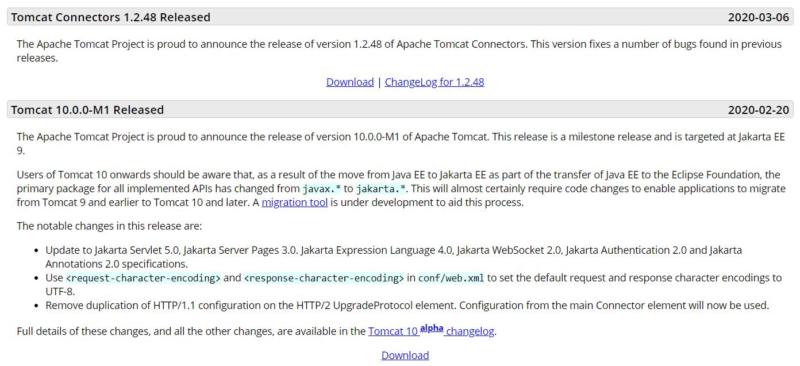
Each release explains what changes have been made to it. As added guidance, Tomcat itself offers a page providing details about which build supports particular Java specifications.
For simplicity’s sake, we’re going to download Apache Tomcat 10. You can get the software as either a .zip file or an .exe file.
Step 2: Choose Your Components
This is when the setup process really begins. Go back to the Apache Tomcat home page, and download the Windows Installer (either 32- or 64-bit as needed):
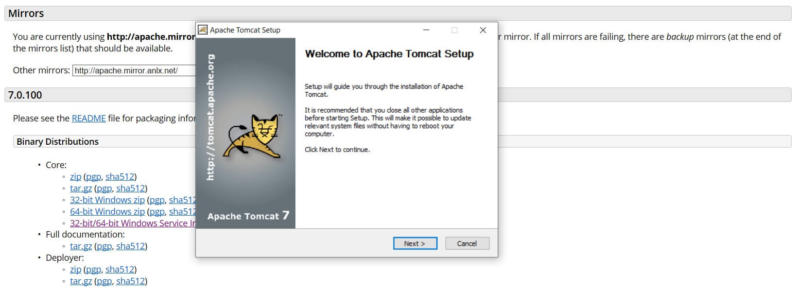
Once the download is complete, click on Next. Then you’ll need to agree to the License Agreement.
Apache Tomcat offers a highly customizable installation process. In fact, you’re able to omit the various add-ons that can be included by choosing whether you want a normal, minimal, full, or custom Windows Service install:
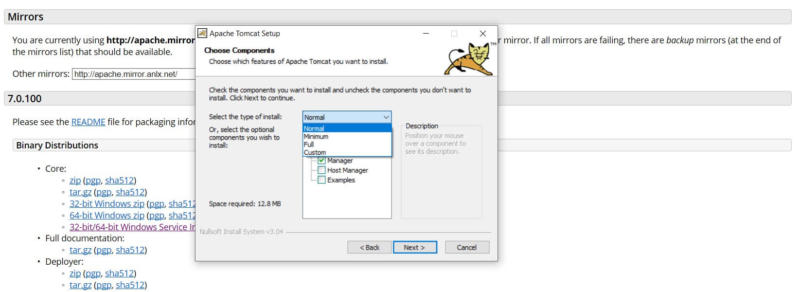
These optional items include:
- Start menu items, which enables you to create a start menu group.
- Documentation bundle, which also includes information specific to the servlet container.
- Jasper, a JSP page compiler.
- Native web server connectors.
- Manager, which installs the Tomcat Manager administrative application.
- The Host Manager that enables you to create, delete, and administer virtual hosts through Tomcat.
- Examples, which provides you with illustrative servlet and JSP web applications.
Once you’ve made your decision about which elements you’d like to include, you can click on Next again. The installation wizard will then take you to the configuration options.
Step 3: Check Your Configuration
On the configuration screen, you’ll again have some choices as to how you’ll customize your Apache Tomcat installation. Let’s take a detailed look at what the options include:
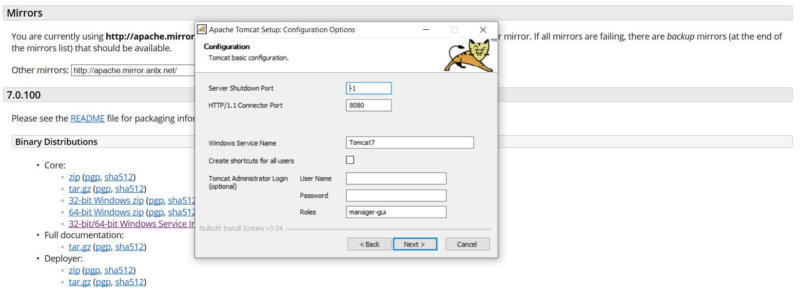
If you’re unsure about what each field means, here are brief descriptions of each:
- Server Shutdown Port enables anyone who contacts the server locally through the default 8005 port with the command ‘shutdown’ to terminate its running web applications.
- HTTP/1.1 Connector Port is Tomcat’s server port, and is used to show HTTP content.
- Windows Service Name tells you what Tomcat will be labeled as when it runs.
It’s worth noting that it’s okay to keep things as they are, as most of these fields can safely be left to their default settings.
Once you are done with the basic configuration process, you’ll need to identify the installation path of your Java 8 or JRE folder:
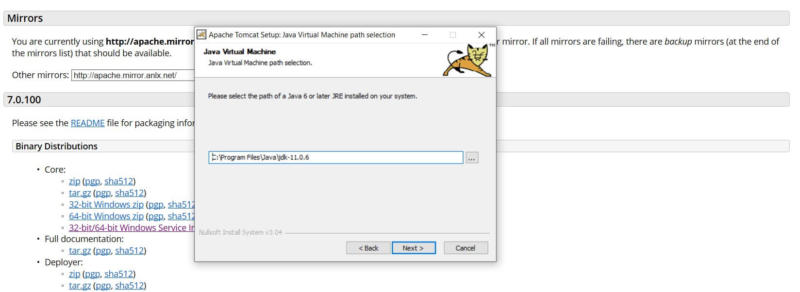
Finally, the wizard will ask you to confirm the destination folder for your Apache Tomcat installation. When you’ve finished with that, you can complete the process.
Step 4: Test Tomcat Out
At the very end of the installation process, you’ll have the option to run Tomcat and display the readme file:
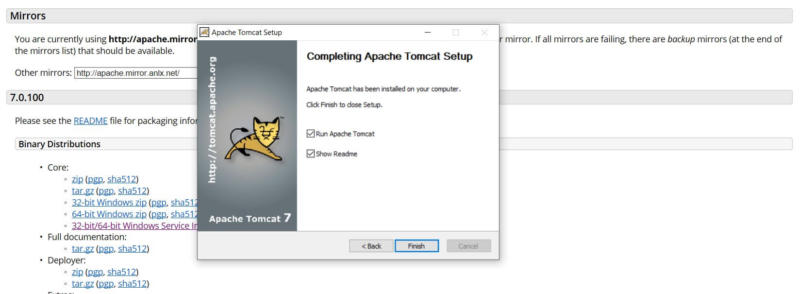
Now that you’ve installed Apache Tomcat, you’ll want to be certain that it’s been property set up. After all, what’s the point of having your new Java servlet only to end up not being able to use it?
Fortunately, you can do this easily by running Tomcat and entering “localhost:8080” into the address bar in your browser of choice. If your installation has been successful, you should see a page similar to this one:
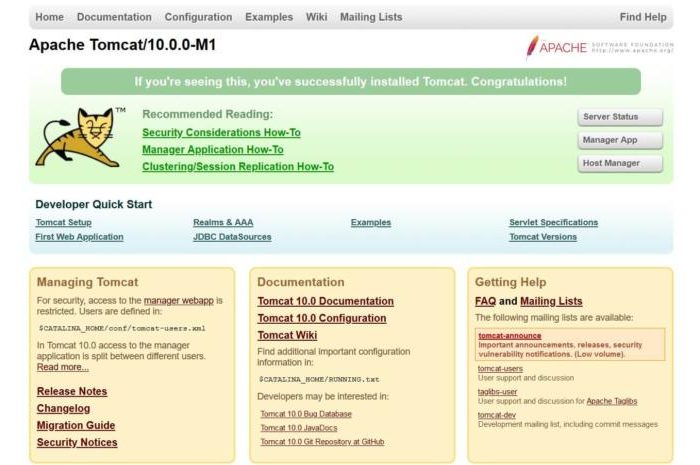
At this point, you’re done! Now you’re ready to go ahead and explore Java with Apache Tomcat.
How To Install Tomcat Conclusion
Setting up Apache Tomcat can be a breeze with the Windows Service Installer. By taking this route, you can make a quick transition to using this handy software.
Let’s recap the four steps you’ll need to follow in order to successfully install and set up Apache Tomcat:
- Download the prerequisite software.
- Choose what type of installation you want.
- Go over Tomcat’s basic configuration options.
- Test the software out to ensure that it’s been configured properly.
Related Results
Apache Tomcat: An Introduction (And How It Can Benefit You)
Image credit: Pexels.
