How to Moderate User Comments in WordPress
Positive or constructive user engagement can go a long way to enrich your website. However, if you’re not moderating comments, internet trolls and spam posters can cost you conversions and cause your site’s traffic to take a hit.
That’s why moderating comments is a key website management task. Fortunately, WordPress provides a range of tools and settings that enable you to filter out damaging posts and keep valuable ones.
In this article, we’ll explain why moderating user comments is necessary. Then, we’ll cover some of the steps you can take to protect your website from posters who don’t have the best of intentions. Let’s get started!
An Introduction to Moderating Comments in WordPress
Moderation is the process of screening comments before they go live. This prevents spam and other inflammatory content from ending up on your posts.
In order to understand how moderation works in WordPress, you first need to have a handle on the comments settings available for the platform. There are four options you can choose between:
- Disabling comments entirely, which may lead to lower engagement rates
- Allowing all comments, which gives spam posters and trolls free rein
- Requiring approval for all comments, which eliminates low-quality content but can be time-consuming
- Mandating approval only for commenters who are not logged in or who have never posted before
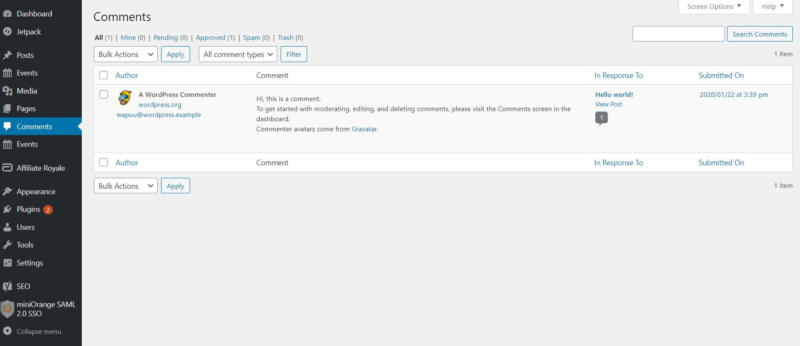
If you choose either of the latter two options, comments awaiting admin approval will appear in the Comments section of your WordPress dashboard:

While each method has its pros and cons, it’s recommended that you moderate comments to some extent. Disabling the feature entirely works against your site, as you’ll miss out on opportunities for social proof and meaningful engagement from users.
Choosing not to moderate comments often leads to spam. These posts are typically left by bots, and provide no value. Instead, they usually contain harmful backlinks, which can drastically lower your search rankings and credibility.
Not moderating comments also leaves the door open to ‘trolls’ who post disruptive content. These users are deliberately offensive and can negatively impact the perception of your website. They may create an unwanted reputation for your brand, and leave visitors with a poor impression of your integrity and credibility.
However, it’s important to distinguish between a troll and someone leaving constructive feedback. Even if you’d rather not publicize criticism of your site, this content still provides valuable information you can put to use.
Your Guide to Moderating User Comments in WordPress (In 4 Steps)
Moderating comments can seem intimidating at first, but WordPress makes the process as simple as possible. By following these steps, you may find it much easier than you expect.
Step 1: Configure Your WordPress Discussion Settings
We’ve already explained WordPress’ comments settings at some length. The first step to building your moderation process is to choose which ones to implement on your site.
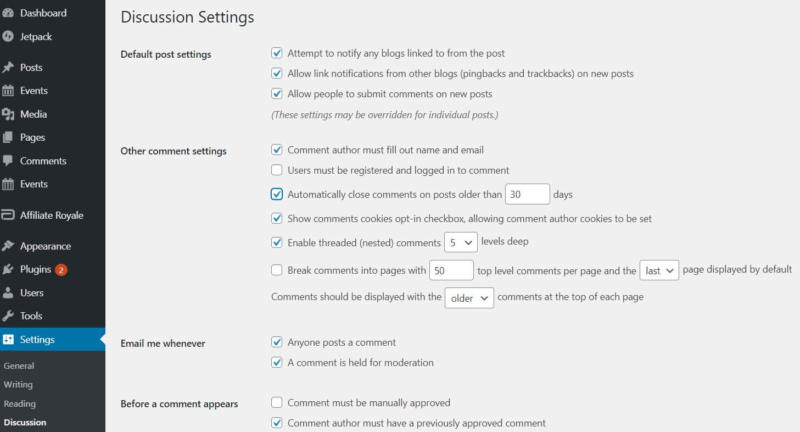
To get started, navigate to Settings > Discussion in your WordPress dashboard:

There are several options listed here, but for the purposes of this post, we’ll just cover the highlights. First, note the checkbox labeled Allow people to submit comments on new posts.
Unchecking this box will disable commenting across your site. As we already explained, this isn’t ideal. Unless you can justify the loss of engagement and social proof, make sure to select this option.
In the next section, you can require commenters to include their name and email address, or to log in to their account before posting. We recommend turning on at least one of these options, as they can deter trolls and spambots.
You’ll also see an option to Automatically close comments after X days. Checking this box can encourage users to move on to fresh posts and save you some work when it comes to moderation.
Finally, you’ll have to select if you want to manually approve every comment or to allow previous posters to continue without moderation. The latter option will take some work off your plate, but could also enable people to get around your spam and troll deterrents.
Step 2: Turn On Your Email Notifications
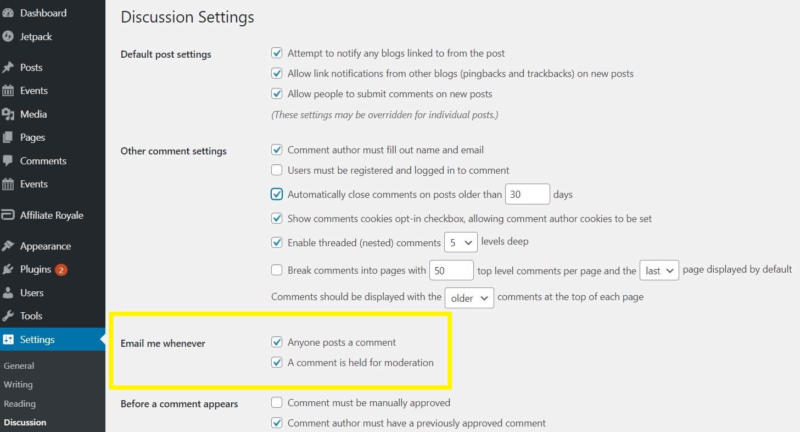
While you’re in your Discussion settings, you’ll likely notice two options under the Email me whenever section:

These settings are especially important. Leaving unmoderated comments sitting in your dashboard can cause you to miss out on quality engagement. If you’re approving users’ input days or weeks after they submitted it, they’re less likely to see replies and start conversations with other readers.
Additionally, letting comments pile up is not the most productive or efficient way to moderate them. Although having your inbox fill up with notifications might seem annoying, it will also help you stay on top of this task. Make sure to turn on both of these settings.
Step 3: Install an Anti-Spam Plugin to Streamline Moderation
Before we get into how to approve and reject comments, it’s important to make note of some tools that could streamline moderation for you. Anti-spam plugins such as Akismet use machine learning to recognize low-quality posts and delete them automatically:

In addition to installing and activating the plugin, you’ll also need to create an Akismet account. Although this appears to require a paid subscription, you can get basic spam protection for free by selecting the Name Your Price option and setting it to $0.
Realize that Akismet is not a ‘set it and forget it’ plugin. After you install it, you’ll have to ‘teach’ it to identify spam. Fortunately, this is as simple as manually approving and rejecting comments (which we’ll cover shortly).
Akismet will start to pick up on qualities similar across your rejected comments and start deleting similar ones automatically. Even after that, however, you’ll still have to do some manual moderation. The plugin won’t catch everything (including comments from trolls). However, it should significantly reduce the time you spend on this task.
Step 4: Manually Approve and Reject Comments from Your WordPress Dashboard
Near the beginning of this post, we explained that submissions awaiting your approval can be found in the Comments section of your WordPress dashboard. Here you’ll find four options to effectively bulk-manage users’ posts:
- Unapprove: Remove an approved comment from a post and return it to the list for moderation.
- Approve: Allow a comment to appear on your live post.
- Mark as Spam: Tell Akismet that this comment contains elements it should recognize as spam in the future.
- Move to Trash: Delete the comment permanently.
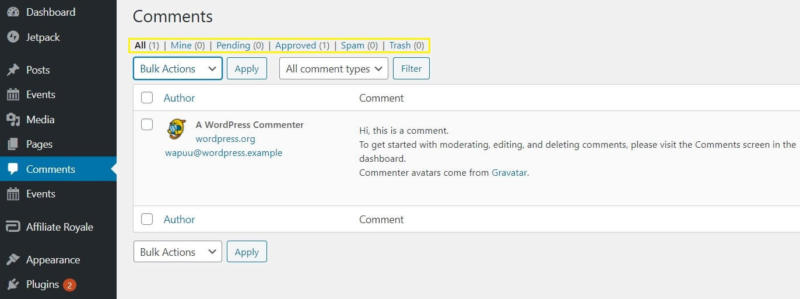
You can view comments based on their status using the navigation links above the list:

If you have a large site with high engagement rates, you’ll want to check back here daily. However, if comments are more sporadic for your posts, you might only need to visit this list when you receive an email notification.
Conclusion
User comments can be hugely beneficial for your website. Unfortunately, they also require moderation to prevent your posts from turning into a toxic environment.
In this article, we covered four steps for moderating comments in WordPress:
- Configure your Discussion settings.
- Turn on email notifications.
- Install an anti-spam plugin.
- Manually approve and reject comments.
Image credit: Unsplash.
