- Sep 28, 2021
 0
0- by Milton Parada
It’s always important to check your website’s technical specifications before updating your CMS to the next version available. In this blog we’re going to share with you a pre-update checklist when moving from Joomla 3.10.X to Joomla 4.0, and then we will take you through upgrading your site!
Your Pre-Update Checklist
One of the latest features Joomla 3.10.X added is an enhancement to Joomla! Update Component. The Pre-Update Check allows an analysis of Required PHP and Database settings, PHP Settings, and Extensions Check so you can make sure your update is seamless.
To check your technical specifications in your website powered by Joomla, follow these steps:
- First, you must log in as an administrator:
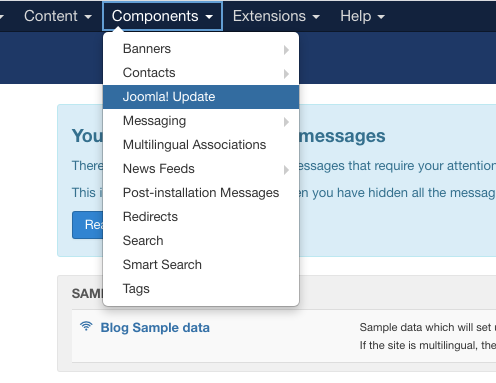
- Then in the main menu, click on Components -> Joomla! Update

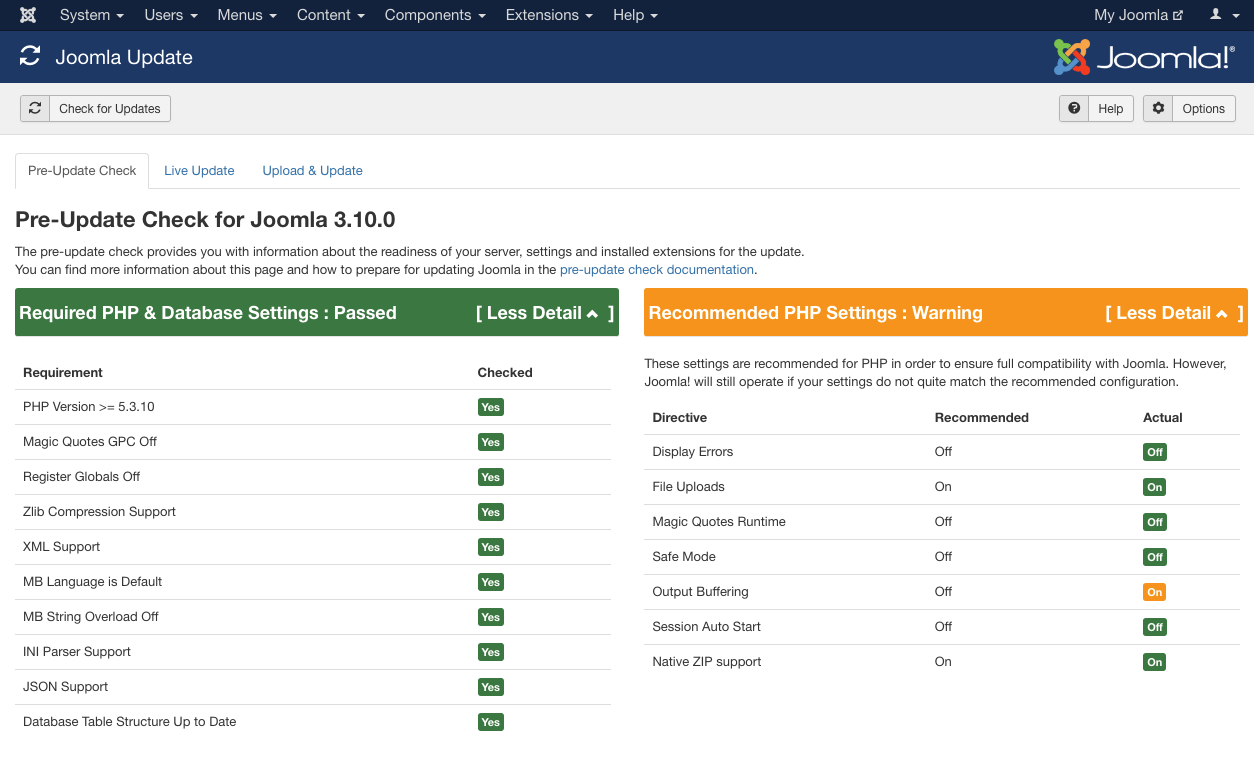
- Click on the Pre-Update Check tab, if you don’t see this tab, click the Check for Updates button:
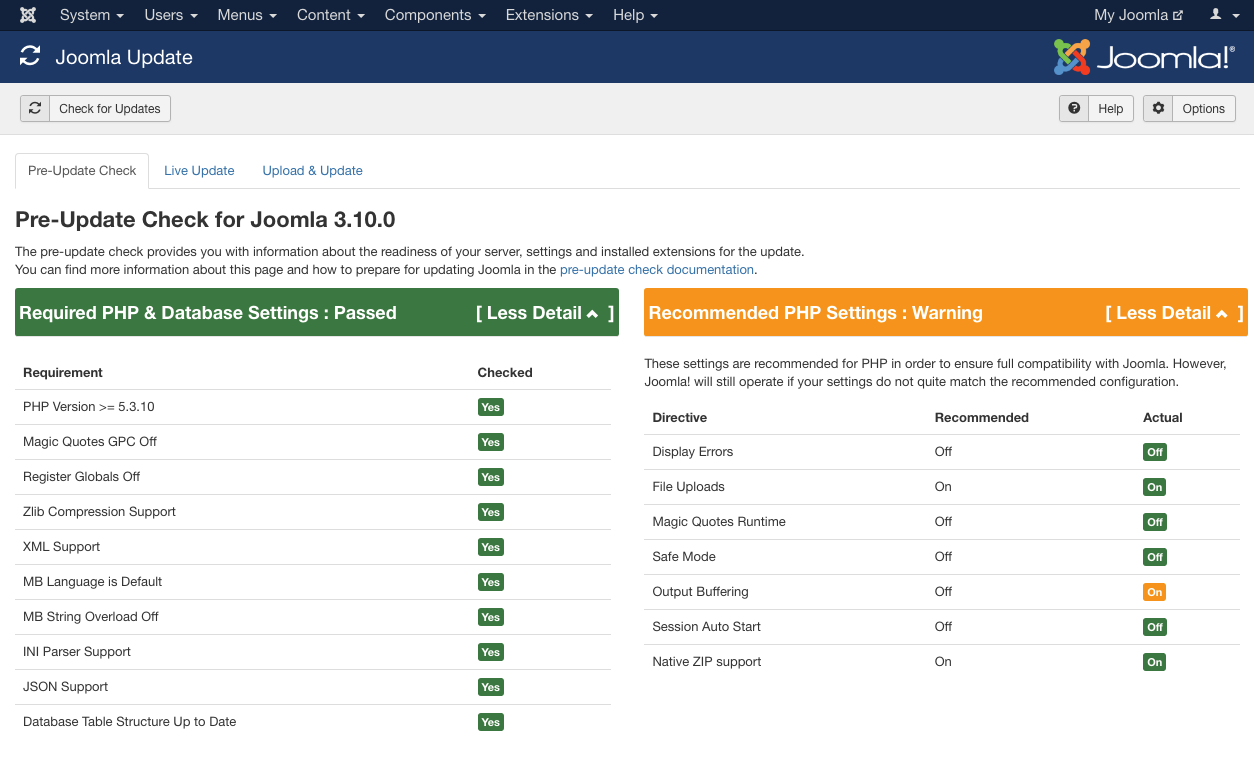
4. This tab will show you your website information: Required PHP & Database Settings, PHP Settings and Extensions check. Green indicates that it is correct, yellow is a warning, and red means that your current website is non-compliant:
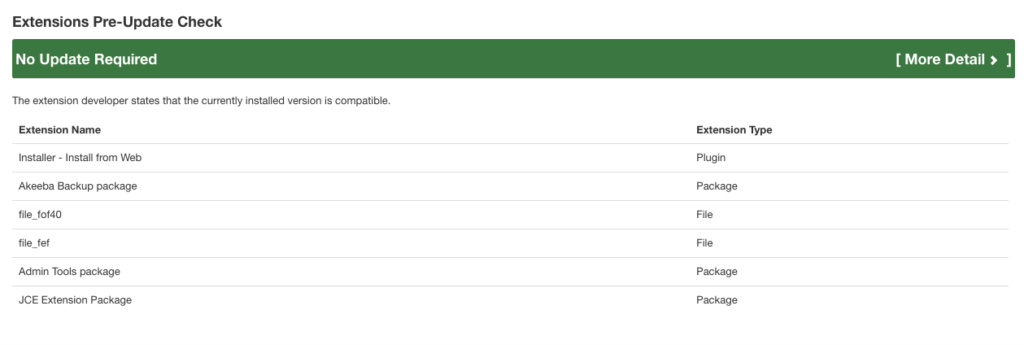
If everything is green and your website is ready then it’s time to upgrade! Check out our step-by-step instructions below.
How to Upgrade from 3.10.X to Joomla 4
Joomla allows an easy and safe update to its latest version, Joomla 4. Through Joomla! Update Component and its many options, you can update your site in just a few clicks.
Before starting, you must create a full backup of your website. This is an important step in the off chance that any part of your update goes wrong. You should always be creating back-ups of your website regularly, whether you are updating or not, to ensure that you don’t lose it. Once you have made your backups check and make sure you are on the latest Joomla 3.10.X version. Finally, check and see if your technical specifications meet the new requirements. Read our blog below for a step-by-step guide on how to do this.
Starting Your Update
- After saving your website’s complete backups, you must check if it meets the requirements to update. To do this you can Pre-Update Check. To navigate to here click on Components -> Joomla! Update:
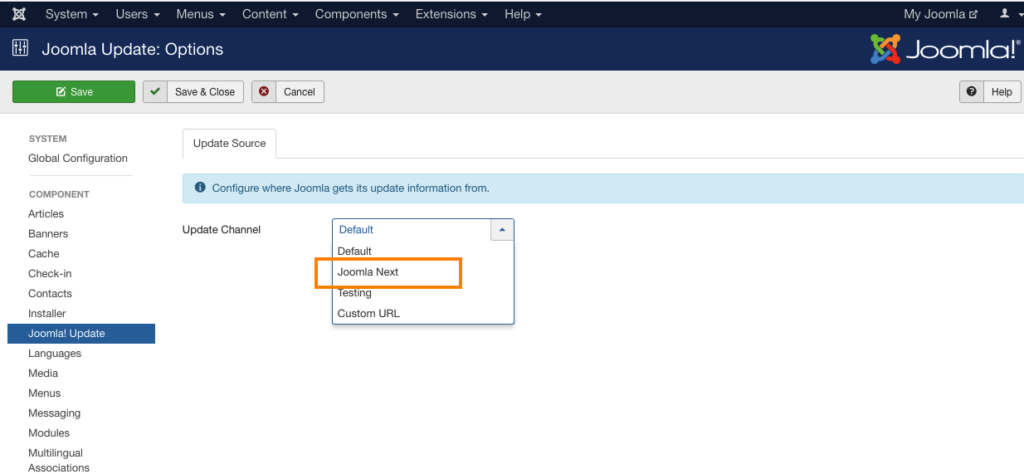
2. Then click Options and change the Update Channel and select Joomla Next:
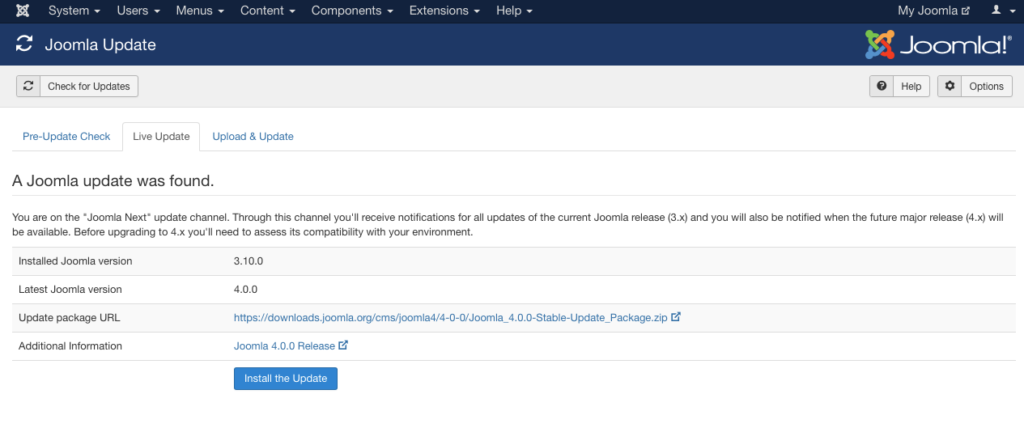
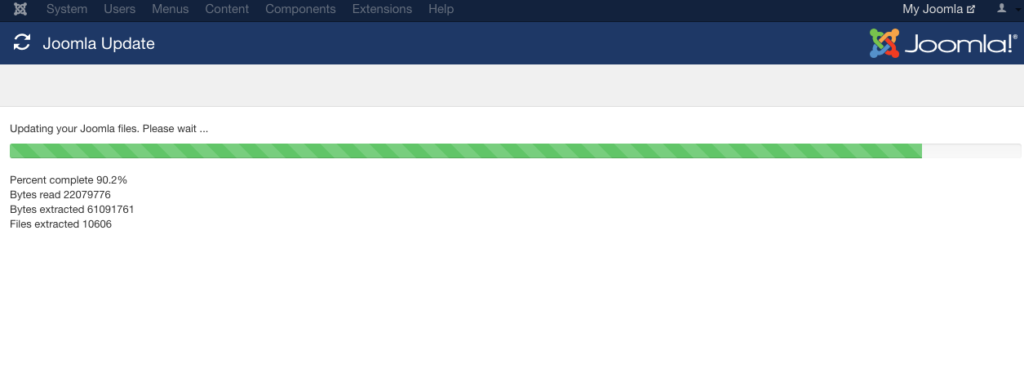
3. On the Live Update tab, a summary shows the details of the update. To install click Install the Update to start the update:
4. After a short wait, it will show a message indicating that the update was completed successfully.
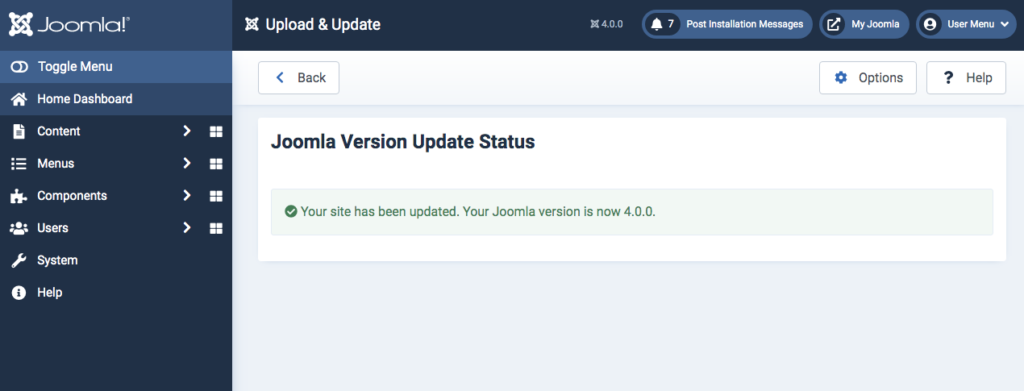
Now your site is completely updated and you’re ready to begin working on more optimizations and improvements to get your site ready for Q4 and the holiday traffic!
If you’re looking for a good host for your updated Joomla site take a second to look at our plans here at A2 Hosting! With 24/7/365 guru crew support, 99.9% uptime, and turbo speeds, we’re ready to help you thrive online this year! Feel free to ask contact our sales team today with any questions!
Related Resources
Joomla Extensions for A2 Hosting Customers
