How to manage local backups on Dedicated servers
This article describes how to manage local backups on Dedicated servers.
About local backups
As of March 2023, managed Warp and unmanaged Hyper Dedicated servers include a 1 TB drive for local backups:
- For Hyper Dedicated servers, you have complete flexibility to configure backups to the 1 TB drive however you want. For information about how to configure backups on Dedicated servers, please see this article.
- For Warp Dedicated servers, these backups are configured automatically, and include cPanel accounts, MySQL databases, and other configuration files. For information about how to access and restore these backups, please see the next section.
Local backup drives provide an additional layer of data protection. Unlike backups to the cloud or other external storage, local backups are stored in the same physical enclosure as the server. This means that data restorations are usually faster. However, local backups should not be used as a replacement for secure, off-site data backups. A complete backup plan includes both local and remote (off-site) backups.
Accessing and restoring local backups
For managed Warp Dedicated servers, the method to access and restore local backups depends on whether or not you have root access.
Accounts without root access
If you do not have root access to your server, please open a Support ticket on the A2 Hosting Customer Portal at https://my.a2hosting.com, and we will restore the files for you.
Accounts with root access
If you have root access to your server, you can access and restore your local backups using WebHost Manager (WHM). To do this, follow these steps:
- Log in to WebHost Manager.If you do not know how to log in to your WebHost Manager account, please see this article.
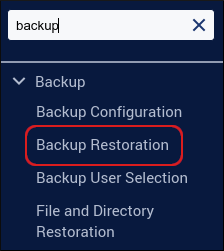
- In the left sidebar, type backup, and then click Backup Restoration when it appears:
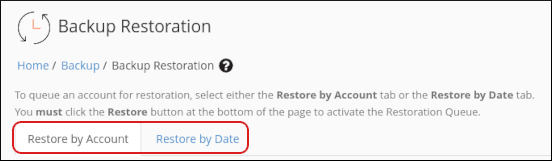
Select how you want to restore files:
- To restore files for a specific account, click the Restore by Account tab.
- To restore files for a specific date, click the Restore by Date tab.
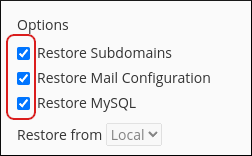
Select any additional items you want to restore. You can restore:
- Subdomains.
- Mail configuration files.
- MySQL databases.
Click Restore. The selected restoration appears in the Restoration Queue section.
For more information about available backup options, please visit https://docs.cpanel.net/whm/backup/backup-restoration/.
Article Details
Grow Your Web Business
Subscribe to receive weekly cutting edge tips, strategies, and news you need to grow your web business.
No charge. Unsubscribe anytime.
Did you find this article helpful? Then you'll love our support. Experience the A2 Hosting difference today and get a pre-secured, pre-optimized website. Check out our web hosting plans today.