Setting up Let's Encrypt and Cloudflare Universal SSL for end-to-end encryption
Cloudflare offers SSL for all sites, but Cloudflare SSL only encrypts the connection from the visitor to Cloudflare. This article shows how to provide full, end-to-end encryption for the entire connection from the visitor to the server.
Step 1: Set up the domain
In order to complete the setup process correctly, Let’s Encrypt requires the domain to resolve to the server IP address. If the domain does not resolve to the server IP address, update the domain name servers to the designated A2 Hosting nameservers for your account. For more information about setting name servers, please see this article.
Step 2: Verify the Let’s Encrypt certificate has been issued
To verify the Let's Encrypt certificate has been issued for the domain, follow these steps:
- Log in to cPanel.If you do not know how to log in to your cPanel account, please see this article.
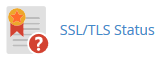
- Open the SSL/TLS Status tool:
- If you are using the Jupiter theme, on the Tools page, in the Security section, click SSL/TLS Status:

If you are using the Paper Lantern theme, in the SECURITY section of the cPanel home page, click SSL/TLS Status:
- If you are using the Jupiter theme, on the Tools page, in the Security section, click SSL/TLS Status:
- On the SSL/TLS Status page, locate the domain in the Domain column.
To the right of the domain is a green lock symbol with the label AutoSSL Domain Validated. If the lock symbol is not green or does not appear, the certificate is not installed.
 Alternatively, you can use an external validation tool like https://www.sslshopper.com/ssl-checker.html to check the SSL certificate.
Step 3: Configure Cloudflare
To sign up and configure Cloudflare for your domain, follow these steps:
- Go to https://www.cloudflare.com, and then click Sign Up. A new page appears:
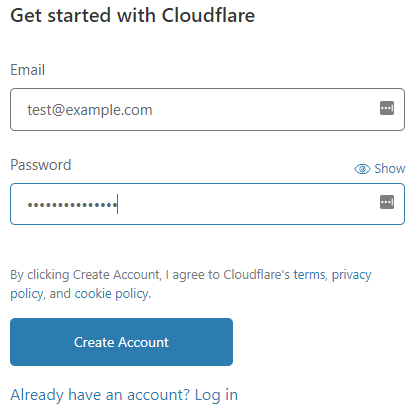
- In the Email text box, type an e-mail address.
- In the Password text box, type a password.
- Click to continue.
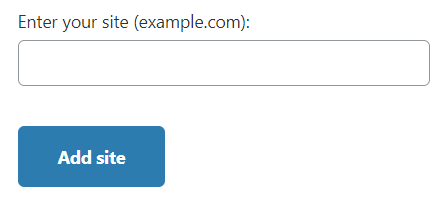
If you already have a Cloudflare account, you do not need to follow this step. Log in to Cloudflare with your existing account instead. - The Welcome to Cloudflare page appears. At the top of the page, click Add site.
On the next page, in the Enter your site text box, type your domain name, and then click :
On the next page, select a plan, and then click Continue. Cloudflare scans the domain's DNS records.
If you are unsure which plan to use, start with the Free plan.- DNS analysis results appear on the next page. Review the information and correct any errors. When you are done, click .
- The next page displays the nameservers to use for your domain. Make a note of the nameservers, and then click .
The Overview page appears. Click the SSL/TLS icon, and then click the Full or Full (strict) radio button on the SSL/TLS page:
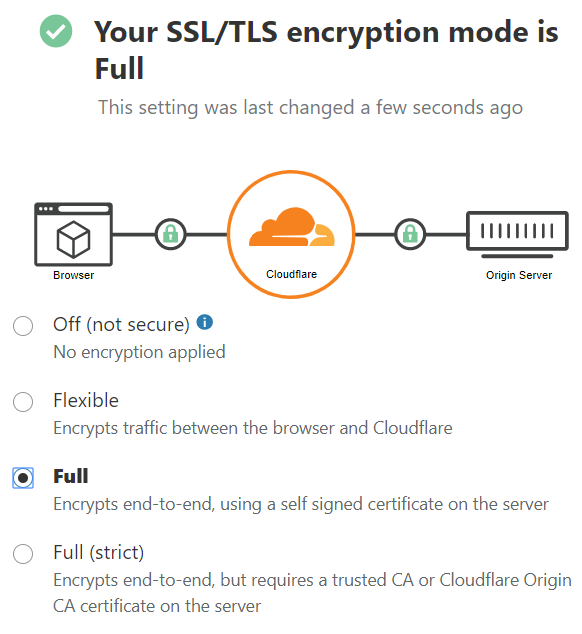
- Full (strict) mode requires that the domain have a valid certificate issued by a recognized certificate authority (CA), such as Sectigo.
- If you use Full (strict) mode, you may need to temporarily disable it (for example, by enabling Full mode) when renewing a Sectigo SSL certificate. Doing this ensures that the domain verification procedure runs correctly.
Step 4: Update nameservers and verify
To update the nameservers and verify the configuration, follow these steps:
- Use the control panel at the domain’s registrar to change the nameservers to those provided by Cloudflare.
- After 24 hours, verify the changes. The domain should resolve to Cloudflare IP addresses and the SSL certificate should be the Cloudflare Universal SSL certificate (sni.cloudflaressl.com).
More Information
Using Let's Encrypt with Cloudflare SSL is a great way to add security to a site quickly and at no cost. However, it may be more convenient to use a traditional CA-issued certificate. For a more complete discussion of the differences between Let's Encrypt and other SSL certificates, please see this article.
Article Details
- Product: Managed Dedicated Server Managed VPSReseller HostingShared Hosting
- Level: Beginner
Grow Your Web Business
Subscribe to receive weekly cutting edge tips, strategies, and news you need to grow your web business.
No charge. Unsubscribe anytime.
Did you find this article helpful? Then you'll love our support. Experience the A2 Hosting difference today and get a pre-secured, pre-optimized website. Check out our web hosting plans today.