Why Google Chrome Blocks Mixed Content (And How To Fix It)
Every year, Google has to adapt to new security issues. For a long time, Google Chrome has been cautious when it comes to mixed content, but this year, that is changing. Now Chrome is blocking all websites that have mixed content, which may include yours if you’re not careful.
Thankfully, there are a few easy ways you can protect yourself. Of course, in order to do so, you’ll need to understand exactly what mixed content is, and know how to check for it. After that, the fix is simple.
In this article, we’ll discuss what mixed content is, how you can look for it, and the steps you can take to eliminate it from your website. Let’s get started!
What Mixed Content Is (And Why Google Is Blocking It)
If you click on a link that leads you to a website with mixed content, you’re taking a risk. To put it simply, mixed content is when a website has both safe and unsafe scripts running simultaneously.
Safe scripts are those transferred over Hypertext Transfer Protocol, or HTTP. The newer Hypertext Transfer Protocol Secure (HTTPS) provides a much safer way for websites to transmit information. Many sites have moved from HTTP to HTTPS, but some site owners fail to make that switch completely, which results in mixed content.
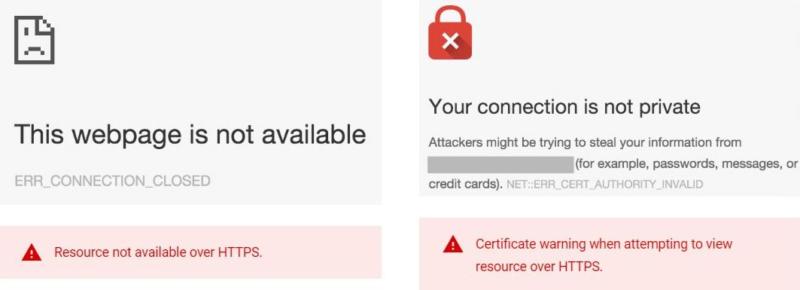
Many browsers will provide a warning to let you know about sites with mixed content. What’s more, Chrome is starting to block such content completely:

When your site has mixed content, you’re more vulnerable to security breaches, likely to have lower search engine rankings, and, starting this year, you may even see your site blocked on Google Chrome.
This may seem like a hassle, but it’s for everyone’s safety. When even one line of code isn’t secure, an entire web page may become vulnerable to attack. So, to improve its User Experience (UX), Google Chrome will no longer be displaying insecure websites.
How to Check Your Site for Mixed Content
You may not know whether your site contains mixed content, but don’t worry. You can find out quickly with a Secure Sockets Layer checker (SSL checker). This kind of tool verifies that your site’s Secure Sockets Layer (SSL) certificate has been properly installed, and that your security is sound.
There are multiple online tools that can do this for you. The best ones give you a rating not only on the certificate, but its protocol support and any potential vulnerabilities.
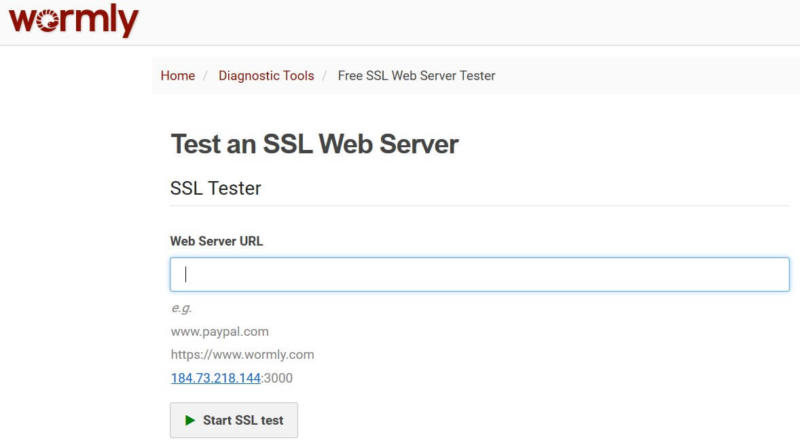
Wormly, for example, is a free tool that verifies your SSL certificate and offers a host of other helpful features:

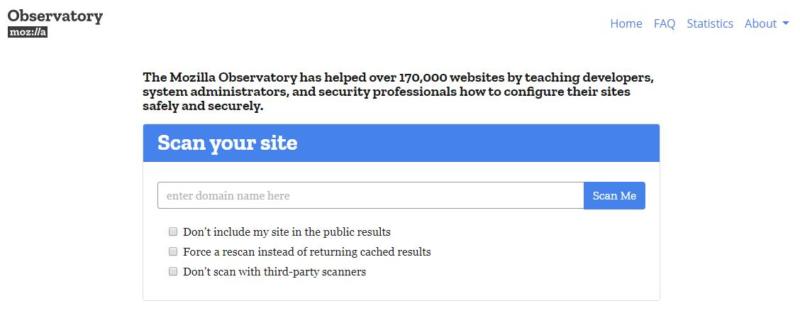
You may also want to check out Observatory by Mozilla. Although similar to Wormly, it has the option to use additional third-party scanners as an extra security measure:

Once you know where your site stands, you can start to take action. Let’s take a look at how you can eliminate mixed content from your website.
3 Steps You Can Take to Eliminate Mixed Content from Your Website
If you discover mixed content on your website, don’t panic. There are ways you can remove it, and make sure your site remains visible in search engines. With a few tweaks, your website can be more secure in no time.
Step 1: Install an SSL Certificate
While some hosts will supply an SSL certificate along with your plan, not all do so by default. If you haven’t installed one yet, this is vital task. An SSL certificate adds an extra layer of protection for you and your visitors, and is what enables your site to function via HTTPS.
There are many places to get an SSL certificate. First, however, you’ll want to become familiar with the options that are available to you. The three main types are:
- Domain Validation (DV)
- Organization-Validation (OV)
- Extended Validation (EV)
DV certificates are the easiest and quickest to get, but offer the lowest level of security. OV certificates are a solid middle option, while an EV will take longer to secure but is a good choice for large e-commerce sites.
After you’ve purchased a certificate, you’ll need to install and enable it. How you do this will depend on your provider and platform. Here at A2 Hosting, all of our plans come with free SSL certificates, and setting yours up is simple.
Step 2: Remove Any HTTP Hyperlinks from Your Website
As we mentioned earlier, most sites are served over either the HTTP or the HTTPS protocol. HTTPS allows for encryption, and adds a layer of safety to your website.
Even if your site is linking to an external resource that contains an HTTP hyperlink, such as an image, you’re opening up your website to possible attacks. That also puts your website’s visitors at risk.
One method for fixing this problem is Google’s audit system. To use it, you will have to install Chrome’s Canary first, and then use Lighthouse (installed through npm) to perform the check.
Once everything is set up, run the audit by using the following code to get your report:
lighthouse --mixed-content http://www.example.com
Lighthouse will show you all of the insecure links that are currently on your website. Then you can modify or replace them as needed.
Step 3: Set Up a 301 Redirect to Boost Security
If you have updated your website from HTTP to HTTPS, you may want to consider implementing a 301 redirect. This type of redirect permanently reroutes users from one domain to another.
If you choose not to do this, some visitors may inadvertently end up using an insecure version of your website, or might never find it at all. To make sure everyone is redirected to the HTTPS version of your site, you’ll want to access your .htaccess file via File Transfer Protocol (FTP). Then add the following line of code at the bottom of the file:
Redirect 301 / http://www.yourwebsite.com/
Don’t forget to replace the placeholder with your site’s domain. Then save and re-upload the file, and your redirect will be ready to go.
Mixed Content Conclusion
Having your website blocked in Google is a worrying prospect. The good news is that if your site is at risk due to mixed content, there are some easy steps you can take to smooth the process.
To recap, here’s what you’ll want to do:
- Install or update your SSL certificate.
- Remove any unsecured links.
- Set up a permanent redirect.
Related Resources
A Security Checklist for Web Developers
4-Step Plan to Deal with a Security Breach
5 Top WordPress Plugins to Protect Your Website
Image credit: stevepb.


