- Jan 02, 2019
 0
0- by A2 Marketing Team
Google AdSense is an excellent way to monetize your blog. However, it comes with a wide range of options that you’ll need to become familiar with. It’s crucial to understand how to customize your ad settings and placement, because having too many distracting ads (or the wrong types) can reflect poorly on your site and drive users away.
Fortunately, it isn’t hard to learn the ins and outs of AdSense. This includes controlling the types of ads that display on your pages, and removing any that might be inconsistent with your site’s message. You can also decide whether you want to set up automatic ads, or retain manual control over ad placement.
In this article, we’ll explain how to review your ad settings and display only relevant content on your site. Let’s get started!
Why It’s Important to Customize Your Google AdSense Ads
Before you begin, you should understand that Google AdSense is an automatic ad placer. This means you will not be able to choose which specific ads appear on your site. However, it is possible to customize what types of ad categories you’ll allow.
For example, if you have a vegan cooking blog, you may want to block ads pertaining to meat products. You may also want to avoid any ads that might be offensive or off-brand for your site. In addition, focusing on categories of ads that will be particularly appealing to your specific audience is a smart way to maximize potential revenue.
In the rest of this post, we’ll help you get started by exploring the different types of ads available from Google AdSense. Plus, we’ll offer advice on where and how to place them on your site.
How to Control Your Site’s Google AdSense Ads (In 4 Steps)
If you’re brand-new to AdSense, we’d first recommend checking out our guide to the platform. Once you know the basics, here are four easy steps you can take to control your site’s ads.
Step 1: Review Your Google AdSense Ad Settings
First, you’ll want to check over the settings for any ads you’ve already created. To see all of your active ads, visit the AdSense website, log in, and choose Ads > Ad Units from your account page’s sidebar:
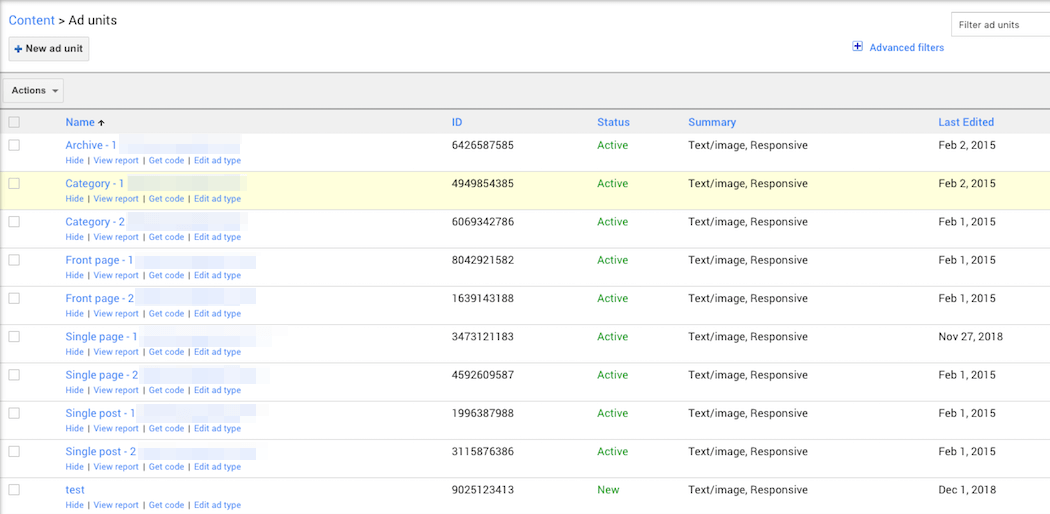
In the Summary column, you can see each ad’s type (such as text/image) and its size. To edit an individual ad’s settings, simply click on its title:

This will enable you to change the ad’s primary characteristics. Let’s look more closely at the options you’ll have.
Step 2: Choose Your Google AdSense Ad Types and Styles
Whenever you create a new ad, you’ll have three types to choose from. Understanding how each works is vital to making an informed decision. The available ad types include:
- Text and display ads. These are static text- or image-based ads. They may be placed in areas such as the top or bottom of a page, and are relatively unobtrusive. You can choose to display text-only (Text) or image-only (Display) ads, or a combination of both (Text & display). If you select the Text & display option, AdSense will automatically choose the highest-bidding advertiser from either format. We recommend choosing this option to maximize your revenue, as text and display ads look relatively similar.
- In-feed ads. In-feed ads are designed to pop up as users scroll through a feed. For example, you may have noticed this type of ‘native ad‘ while scrolling through your own Facebook or Twitter feed. In-feed ads can help to promote engagement because they are displayed organically, and they appear similar enough to your own site’s content that they’ll be less likely to stand out to your visitors.
- In-article ads. Finally, these are just like in-feed ads, except that they’re displayed as a visitor scrolls through an article on your site.
Once you choose the ad type you want, you’ll also be asked to choose a size. We recommend selecting Responsive, so your ads will automatically resize when viewed on a cell phone or tablet.
When you create a text ad, you’ll also be able to choose the colors for its text and background:

Naturally, you’ll want to select colors that complement your website’s design. For In-feed ads and In-article ads, you can choose to let Google automatically match their style to your site by entering a page URL to be scanned:
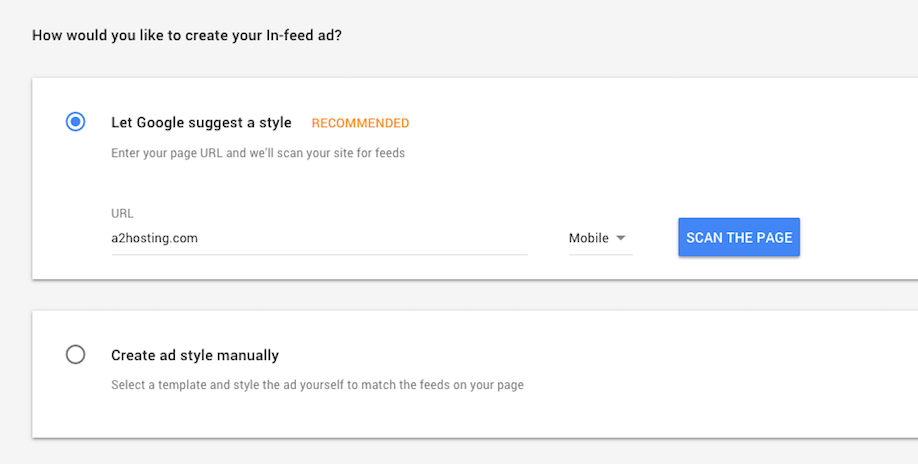
Finally, you can also choose what happens when there is no ad available to display in a particular spot. You can collapse the ad and display blank space, or display a URL pointing to another ad of your choice, such as one for your own products.
Step 3: Remove Unwanted Google AdSense Ads
As we mentioned before, you’ll want to match your ad categories to your site’s content. You can do this from your AdSense dashboard, by visiting Blocking Controls in the sidebar:
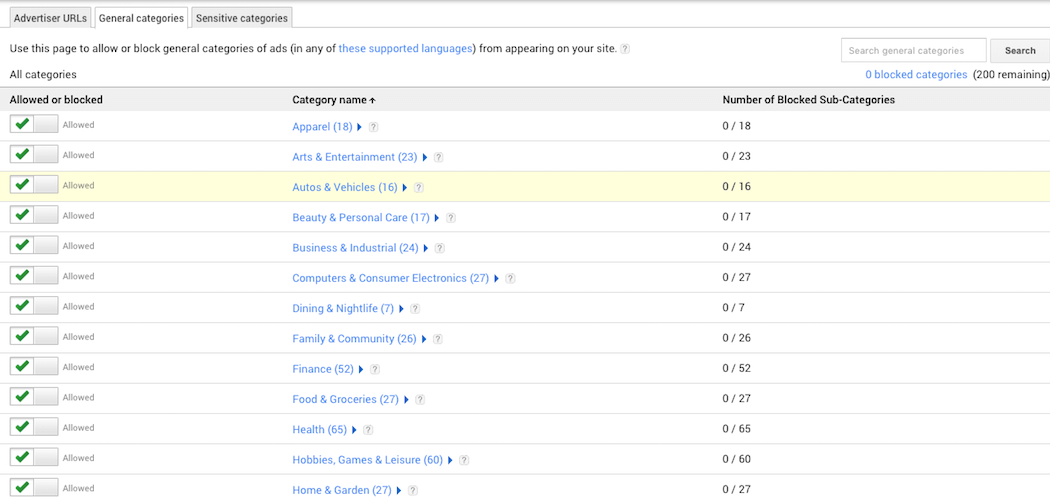
All ad categories are displayed in the General categories and Sensitive categories tabs. You can simply un-check a category or subcategory to block those types of ads.
It’s worth noting that this may not prevent all poor ad choices. If an issue comes to your attention, you can always block a specific ad from the Advertiser URLs tab:
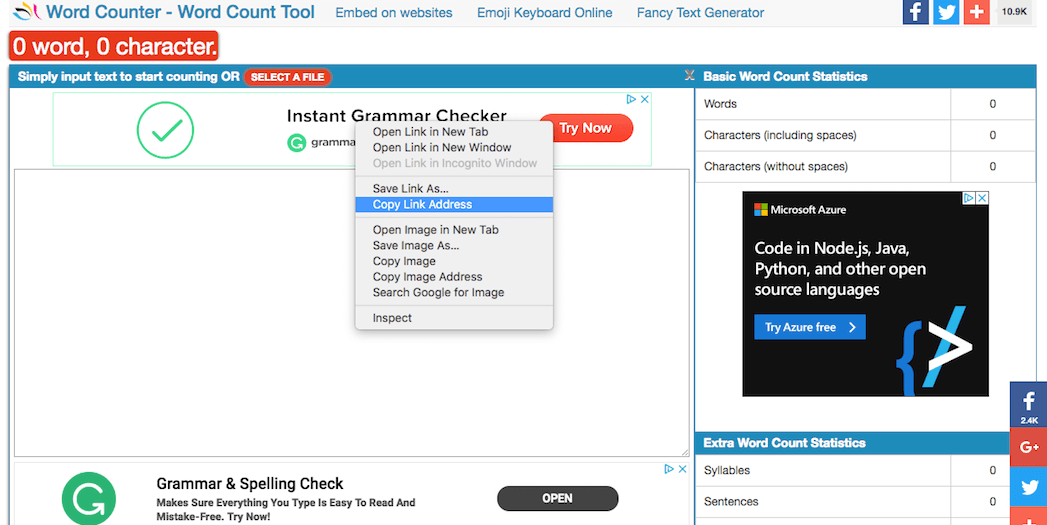
To block individual ads by URL, first find the ad on your website. Right-click on it, and copy the URL. Then, simply paste the link into the Block Advertiser URLs section in AdSense.
Step 4: Set Up Auto Google AdSense Ads (Optional)
One of AdSense’s more interesting options is ‘Auto ads’, which uses machine learning to automatically generate custom ad placements based on how a user is browsing your site. With Auto ads, you can’t control exactly where the ads are placed. However, you can restrict which types of ad formats will be displayed.
In addition to the three ad types we discussed previously, Auto ads offers three new varieties. These include:
- Matched content. This will generate a list of related content from your own site, with an ad or two mixed in. Matched content ads often appear as a thumbnail grid at the bottom of an article.
- Anchor ads. This type of ad hovers at the top or bottom of your user’s screen, and must be tapped to close.
- Vignette ads. These are full-screen ads that appear between page loads on your site – as a visitor leaves one page, the vignette ad displays while the next page loads.
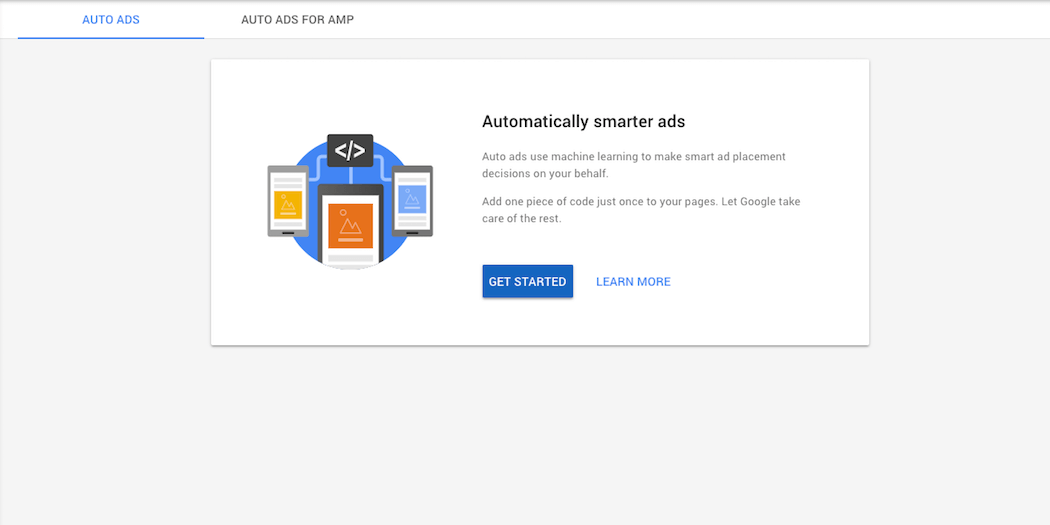
To set up Auto ads, you just need to place a single piece of code on your site, and Google takes care of the rest. Visit your AdSense account and choose Ads > Auto Ads from the sidebar. Then, click on Get Started:
On the next screen, you’ll be prompted to choose your ad types:
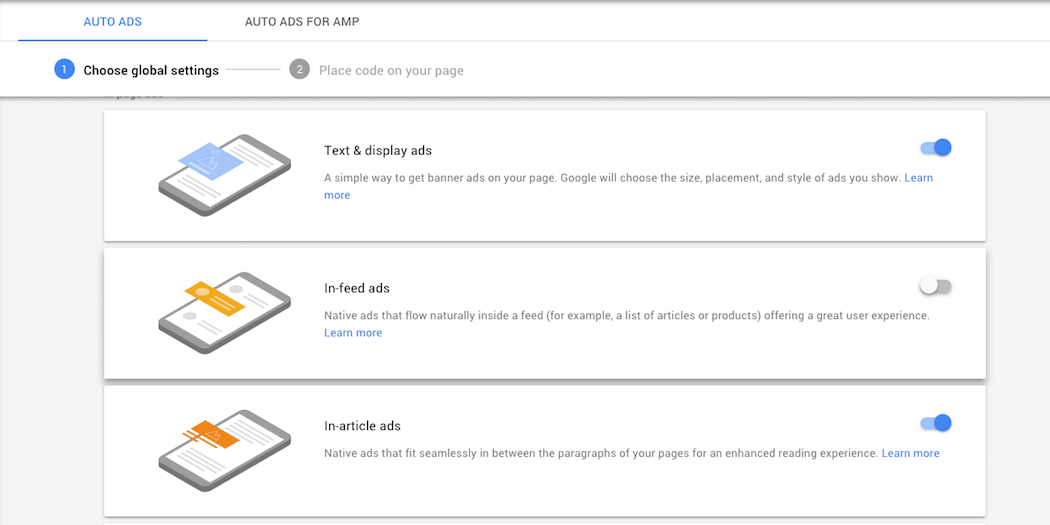
Un-check any you don’t want to use, and save your selections. Then, you can copy the provided code and paste it anywhere on your site in an HTML area.
Google AdSense Conclusion
Google AdSense is a beginner-friendly way to get started with online advertising. You can’t choose individual ads to display, but you have a great deal of control over the categories and types of ads that are placed on your site. It’s important to think carefully about these choices, to make sure your ads are consistent with your site’s look and message.
The four steps you can take to control your site’s ads include:
- Review your ad settings.
- Choose your ad types and styles.
- Remove unwanted ads.
- Optionally, set up Auto ads.
Image source: Pexels.


