- Dec 04, 2018
 0
0- by A2 Marketing Team
WordPress’ new Gutenberg editor is imminent, and the opportunity is ripe for creating advanced content layouts. However, some aspects of Gutenberg can be less intuitive than the old editor, so it may not be immediately apparent how to use it.
To get started, it helps to get a firm handle on the editor’s new features. If you haven’t thoroughly explored the new editor yet, we recommend doing so in a testing environment, so you can get accustomed to it before it’s rolled into WordPress’ core.
In this article, we’ll introduce some of the content blocks in Gutenberg that let you customize the layout of your posts and pages in exciting new ways. Let’s get to work!
What’s Changed in the Gutenberg Editor
First, let’s take a moment to talk about the major differences between Gutenberg and the Classic WordPress editor. Most importantly, the Gutenberg editor is a drag-and-drop system. This means instead of composing your content largely in a single field, each part of a post or page gets its own dynamic section.
These sections, or ‘blocks’, let you add basic elements to your content, such as text and images. In addition, some blocks provide more advanced functionality, like tables and buttons. You can even add more blocks to your editor’s library by downloading new options from plugins, or you can create your own custom blocks.
What’s clear is that Gutenberg will change the way posts and pages are built in WordPress. However, because the editor is more complex, some of its features may not be obvious right away. That’s why we’re going to look at some of the ways you can get the most out of the Gutenberg editor.
5 Ways to Create WordPress Content Using Gutenberg
Gutenberg’s new content blocks and options mean that you can do much more with WordPress 5. In the next few sections, we’ll look at some of the most important and interesting changes.
1. Place Widgets Anywhere on a Page or Post
WordPress widgets add specific features to your site. For example, you can use widgets to pull up recent posts, display comments, or add a Google Map. In most versions of WordPress, you could only place widgets in specific areas of your site, typically its sidebars and footer. You could not use them in the editor itself.
However, with Gutenberg you will now be able to place widgets nearly anywhere on your site, including on pages and posts. You can add widgets in Gutenberg by clicking on the plus sign to add a content block, and then searching for “widgets.” Any widgets that are compatible will display in the menu:
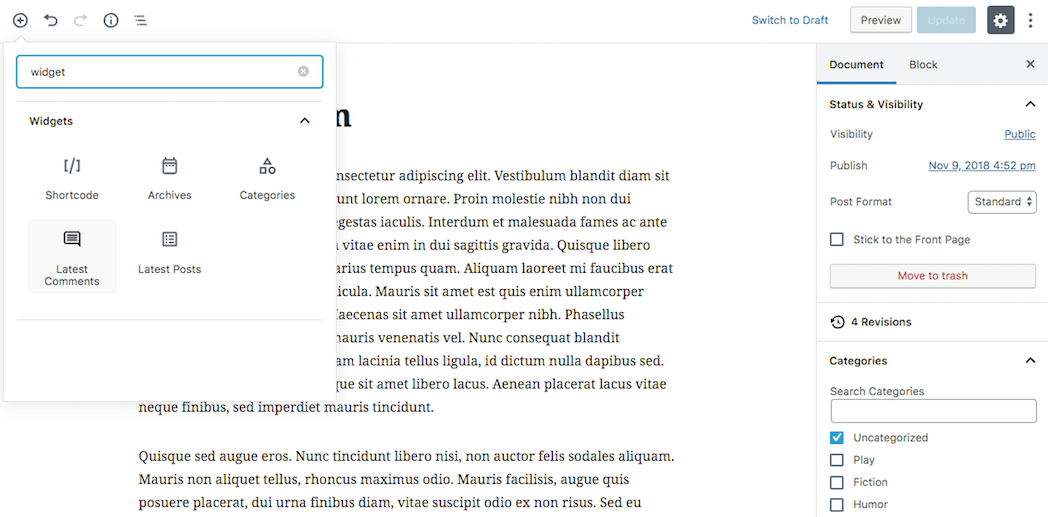
Choose the widget you’d like to insert, and drag it into place:
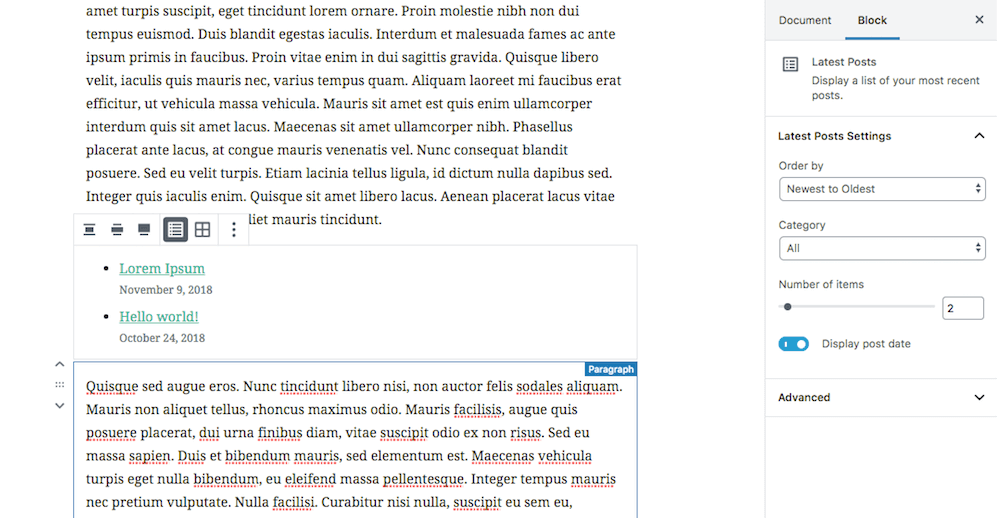
Then, when you click on the widget block, additional options will display on the right-hand sidebar. This lets you customize the widget itself. All-in-all, this is a promising feature that can be used to make your content a lot more dynamic and complex.
2. Add Custom HTML in the Visual Editor
The traditional WordPress editor has two tabs, one for creating content visually and another for editing its underlying code. If you’re less confident using HTML, this could make it confusing to find the right place to add custom code. Gutenberg, on the other hand, offers the option to add a block of code via the same interface you use to create visual content.
This means that with the Gutenberg editor, it’s easy to create a distinct block of code and place it exactly where you want it to go. To do that, you’ll first need to add a Custom HTML block to your content:
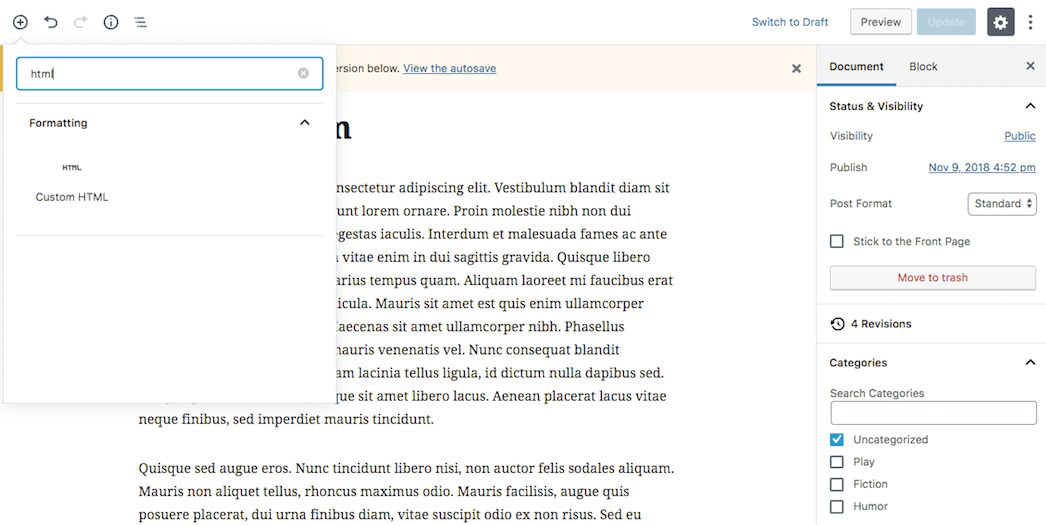
Then, place your HTML code into this block. This can include HTML, PHP, or JavaScript:
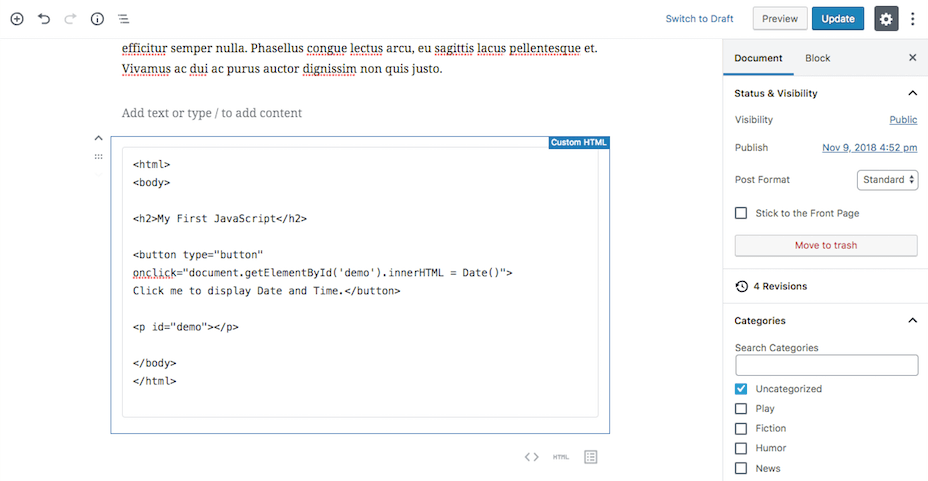
When you hit Preview, your code will display:

Using this feature, even HTML novices can copy prewritten code blocks from sites such as W3 Schools, and confidently use them to build more complex WordPress content.
3. Adjust CSS for Individual Content Blocks
Adjusting CSS is another task that’s made easier for non-coders with the Gutenberg editor. In the Classic editor, to adjust CSS for a specific widget or part of your site, you either needed a special plugin or knowledge about what CSS selector to use.
However, in Gutenberg, you can add an individual CSS class right from the visual editor. You can then include CSS for that class, using the Additional CSS editor. This enables you to do some pretty cool things, such as applying CSS shapes to an image gallery.
To get started, first click on the content block you’d like to modify. From the options in the right-hand sidebar, go to Advanced > Additional CSS Class and assign it a CSS class name:
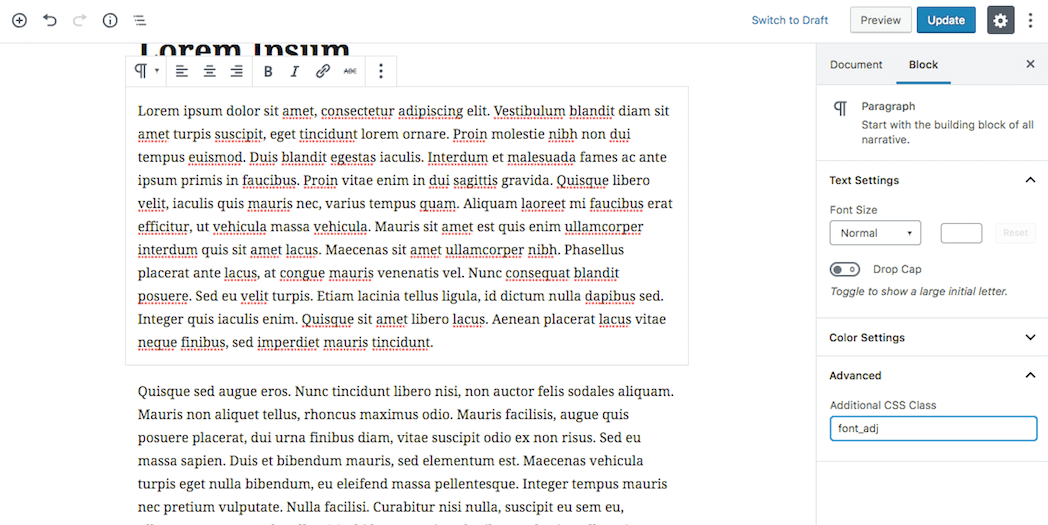
Then, copy this name and open up the WordPress Customizer (Appearance > Customize). Click on Additional CSS, and in the text box, paste the name of your CSS class preceded by a period. Then you can add whatever additional code you like.
In the example below, we added CSS to change the font of a text block:
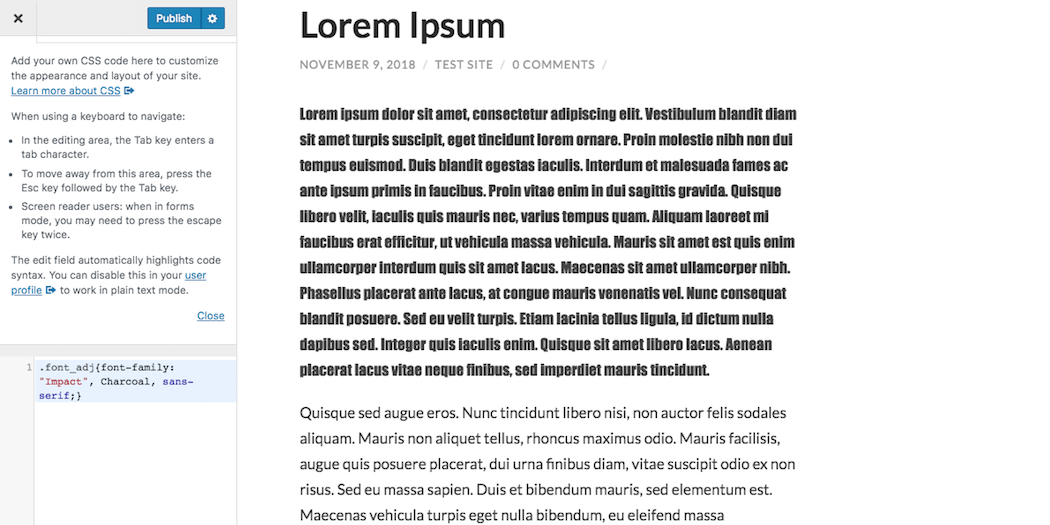
The CSS editor will show you a preview of your changes, and you can hit Publish to save them. This lets you affect only the specific elements you want to modify.
4. Edit Text Size and Color
Another thing the Classic WordPress editor lacked was an easy way to change text size and color within a post or page. The only way to do so was by either installing a composer plugin or manually adding a style via HTML.
However, the Gutenberg editor gives you a range of style options for text blocks. You can even add a ‘drop case’ (a large initial letter) to help visually break up your content, or change a text block’s background color.
To modify these options, just click on any text block and check out the right-hand sidebar:
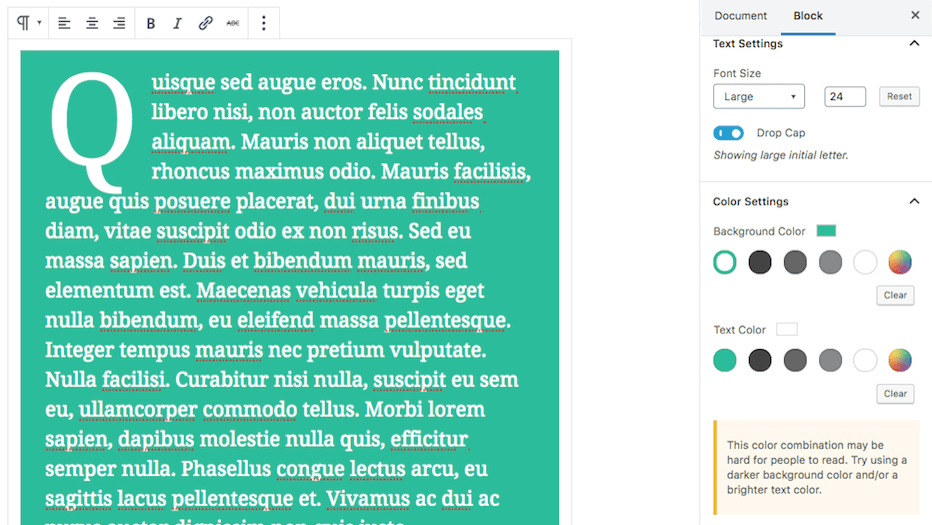
You can adjust font size from the drop-down menu, or by simply typing in a number. Then you can change background and font colors using the color picker, and add a drop case if you like.
Gutenberg will even display a warning message if you inadvertently choose a color combination for text that may be hard to read. This is an excellent feature if you’re concerned about your site’s accessibility.
5. Add Advanced Features to Your Content
With Gutenberg, there are more ways to add features to your content than ever before. New content blocks in this editor enable you to do things that would have previously required you to either know HTML or use an additional plugin.
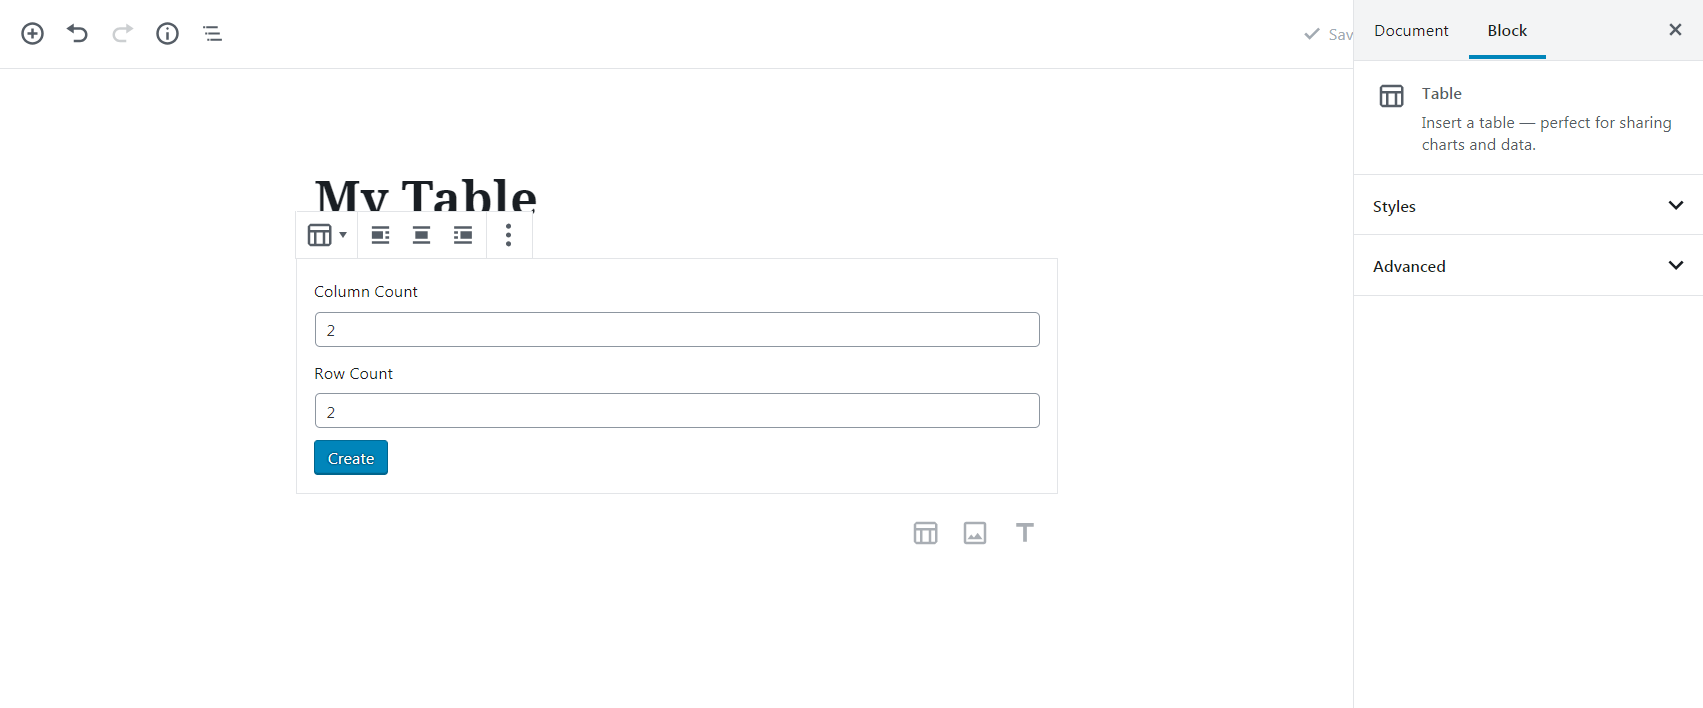
Some of the options on offer include tables, buttons, and image galleries. To create a table, for example, you’ll simply need to choose the Table block within a post or page. Then, you can enter the number of columns and rows you’d like to use:
You can click on each cell of the resulting table to add whatever content you’d like:
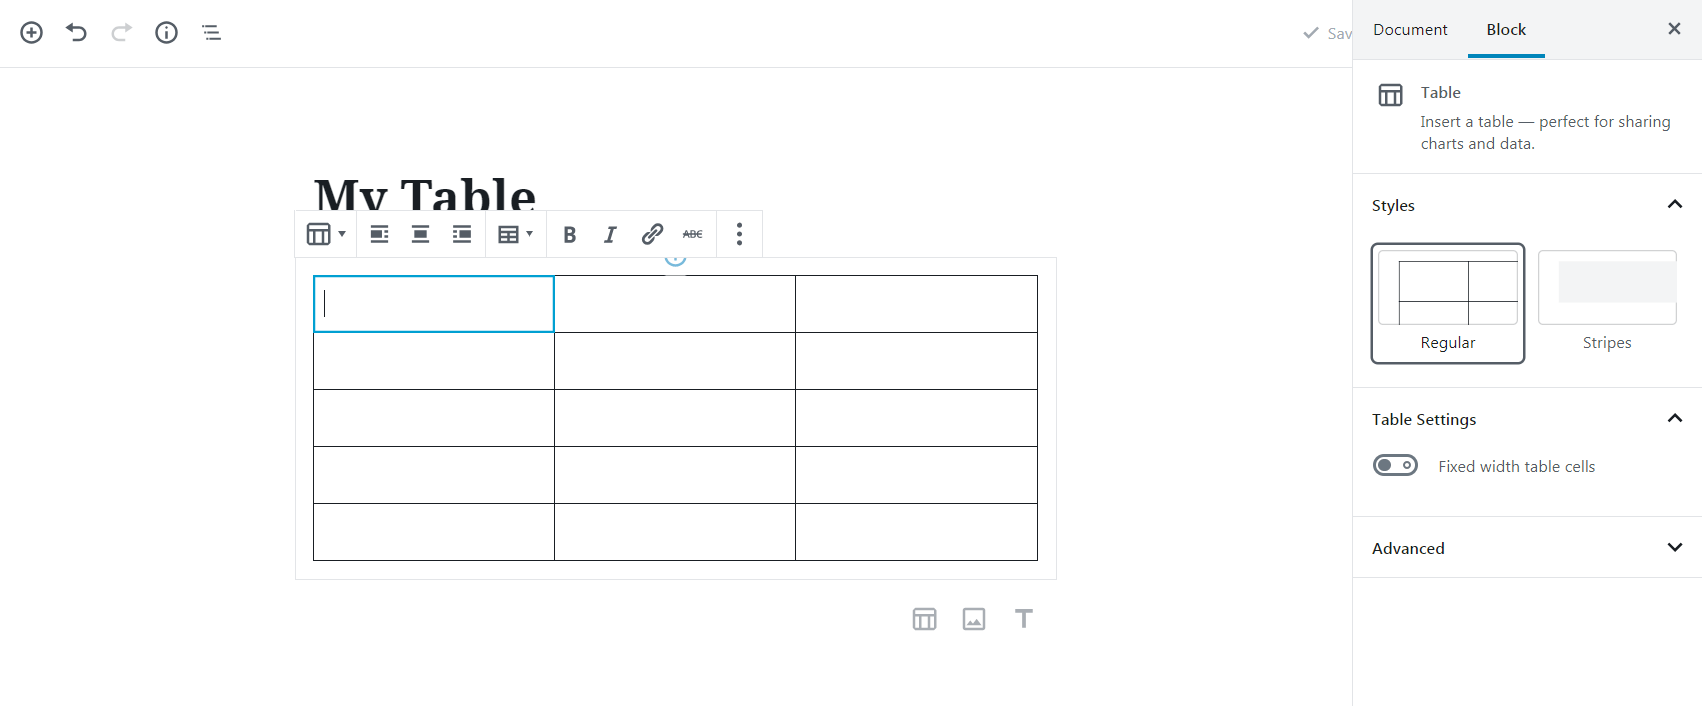
Each type of content block has its own set of options in Gutenberg. The table block menu lets you add or delete rows and columns, for example, and apply formatting to the table itself. We’d recommend spending a few minutes exploring each block, to familiarize yourself with the options you now have available.
Conclusion
Gutenberg, which will become the default editor with the release of WordPress 5.0, will change the way WordPress posts and pages are put together. That means you’ll need to starting learning it inside and out, as soon as possible.
Five exciting ways you can use the new Gutenberg editor include:
- Placing widgets anywhere on posts and pages.
- Adding custom code in the visual editor.
- Adjusting CSS for individual content blocks.
- Editing text size and color.
- Adding advanced features to your content, such as buttons, tables, and image galleries.
Image source: Pexels.
