


- Jan 10, 2019
 0
0- by A2 Marketing Team
In a crowded online market, effectively targeting audiences with smart marketing campaigns is an essential way to get your content noticed. This can be difficult, however, as so many brands are looking to do the same thing. In order to get ahead, you need tools that enable you to reach your target market more directly.
That’s where the Facebook pixel comes in – an analytics tool that helps you measure the effectiveness of your site by tracking the actions people take. This enables you to develop extremely targeted ads and measure important conversions across your pages. It also makes the process of doing these things a lot faster.
In this article, we’ll explain how to add the Facebook Pixel to your site, and discuss the ways you can use it to boost your social media marketing strategy. Let’s get to work!
An Introduction to the Facebook Pixel
![]()
So, what is the Facebook pixel? Put simply, it’s a snippet of code that you can insert into the back end of your website. Once in place, it enables you to closely monitor the effectiveness of your site, by tracking the activities of people who visit it.
The pixel keeps on eye on the actions your site’s visitors take, with the goal of helping you better understand your target audience. More specifically, it focuses on how people interact with your Facebook ads. This information is reported back to the platform, and is used to display more relevant and effective ads in the future.
How to Install the Facebook Pixel on Your Website
Adding the Facebook pixel to your site is surprisingly easy, and can be done quickly. We’ll talk you through how to do this in WordPress, but the feature can also be used with Joomla and Drupal.
Regardless of the platform you use, the first step is actually creating your Facebook pixel. It’s important to keep in mind that you or your business will need an account with Facebook in order to do this:

You’ll first need to navigate to the Ads Manager tab in your account. Then go to Tools > Pixels:
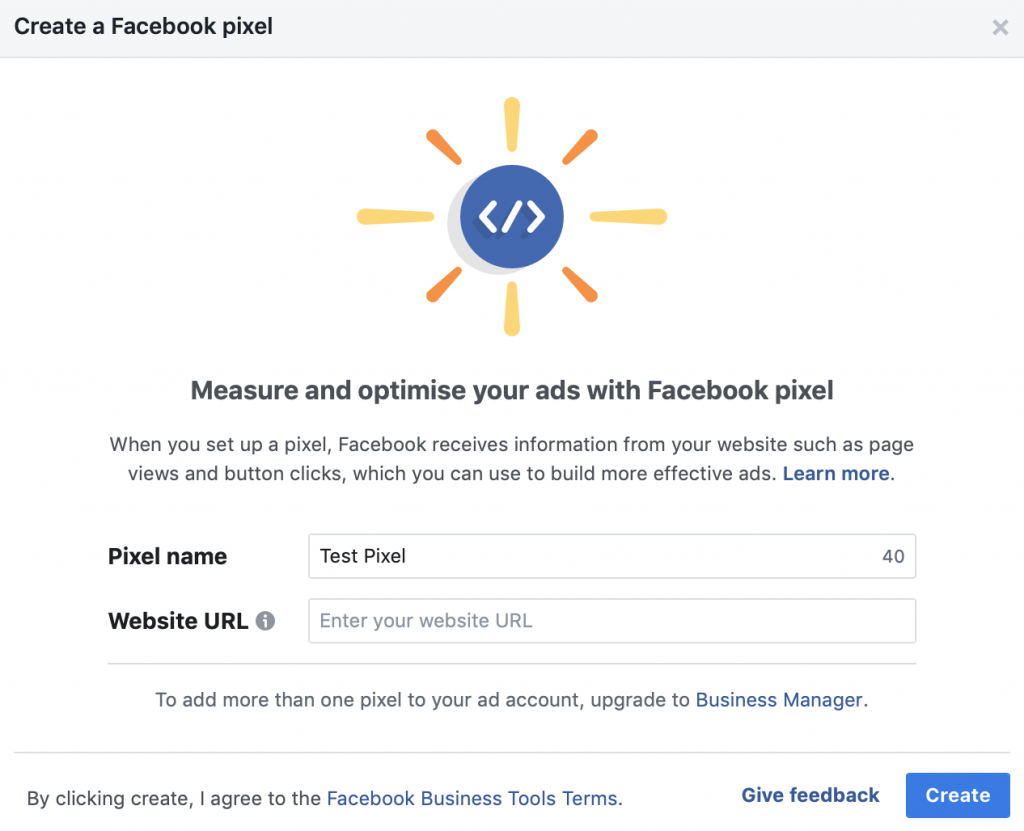
On the next screen, click on Create a Pixel. A pop-up should appear, where you can set a name for your new pixel. Then, you’ll be provided with a unique ID.
If you have an in-house developer, you can email them the code via this screen. If you’re planning to add the pixel now, select Manually Install the Code Yourself:
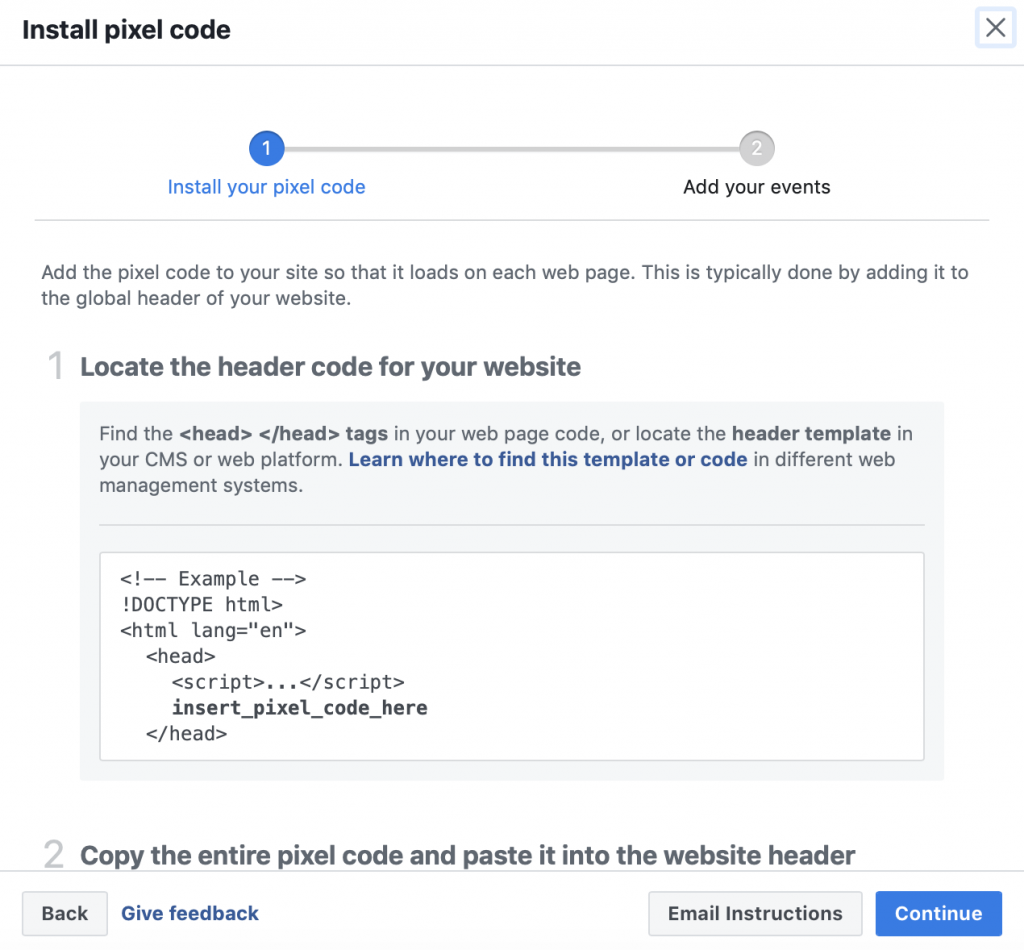
You should now see the pixel code that you need to install on your website. Copy the code, and log into your website.
How you add the pixel will vary based on your platform. If you have a WordPress website, you need to insert the code just before the </head> tag in your WordPress theme.
While you can do this manually, it’s easier (and safer) to use a plugin like Insert Headers and Footers. Once you’ve installed and activated the plugin, you can navigate to Settings > Insert Headers and Footers:

Just paste your Facebook pixel code into the box labeled Scripts in Header, and save your changes. With that, your pixel should be up and running.
3 Ways to Drive Engagement Using the Facebook Pixel
You’re now ready to begin implementing all the powerful tools the Facebook pixel interacts with. The possibilities are pretty much endless, but in the next few sections we’ll look at three of the most useful options.
1. Retargeting and Custom Audiences
Custom audiences are one of the Facebook pixel’s most useful targeting abilities. Unlike other methods of targeting, custom audiences aren’t defined by demographics. Instead, they’re created by using information gathered from real people who have previously engaged with your site.
Using custom audiences enables you to refocus your ads for people who have already shown an interest in your business, such as those who started but didn’t complete a purchase. This can encourage a select audience to come back and give your site another chance.
To create a custom audience, open the Facebook Ads Manager dashboard, and then click on Audiences:
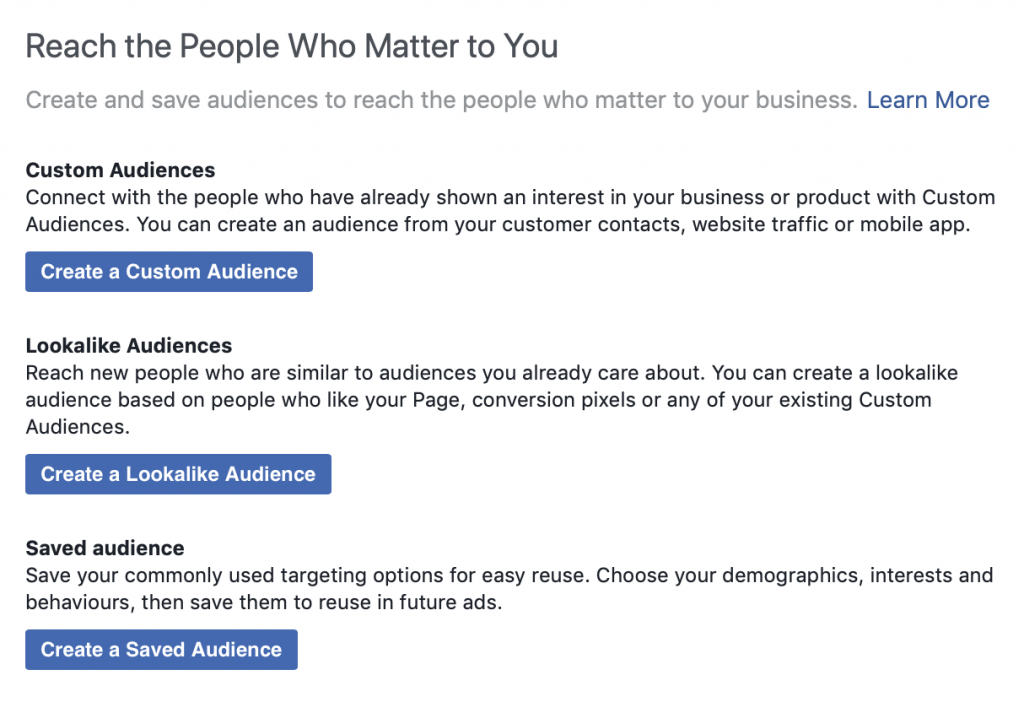
On the next screen, select Create a Custom Audience:
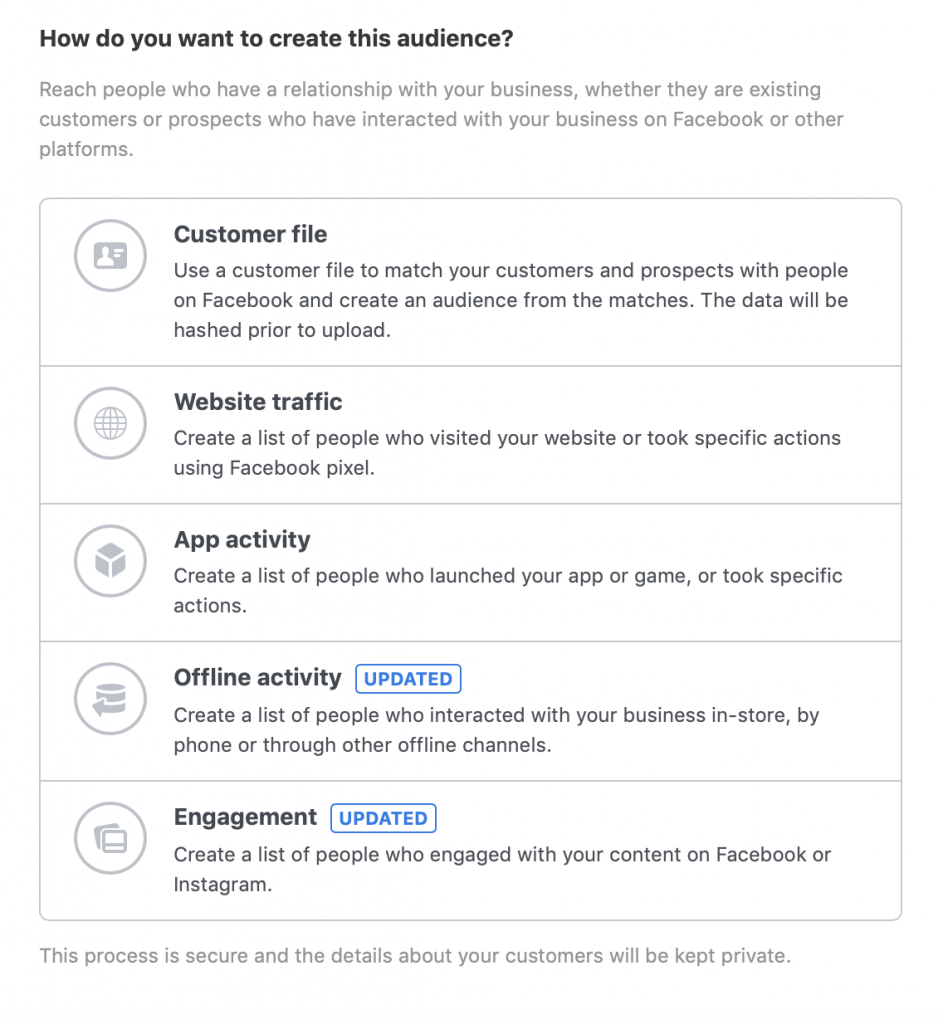
You can then choose from several options, depending on your goals. As an example, we’re going to select App activity:
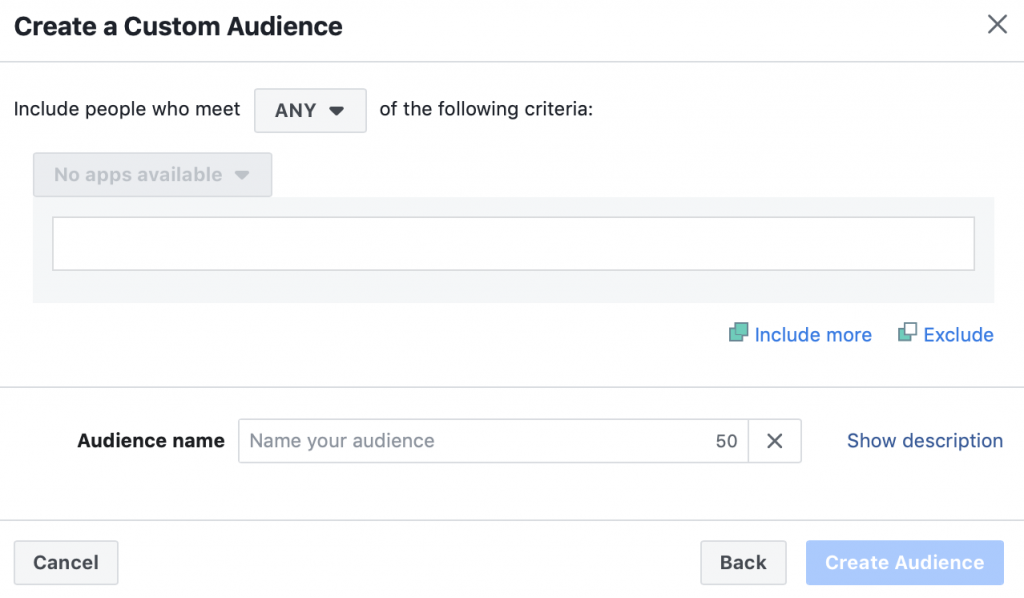
On the following page, you can choose what kind of audience you’d like to target. You’ll see several pre-made options, but you can also create custom combinations. Finally, you’ll need to decide how many days of activity you’d like the audience data to be based on, and pick a name so you can locate it easily in the future.
You have now successfully built your first custom audience! Keep in mind that you can also create as many as you’d like.
2. Building Lookalike Audiences
Lookalike audiences are another form of advanced targeting, which helps you market your content to an entirely new group of carefully-selected users. Lookalike audiences are created based on the user attributes outlined in one of your custom audiences (as described above). The Facebook pixel on your site takes key data about the selected group, and finds new sets of people who match the same criteria.
While you may have an idea of who your ideal site visitor is, the in-depth analysis involved in setting up a lookalike audience can help you reach more relevant users and grab their attention. Implementing this feature is likely to boost conversion and site traffic rates, and can even lower your marketing costs.
To create a lookalike audience, navigate to Tools > Audiences, just as you did in the previous step. From there, select the Lookalike Audience option, and then pick a source audience and country:
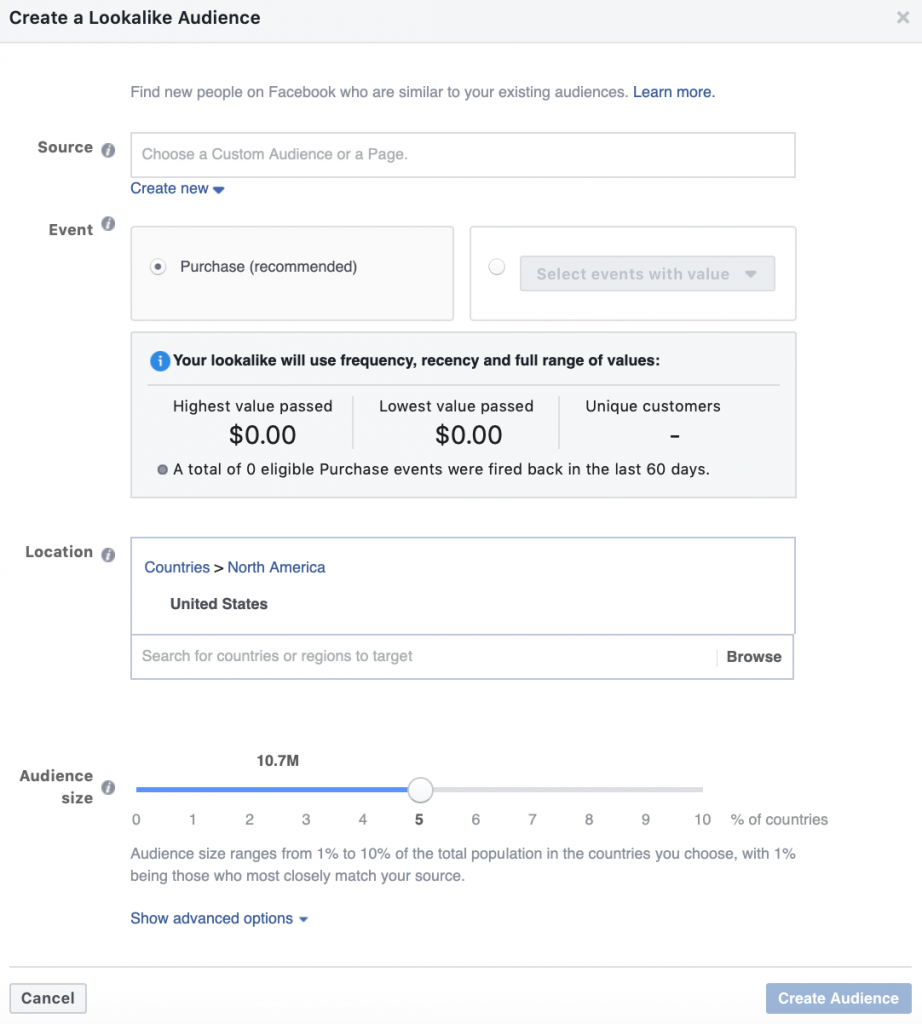
You can also choose the size you want your audience to be. You can go as high as you’d like, but keep in mind that larger audiences will be more loosely matched. There are also many different types of lookalike audiences for you to try out, so it’s easy to find one that’s a good fit to your specific needs.
3. Using Custom Conversions to Track User Activity
Finally, custom conversions enable you to track how people navigate your website, without the need to add anything to your existing Facebook pixel code. Designed to work alongside or partially replace Standard events, custom conversions help you track the journey users take through your site, and highlight areas for improvement.
Along with vastly simplifying the tracking process, custom conversions grant you a more accurate insight into the effectiveness of your website and advertisements. This means you can better understand what makes your visitors complete their conversions, whether that means making a purchase or hitting subscribe, and use that information to improve future campaigns.
To create a custom audience, navigate once more to the Tools tab of the Facebook Ads Manager dashboard, and select Custom Conversions:

From there, you can begin to build your custom conversion based around select criteria, such as how many people reach a purchase confirmation page. Using the conversion rules you put in place as guidelines, the Facebook pixel will then begin to work its tracking magic.
Conclusion
Social media marketing is a constantly developing environment, and nowhere is this more apparent than on Facebook. The Facebook pixel is an incredibly powerful tool, and when used correctly it can open up a whole new set of options for improving your marketing effectiveness.
In this article, we’ve covered some of the ways you can improve engagement using the Facebook pixel. These include:
- Create custom audiences based on data collected from real visitors.
- Build lookalike audiences to target new groups of people.
- Track and improve engagement rates through custom conversions.
Image credit: Pexels.
