- Sep 12, 2017
 0
0- by A2 Support Team
When you want to register a domain name for your site, you’ll have to go through either a registrar or a web host that offers the service. In most cases, these options provide a decent enough experience. However, you can always move your domain to a different home if you’re not satisfied with your choice.
There are a number of reasons you may want to make this switch. A different web host may offer you lower renewal rates, for example, or might have an interface you feel more comfortable using. In any case, the moving process isn’t complicated, and you should be able to complete it quickly.
In this article, we’re going to talk about why you might want to transfer your domain name. Then we’ll teach you how to transfer your domain in four simple steps. Let’s get to work!
Why You Might Want to Transfer Your Domain Name

If you already have a website, chances are you handled the domain registration process yourself. What you may not know is that domains are tied to the registrar or web host where you first got them. That’s not necessarily a bad thing – it just means that other people can’t poach your domain, and you can’t pay for renewals through a different platform.
With that said, there are some circumstances in which you might want to transfer your domain to an alternative service. These include situations when:
- You think your registrar is charging you too much for renewals. Domain renewal prices vary from platform to platform. You may be able to save money by changing services.
- Your new registrar offers a better experience. Some platforms are just easier to use than others. If your web host or registrar uses an old interface, managing your domains can be a pain.
- Your current option lacks quality support options. Changing your domain settings can be tricky if you don’t know your way around DNSs, name records, and so on. That means you’ll want to have a solid support team that can help you out with any issues you run into.
- You want to move all your domains to a single platform. If you run multiple sites, you may have a few domains spread out across multiple registrars. That’s a decent move from a security standpoint, but it also makes managing them more complicated.
Of course, if you’re happy with your current choice of host or registrar, there’s no need for you to consider transferring your domains. On the other hand, if you identify with any of the above scenarios, you’ll probably want to look into some other options.
How to Transfer Your Domain to a New Host (In 4 Simple Steps)
Now that you understand why you might want to transfer your domain name, it’s time to discuss how to get it done. You’ll need two things: a domain that’s still active, and an account on the platform where you want to transfer it to. The latter is easy enough to secure – just sign up to your new web host or registrar as you would any other site. Then proceed to the first step.
Step #1: Remove Your Domain Lock and Get an Authorization Code
Most registrars and web hosts implement a feature called a ‘domain lock’. To put it simply, this ties your domain to that service, until you disable it manually. Think of it as a safeguard to protect you from unauthorized transfer attempts on your domain.
Fortunately, disabling this feature is simple enough. Just sign into the platform where your domain is registered, and look for the option to disable your domain lock:

Keep in mind that the layout for your platform may look different, since no two services are the same. In this case, we found the option under a tab called Sharing & Transfer, but your experience might be different.
After disabling your domain lock, look for an option that will enable you to receive an authorization code. This code will be sent to the email associated with your domain, and your new platform will require it to authorize the transfer:

Once you’ve received your authorization code and you’ve successfully disabled your domain lock, you’re ready for the next step.
Step #2: Initiate a Transfer With Your New Host
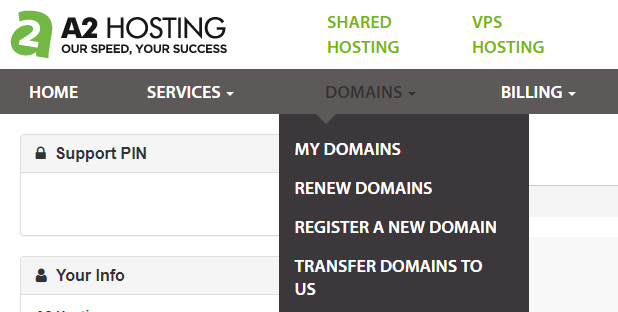
Log into your new host or registrar now, and look for an option to transfer your domain. It should be somewhere on your dashboard or management panel (if you’re moving to our service, you’ll find it under the Domains tab):

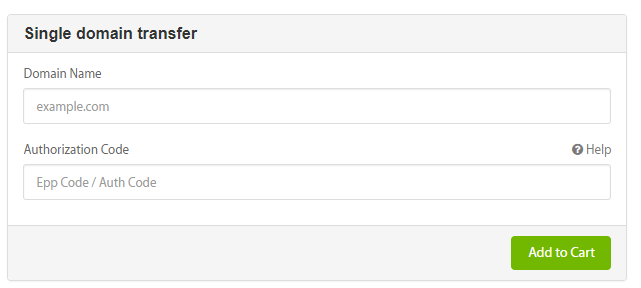
Once you’ve found the right option, you’ll be asked to confirm which domain you want to transfer in, and provide its authorization code:

Once you’ve entered both pieces of information, your new platform will get the process started. However, you’ll first need to provide verification for the transfer.
Step #3: Verify the Transfer
At this point, you should receive an email asking you to confirm that you want to transfer your domain to the new platform. This message will indicate which domain you’re moving and the registrar you’re transferring it from. All you have to do now is look for the confirmation link, and agree to the terms of the transfer:

Keep in mind that after transferring your domain, you won’t be able to do so again for at least 60 days (unless you want to return it to the previous registrar).
Once you’ve verified the transfer, your new platform will do the heavy lifting for you. All that’s left is to pay for the service if applicable.
Step #4: Pay for Your Transfer and Wait for the Process to Complete
A lot of platforms (such as ours) enable you to transfer domains in for free, but require you to renew them for an additional year. This means that for your transfer to happen successfully, you’ll need to pay for the renewal beforehand.
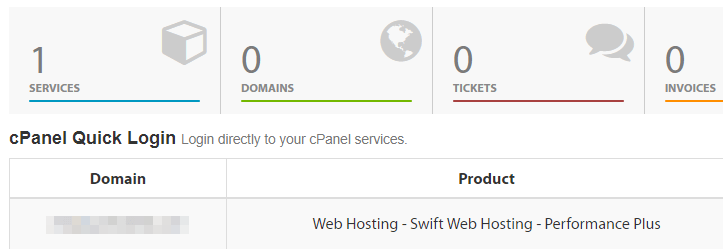
Once you complete the payment process, the transfer itself shouldn’t take long. With some registrars you’ll need to wait several days, but with others it can take less than a day. When the transfer is complete, your new domain will appear under your management screen on your new platform:

If you have other domains you want to transfer to the same service, the process will be identical. Just rinse and repeat until you’re done!
Transfer Domain Conclusion
A lot of people register their domain names at one web host, and end up switching to another. If you fall into that category – or you’re just looking for a change – moving your domain name is a quick and painless process.
Let’s recap the four steps you’ll need to follow if you want to transfer your domain name to a new host:
- Remove your domain lock and get an authorization code.
- Initiate a transfer with your new host.
- Verify the transfer.
- Pay for your transfer and wait for the process to complete.
Related Resources:
- Domain Management in the Customer Portal
- How to Switch Your Domain Name Without Damaging Your Site’s SEO
- 5 Essential Tasks to Tick Off When Transferring a Domain
- What is a Subdomain and When to Use It
Image credit: Pixabay.


