- Aug 15, 2018
 0
0- by A2 Marketing Team
If your business requires more than one website, managing them all separately can be a lot of work. What’s more, it’s difficult to standardize branding and messaging between individual sites. It’s a lot easier if you can connect those sites, and manage them all from one place.
Fortunately, you can do this easily with WordPress. By setting up WordPress Multisite, you can create an entire network of sites that are separate on the front end, but interconnected on the back end. You can even have individual people or teams manage each site, while making big decisions that affect the network as a whole yourself.
In this article, we’re going to explain what WordPress Multisite is and why it’s so useful. Then we’ll show you exactly how to set it up. Let’s take a look!
An Introduction to WordPress Multisite
WordPress is an incredibly flexible platform. It enables you to create practically any type of website, and is scalable with regard to content. You can also use it to build any number of sites and host them each separately.
However, what if you want to run multiple websites that are linked together in some way? For this, you’ll need to set up WordPress Multisite. This built-in feature enables you to create an entire network of sites, all of which are connected.
What’s more, you can manage this network from a single installation. As the ‘Super Admin’ for the network, you have top-level control. For example, you can install plugins and themes that will be available to every connected site. Plus, you can create new sites or delete old ones at will.
At the same time, each individual site can be managed by a different (regular) Admin user. They won’t be able to do certain things – such as install their own themes and plugins – but they can choose which features to activate, create content, customize the site’s layout, and so on.
Why WordPress Multisite Can Be Useful for Your Business
There are a lot of applications for a Multisite network. This feature is particularly useful for WordPress developers, for example, who need to build and manage multiple client sites. However, even if you don’t create websites for a living, Multisite can come in handy.
In a nutshell, it’s useful to create a Multisite network any time your business involves more than one website. For instance, let’s say you own multiple blogs. By connecting them through Multisite, you can keep control over any major decisions, and stay aware of what’s happening on every site. Yet, you can assign a different admin and management team to each site, so you don’t have to do everything yourself.
The same applies for businesses running multiple types of sites. Many companies have a main business site, a blog, and an e-commerce storefront. Again, Multisite enables you to put a separate team to work maintaining each site. Meanwhile, you can ensure consistent branding and messaging across all of them.
How to Set Up WordPress Multisite (In 3 Steps)
If a Multisite network makes sense for your business, all you need to do is set one up. Fortunately, this isn’t a difficult task, although it is a bit technical. Below, we’ll walk you through the necessary steps.
First, however, it’s important to note you can create a Multisite network using either a new WordPress installation or an existing one. However, we highly recommend using a brand-new site as the basis for your network. If you do decide to modify a live site, you will need to completely back it up first, just in case.
Step 1: Edit Your wp-config.php File
First, you’ll need to log directly into the site you intend to use as the basis for your Multisite network. This means accessing its files using a File Transfer Protocol (FTP) client. If you don’t know how to do this, you can check out our beginner-friendly guide on the subject.
Once you’re logged in, you’ll need to find your wp-config.php file. This should be located in your site’s root folder, usually called public_html, but also www, root, or its name:
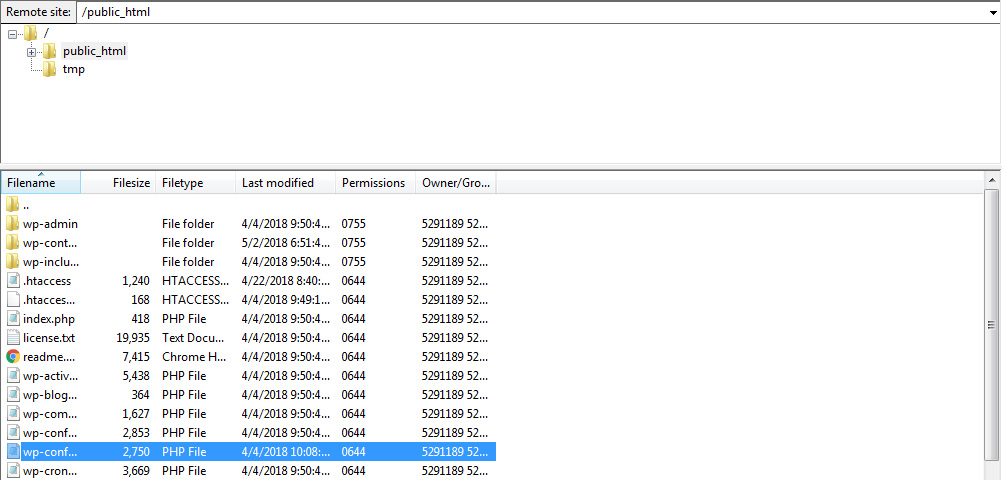
Open it up in a text editor, and look for the line reading /* That’s all, stop editing! Happy blogging. */. Right above, add this snippet:
define( 'WP_ALLOW_MULTISITE', true );
Save the file, and re-upload it to your site via your FTP client.
Step 2: Install Multisite Through Your Dashboard
Next, you’ll need to log into your site’s dashboard. Under the Tools tab, there will be a new option called Network Setup:
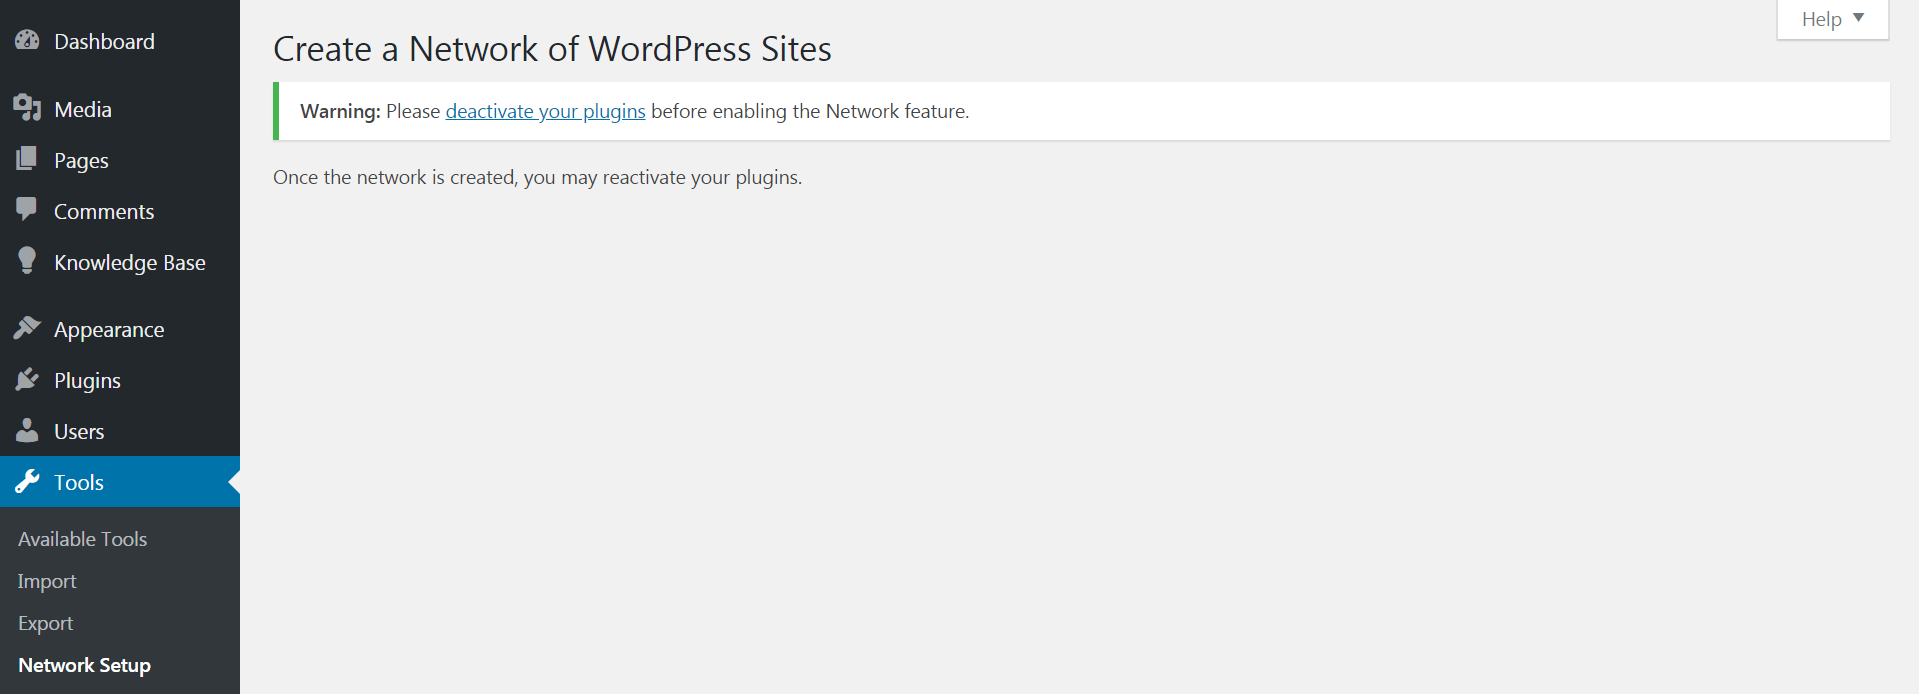
If you’re using a site with plugins already installed, you’ll need to deactivate them in order to avoid conflicts. Then, return to the Network Setup page:
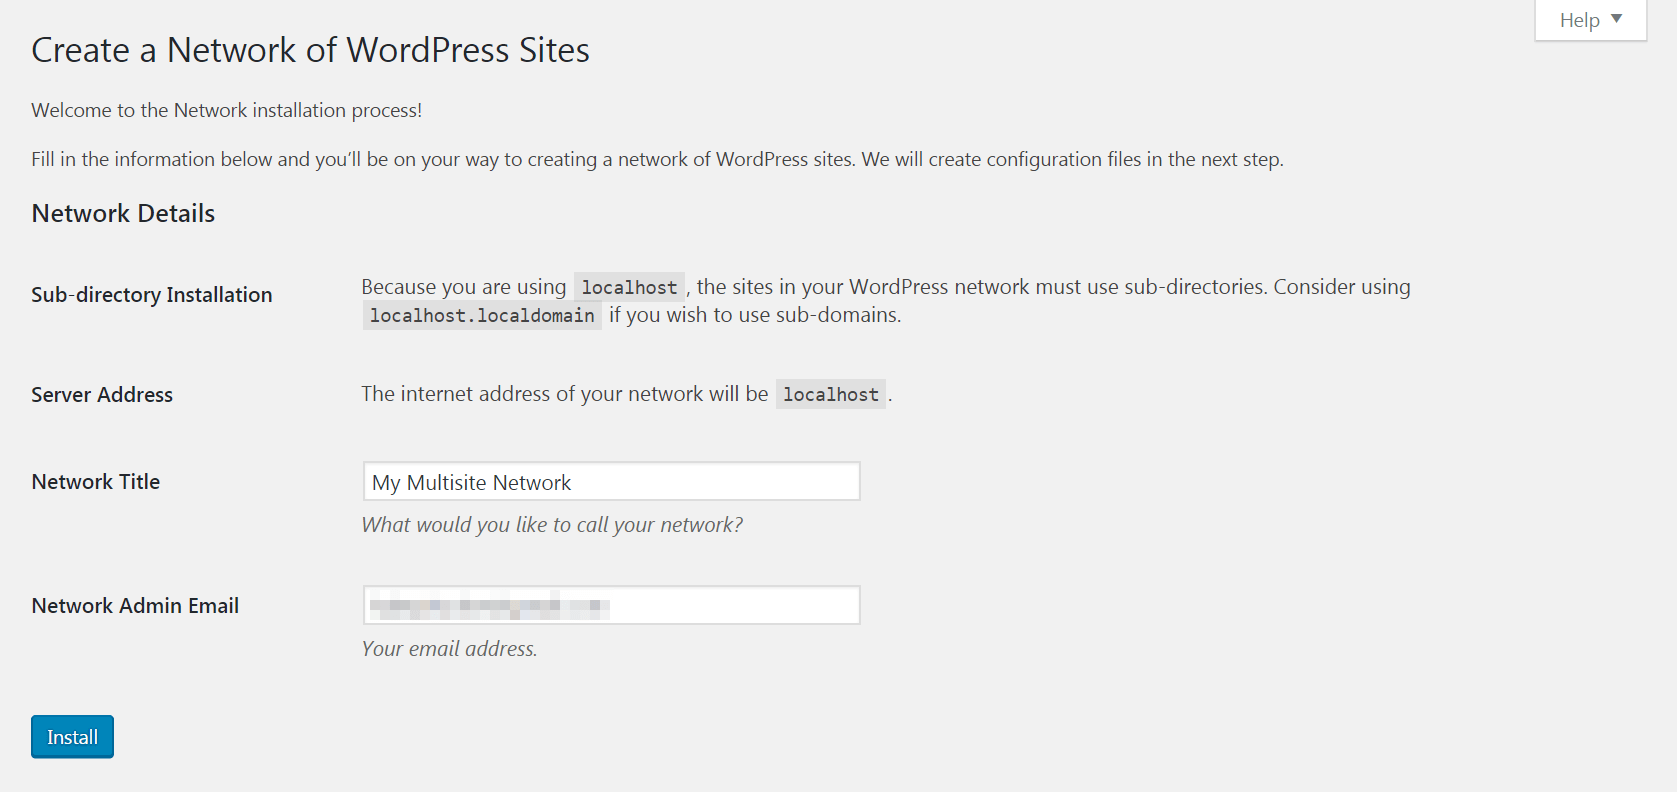
What you see here will vary somewhat. Network sites can either be created as sub-directories or sub-domains of your main site. However, you may be forced to use one or the other, depending on how old your site is and where it’s set up. If you are given a choice, this guide can help you choose the best option for you.
Regardless, you’ll also need to create a name for your network, and enter your admin email address. Then, select the Install button.
Step 3: Add Code to Your Site’s Files
WordPress will do most of the setup work for you, but you’ll need to do a few things yourself in order to complete the installation process. At the moment, you should see a page looking similar to this:
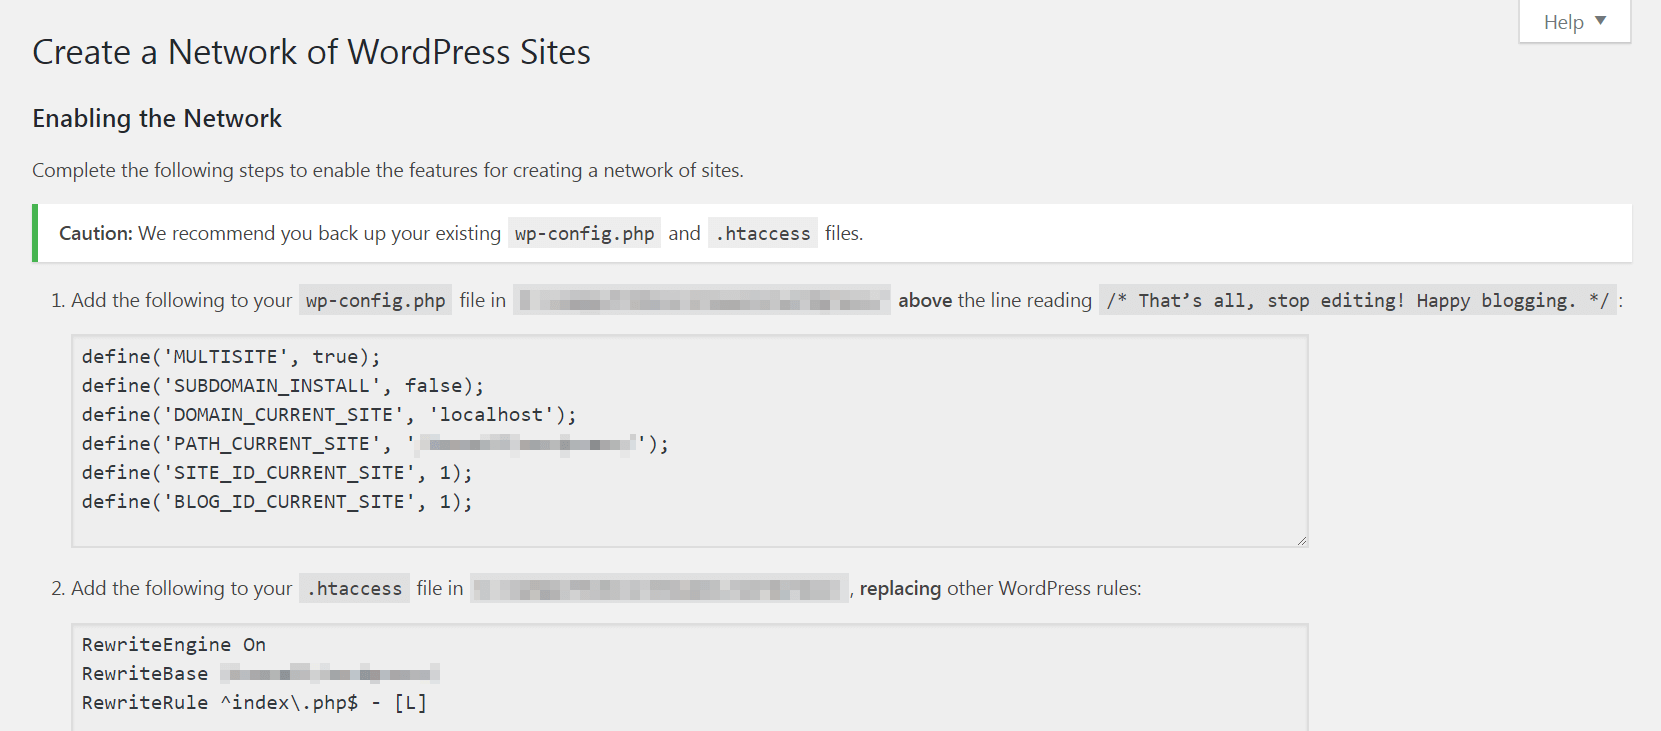
There’s a warning at the top to back up a few key files. This will help you restore your site to a normal installation later on. Once you’ve taken care of this (if necessary), you’ll need to follow the directions on this page.
This will involve logging into your site via FTP again, and adding some code to your wp-config.php and .htaccess files. The latter should also be located in your site’s root directory. Save the files when you’re done, then log out and back into your site.
Your dashboard should look mostly the same, since what you’re seeing is still the dashboard for the individual website. However, if you click on My Sites at the top of your screen and select Network Admin, you’ll see a brand-new dashboard:
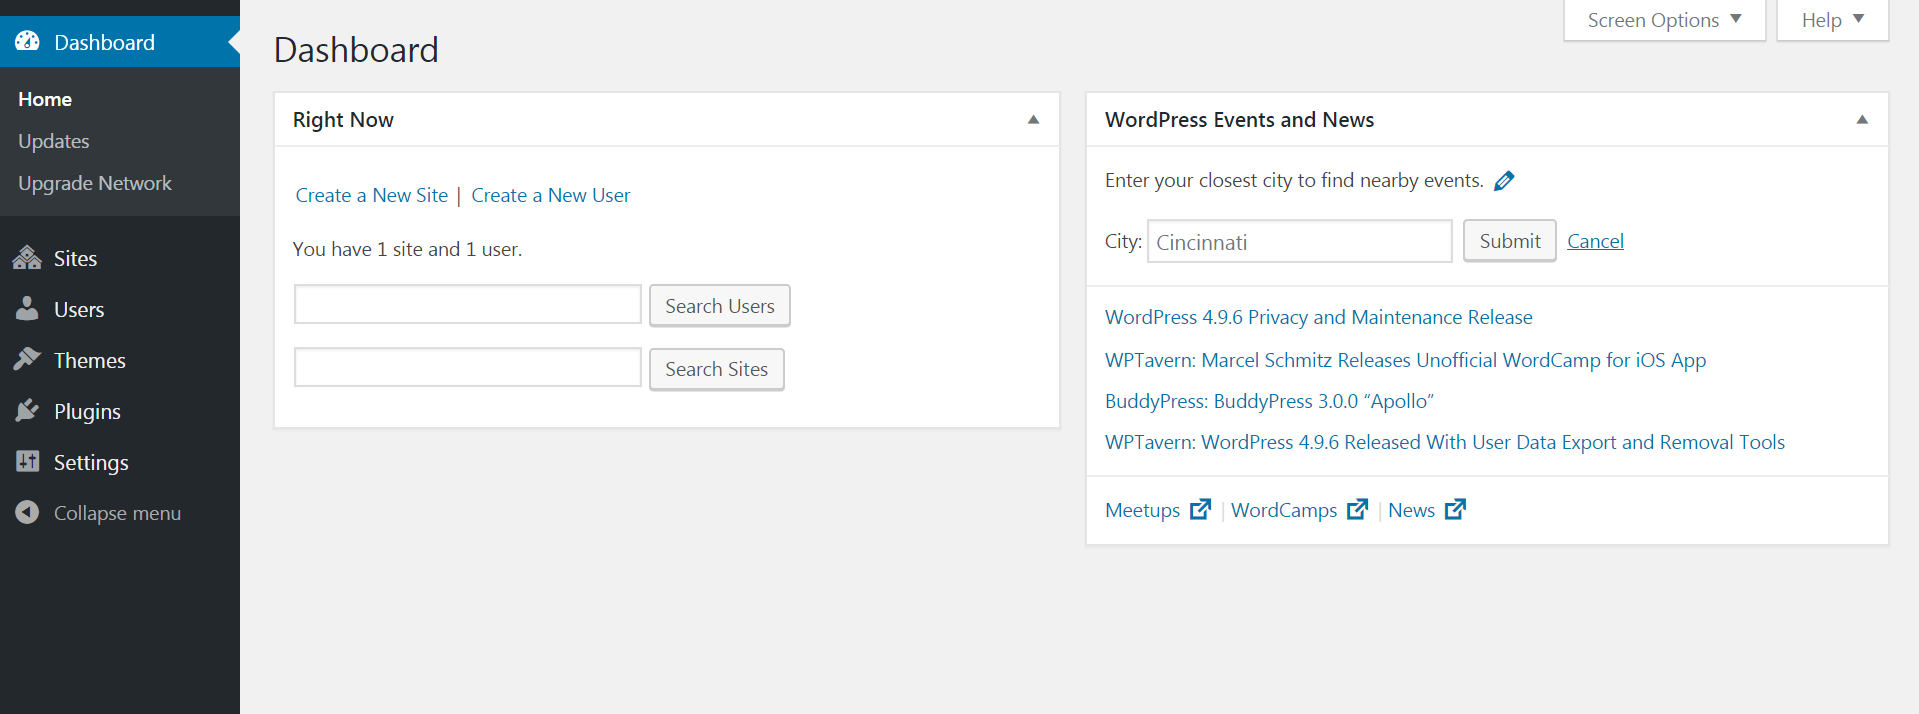
Here, you can manage your Multisite network. You can add themes and plugins, manage users, change settings, and so on. All of the changes you make here will be applied to every site on your network. You can also go to Sites > Add New to create a new website:
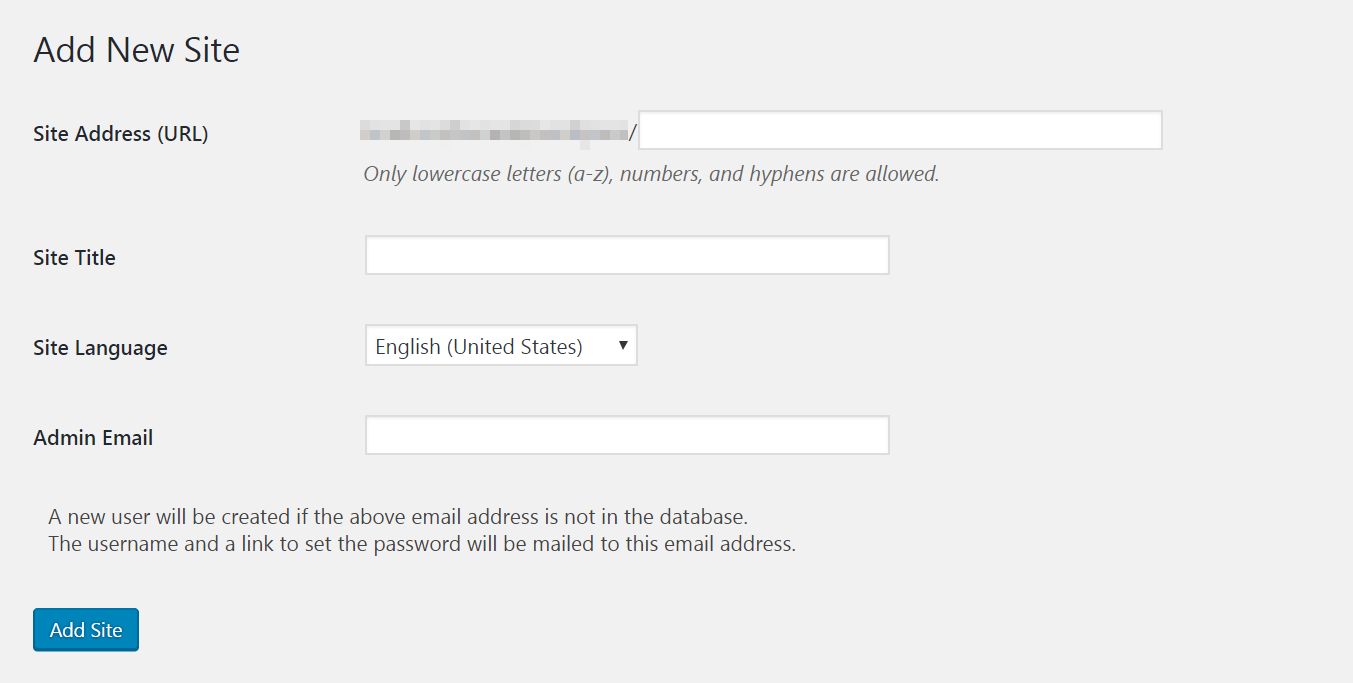
That’s it! Your Multisite network is up and running, and you’re ready to start setting it up to meet your business’ specific needs.
Conclusion
Managing a website requires a lot of work, and this is only compounded if you’re responsible for more than one. A Multisite network simplifies your job, by letting you manage everything from one convenient dashboard.
What’s more, setting up WordPress Multisite isn’t too difficult. All it takes are three steps:
- Edit your wp-config.php file.
- Install Multisite through your dashboard.
- Add code to your site’s files.
Image credit: geralt.


