How to manage email signatures in Professional and Pro Plus Email Hosting
This article describes how to create and modify email signatures using the webmail interface provided in Professional and Pro Plus Email Hosting accounts. Signatures are an easy way to automatically personalize your outgoing email messages.
With Professional and Pro Plus Email Hosting, you can configure multiple signatures. For example, you might have a signature that you want to use for personal email, and another signature for business correspondence.
Creating and managing signatures
To create and manage email signatures, follow these steps:
- Log in to your webmail account at https://a2hosting.titan.email.
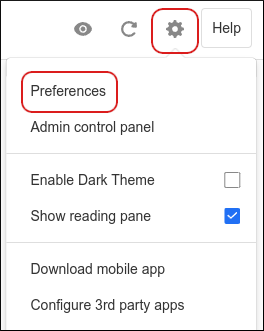
- Click the Settings (gear) icon, and then click Preferences:
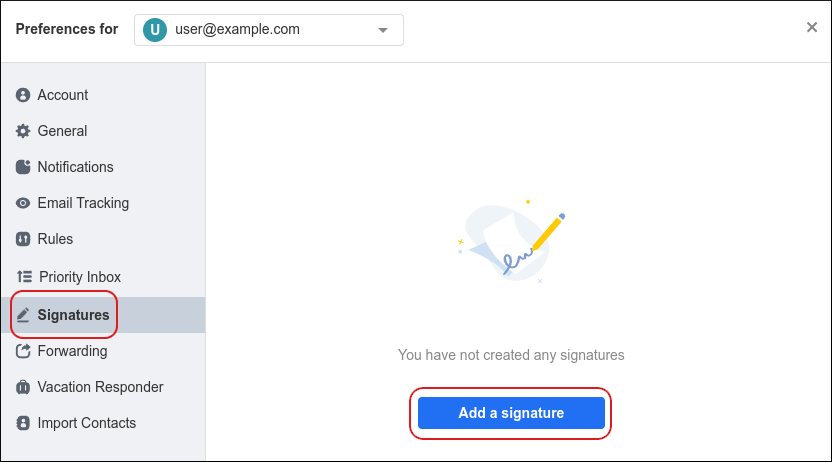
Click Signatures, and then click Add a signature:
In the Name this signature text box, type a descriptive name for the signature:
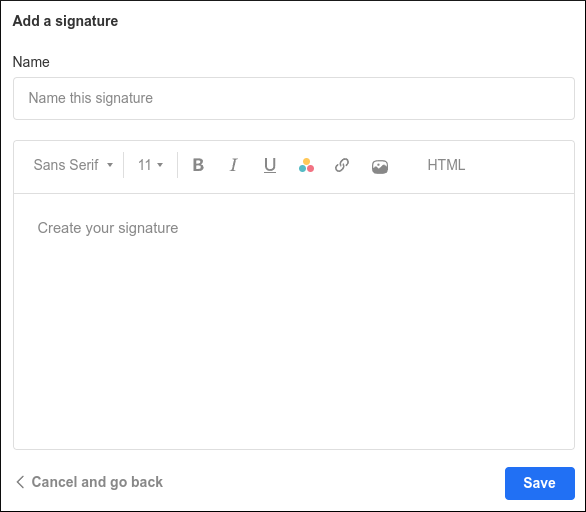
In the Create your signature text box, type the text you want to appear in the signature.
You can add text formatting, URLs, images, and even raw HTML code to your signature.Click Save. From here, you can manage your signatures:
- To select the default signature, click the signature.
- To add another signature, click Add a signature.
- To edit an existing signature, hover over the signature and then click the pencil icon.
- To delete a signature, hover over the signature and then click the trash can icon.
Using your signatures in messages
When you compose a new email message, the default signature appears automatically. However, if you have created multiple signatures and want to insert a different signature (or if you do not want a signature in the message at all), all you need to do is click the following icon in the New Mail dialog box:
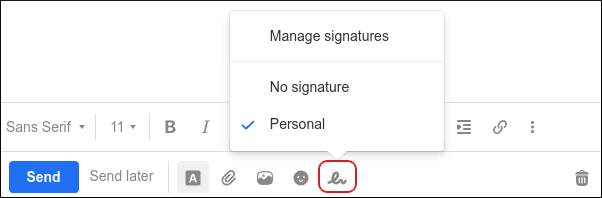
Click the name of the signature you want to use, or click No signature to remove the signature from the message completely. To manage your signatures, click Manage signatures.
More Information
For more information about how to manage signatures in webmail, please visit https://support.titan.email/hc/en-us/articles/360038283814-Add-and-Manage-Signatures.
Article Details
- Product: Email Hosting
Related Articles
- Changing your password in Professional and Pro Plus Email Hosting
- Importing contacts into Professional and Pro Plus Email Hosting
- Managing your email in Professional and Pro Plus Email Hosting webmail
- Setting up Professional and Pro Plus Email Hosting on Android devices
- Setting up Professional and Pro Plus Email Hosting on Apple iOS devices
Grow Your Web Business
Subscribe to receive weekly cutting edge tips, strategies, and news you need to grow your web business.
No charge. Unsubscribe anytime.
Did you find this article helpful? Then you'll love our support. Experience the A2 Hosting difference today and get a pre-secured, pre-optimized website. Check out our web hosting plans today.