How to remove a banned IP address in WHMCS
If you are a reseller running WHMCS, after three failed logins, WHMCS bans your IP address. You can wait for the ban to expire, or you can remove the banned IP address in the WHMCS database to regain access to your account immediately. The following procedure demonstrates how to do this.
To remove a banned IP address in the WHMCS database, follow these steps:
- Log in to cPanel.If you do not know how to log in to your cPanel account, please see this article.
- Open phpMyAdmin:
- If you are using the Jupiter theme, on the Tools page, in the Databases section, click phpMyAdmin:
If you are using the Paper Lantern theme, in the DATABASES section of the cPanel home page, click phpMyAdmin:

The phpMyAdmin administration page appears in a new window.
- If you are using the Jupiter theme, on the Tools page, in the Databases section, click phpMyAdmin:
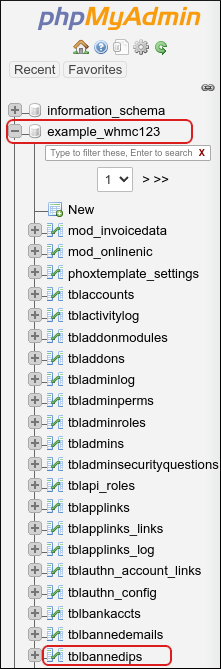
- In the left-hand pane of phpMyAdmin, click the name of the WHMCS database. A list of tables in the database appears.
Click the tblbannedips table:
Locate the row that contains the banned IP address, and then click Delete:
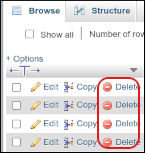
- Click OK to confirm the deletion. phpMyAdmin deletes the database row.
You should now be able to log in to WHMCS from the previously banned IP address.
If your IP address is banned often, you may want to add it to the list of whitelisted IP addresses in WHMCS. For more information, please visit https://docs.whmcs.com/Security_Tab#Whitelisted_IPs.
Article Details
Grow Your Web Business
Subscribe to receive weekly cutting edge tips, strategies, and news you need to grow your web business.
No charge. Unsubscribe anytime.
Did you find this article helpful? Then you'll love our support. Experience the A2 Hosting difference today and get a pre-secured, pre-optimized website. Check out our web hosting plans today.