How to configure your domain to use Ezoic
This article explains how to configure a domain to use Ezoic.
Table of Contents
About Ezoic
Ezoic is an advertising platform and Content Delivery Network (CDN). When your site is integrated with Ezoic, it acts as a proxy between your site and visitors, customizing what they see based on machine learning algorithms.
To use Ezoic, you must change the nameservers for your domain to integrate with its network.
Configuring your domain
To configure your domain to use Ezoic, follow these steps:
- Log in to cPanel.If you do not know how to log in to your cPanel account, please see this article.
- On the Tools page, in the Domains section, click Zone Editor, locate your domain, and then click Manage.
- Note the DNS records for your domain. You will need this information later to verify that Ezoic imported your DNS records correctly.
- Log in to your Ezoic account. If you do not already have an Ezoic account, go to https://www.ezoic.com/join-ezoic and create one.
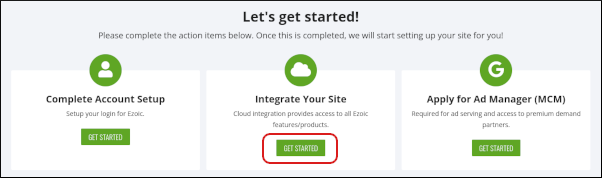
- Under Integrate Your Site, click Get Started:
Alternatively, click Settings, click Connection, click the Nameservers tab, and then click View Instructions:

Note the nameservers provided by Ezoic to use with your account:
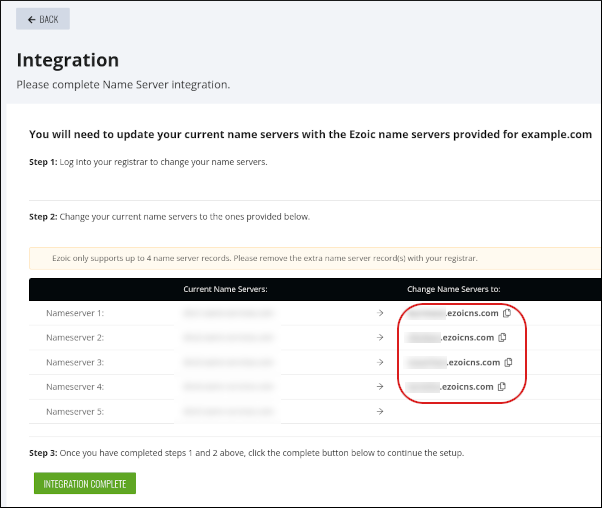
Change the nameserver records for your domain to the nameserver values you obtained in the previous step. The exact procedure to change your nameservers varies based on the registrar you have for your domain:
- For information about how to change the nameservers for a domain hosted at A2 Hosting, please see this article.
- For information about how to change the nameservers for a domain hosted at a third-party registrar, please see this article.
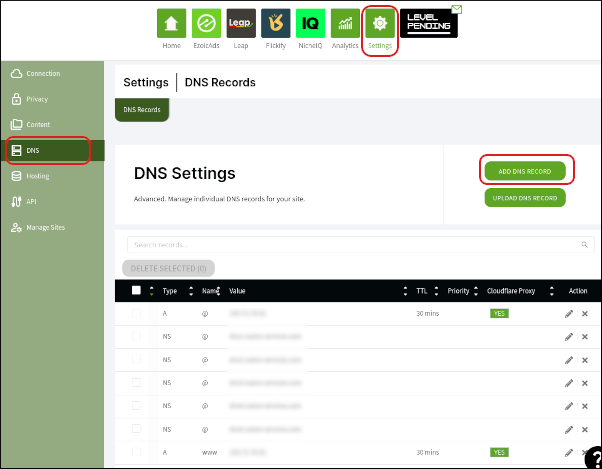
It can take up to 24 hours for DNS changes to fully propagate across the internet (though the process is usually much faster).After DNS propagation is complete, click Settings, and then click DNS. Compare the records imported by Ezoic to the DNS records in cPanel you obtained in step 3. If you need to add any records, click ADD DNS RECORD:
More Information
For more information about Ezoic, please visit https://www.ezoic.com.
Article Details
Grow Your Web Business
Subscribe to receive weekly cutting edge tips, strategies, and news you need to grow your web business.
No charge. Unsubscribe anytime.
Did you find this article helpful? Then you'll love our support. Experience the A2 Hosting difference today and get a pre-secured, pre-optimized website. Check out our web hosting plans today.