How to set up DMARC
DMARC (Domain-based Message Authentication, Reporting and Conformance) is an e-mail authentication method designed to help reduce e-mail abuse, such as spam. It builds upon the SPF (Sender Policy Framework) and DKIM (DomainKeys Identified Mail) authentication methods to provide e-mail senders and recipients a more reliable way to exchange messages.
You can use cPanel's DNS Zone Editor to add DMARC settings to your DNS records. You can also use cPanel to configure your mailing lists to be compatible with DMARC.
Configuring a DMARC TXT record in DNS
To enable DMARC for your domain, you must add a TXT record to your domain's DNS entries that contains the DMARC configuration data. To do this, follow these steps:
- Log in to cPanel.If you do not know how to log in to your cPanel account, please see this article.
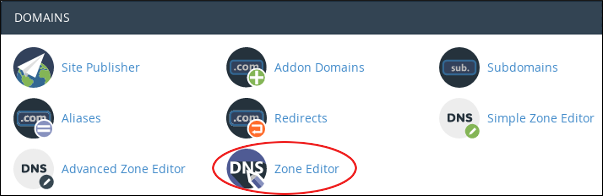
- Open the Zone Editor:
- If you are using the Jupiter theme, on the Tools page, in the Domains section, click Zone Editor:

If you are using the Paper Lantern theme, in the DOMAINS section of the cPanel home page, click Zone Editor:
- If you are using the Jupiter theme, on the Tools page, in the Domains section, click Zone Editor:
Locate the domain you want to configure, and then click Manage.
Usually, this is your primary domain.- Click the down arrow icon next to Add Record, and then click Add TXT Record.
In the Name text box, type _dmarc.
When your cursor leaves this text box, cPanel automatically adds the domain name to _dmarc, for example, _dmarc.example.com.- In the TTL text box, type 14400.
- In the Type list box, select TXT.
In the Record text box, type the DMARC configuration line.
DMARC is not yet a fully standardized protocol. As a result, different providers handle DMARC policies in different ways. You may have to experiment with various DMARC configurations to find the one that works best for your domain. Here are some example DMARC configurations:
- Enable DMARC “monitor mode”. With this configuration enabled, the specified e-mail address (in the mailto setting) receives daily reports from providers regarding how many messages were received, and whether or not they passed policy checks:
v=DMARC1;p=none;rua=mailto:[email protected]
Instruct the recipient to quarantine all messages (100%) that do not pass policy checks:
v=DMARC1;p=quarantine;pct=100;
Instruct the recipient to reject half of all messages (50%) that do not pass policy checks. The remainder should be quarantined:
v=DMARC1;p=reject;pct=50;
- Enable DMARC “monitor mode”. With this configuration enabled, the specified e-mail address (in the mailto setting) receives daily reports from providers regarding how many messages were received, and whether or not they passed policy checks:
- Click . cPanel adds the TXT record for DMARC.
Testing the new DMARC DNS record
After you add the DMARC TXT record and allow time for DNS propagation, you should test that the record is correctly configured. Follow the appropriate procedure below for your computer's operating system.
Microsoft Windows
If you are using Microsoft Windows, type the following command at the command prompt:
nslookup
At the nslookup > prompt, type the following commands. Replace example.com with your own domain name:
set type=txt
_dmarc.example.com
You should see output that resembles the following (the exact text varies based on your own settings):
_dmarc.example.com       text =
     "v=DMARC1;p=none;rua=mailto:[email protected]"
Linux and Mac OS X
If you are using Linux or Mac OS X, type the following command at the command prompt. Replace example.com with your own domain name:
dig +short txt _dmarc.example.com
You should see output that resembles the following (the exact text varies based on your own settings):
"v=DMARC1\; p=none\; rua=mailto:[email protected]"
Configuring mailing lists (mailman) for DMARC
If you administer a mailing list, you may encounter problems such as:
- Mailing list messages are marked as spam.
- Mailing list messages do not reach recipients at all.
To help improve the likelihood of mailing list messages arriving at their correct destination, you can configure a mailman setting in cPanel to make your list DMARC-compatible with other providers.
To do this, follow these steps:
- Log in to cPanel.If you do not know how to log in to your cPanel account, please see this article.
- Open the Mailing Lists tool:
- If you are using the Jupiter theme, on the Tools page, in the Email section, click Mailing Lists:

If you are using the Paper Lantern theme, in the EMAIL section of the cPanel home page, click Mailing Lists:

- If you are using the Jupiter theme, on the Tools page, in the Email section, click Mailing Lists:
- Under Current Lists, locate the mailing list you want to configure, and then click Manage. The mailman General Options page appears.
- Under General list personality, locate the Details for from_is_list setting.
You will probably need to send some test messages to determine the optimal setting for your mailing list:
- Try the Wrap Message option first, click , and then send some test messages.
- If the messages are rejected by the recipient or marked as spam, try the Munge From option, and then click .
The Wrap Message option wraps the message with a From: header indicating the mailing list (not the actual poster). The Munge From option rewrites the From: header by replacing the poster's address with the mailing list's address.
More Information
To view the official DMARC web site, please visit http://dmarc.org.
Article Details
- Product: Managed Dedicated Server Managed VPSReseller HostingShared Hosting
- Level: Intermediate
Grow Your Web Business
Subscribe to receive weekly cutting edge tips, strategies, and news you need to grow your web business.
No charge. Unsubscribe anytime.
Did you find this article helpful? Then you'll love our support. Experience the A2 Hosting difference today and get a pre-secured, pre-optimized website. Check out our web hosting plans today.