


- Jun 27, 2017
 0
0- by A2 Marketing Team
Typography is a critical element in modern web design. If you’re using the same default fonts as every other WordPress website, you’re probably due for an update. Plus, using the wrong fonts can impact your site’s readability and aesthetics, so you’ll want to have lots of alternatives available.
Naturally, there’s more to typography than just choosing the right font, but having more options in your repertoire is always a good idea. Plus, WordPress makes switching between fonts easy, and it won’t take you long to add more of them to your collection.
In this article, we’re first going to discuss how using custom fonts can help you, and then we’ll teach you two methods to add them to WordPress. Let’s get started!
Why You Should Consider Using Custom Fonts in WordPress
The term ‘custom fonts’ doesn’t necessarily refer to overly complicated or elaborate typefaces. It’s just a way of referring to those fonts that aren’t supported by WordPress out of the box.
That’s not to say that WordPress’ default font selection is lacking, but with thousands of options to choose from online, it doesn’t make sense to limit yourself to only a few dozen. Plus, custom fonts have a few more benefits, such as:
- Differentiating your site from those of competitors. We don’t have numbers at hand, but we’re willing to bet that many sites just stick with using the default WordPress fonts. Adding custom options can help you set your designs apart from the competition.
- Helping you customize your theme. If you’re going to go to the trouble of finding the perfect theme for your site, it makes sense to look for some excellent custom fonts to complement it.
- Enhancing your overall design. Fonts are an important part of typography, and they can enhance your site’s overall design if used correctly.
Fortunately, WordPress makes it relatively easy to add new custom fonts to your installation. Let’s check out how.
2 Ways to Add Custom Fonts to WordPress
Before we jump in, it’s important to note that these aren’t the only ways to add new fonts to WordPress. However, these two methods happen to cover some of our favorite font repositories, which makes them stand out.
1. Add Google Fonts
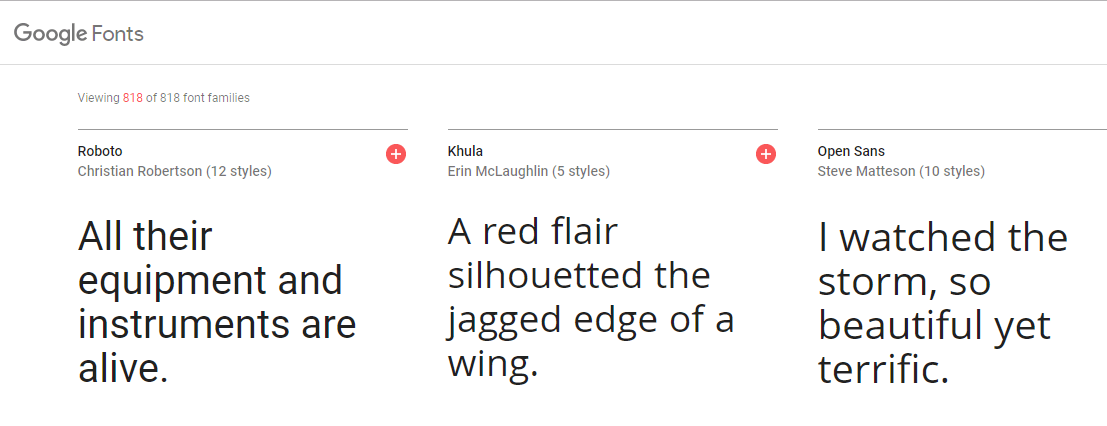
Google Fonts is one of the largest repositories of open-source fonts around. It offers users over 800 font families with thousands of individual options to choose from.
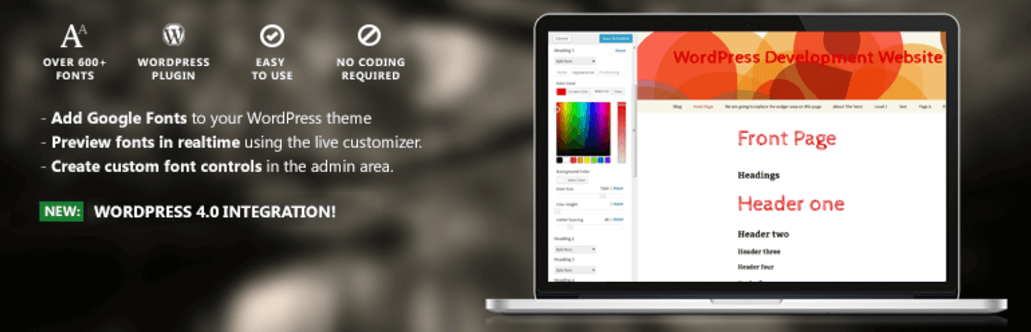
There are several ways to add this custom font collection to WordPress, but the easiest is to use a plugin such as Easy Google Fonts:
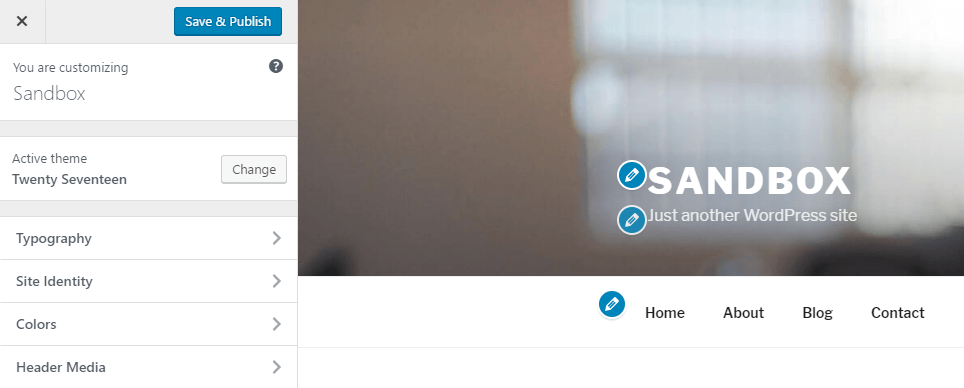
After installing and activating the plugin, you’ll be able to access Google Font’s selection using the WordPress customizer. To see it in action, go to your dashboard and into the Appearance > Customize tab. In case you don’t know, this feature enables you to customize WordPress using a live editor:
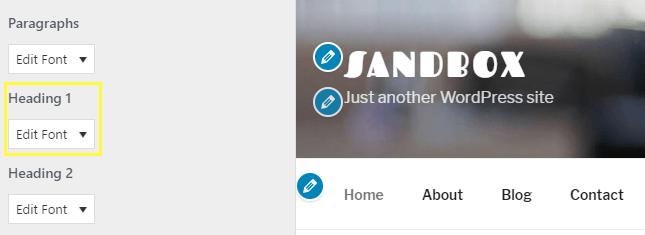
To test your new fonts, click on the Typography tab and select the Default Typography option. Then, choose the element with font you want to change, such as Heading 1:
In the next screen, look for the option that reads Font Family, which is where your new fonts will be located. Now, make your way through the list until you find the right fit for your design, and check out how it will look:
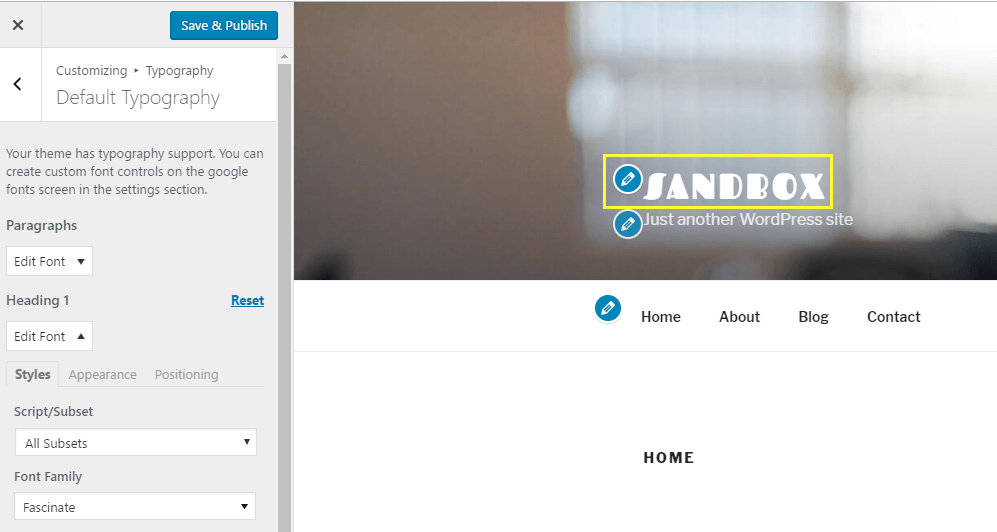
For the above example, we used the Fascinate font from Google’s repository. As mentioned, there are hundreds of fonts to choose from so you won’t be lacking options.
When you’re ready to exit the customizer, click on the Save & Publish button on the top right of the customizer’s sidebar, and your changes will go live.
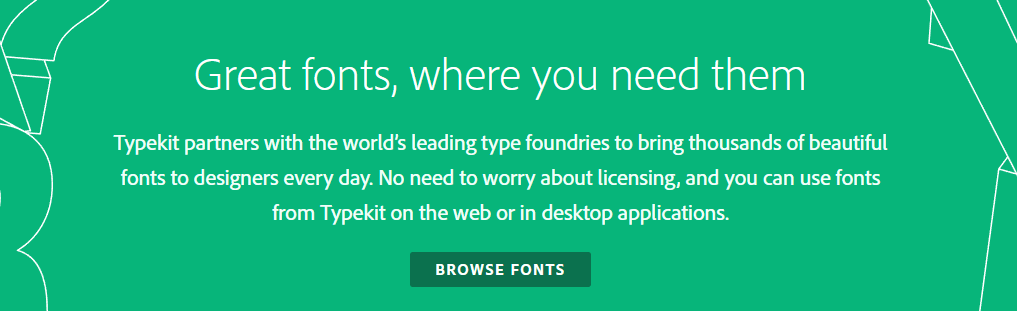
2. Add Adobe Typekit Fonts
Unlike Google Fonts, Adobe Typekit is more of a marketplace for professional typographers to offer their wares. However, there are still many free fonts available if you aren’t ready to invest in premium options.
To access this collection, you’ll need to sign up for an account and choose a plan. For this tutorial, we’re using a free account, which doesn’t require you to enter any payment information.
Once you’re signed into the service, look for the option that reads Kits right under your username on the top right of the screen:

On the next screen, scroll down until you find the Create new kit option and click on it. Now, you’ll need to enter your site’s name and domain before proceeding:

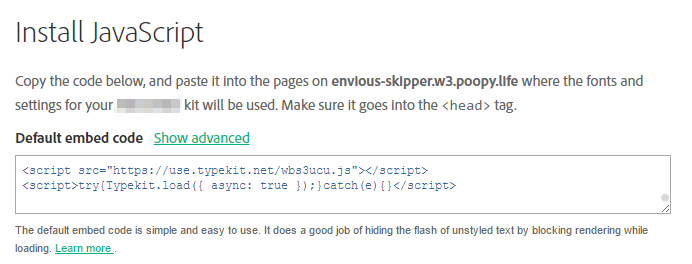
Afterwards, Adobe Typekit will provide you with a JavaScript snippet, which you’ll need to save for later. We recommend copying and pasting it into a text file for the meantime, while we add fonts to our kit:
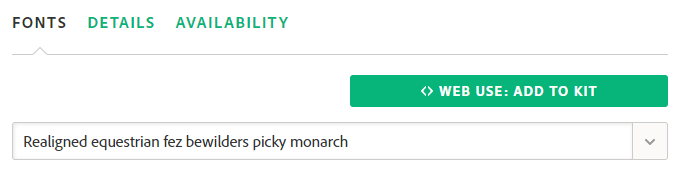
Now that your kit is ready, all you need to do is browse through Adobe’s selection of fonts. When you find one you like, just click on the button that reads Web Use: Add to kit:
That’ll give you the option to add the font you want to the kit you just created, which will in turn make it accessible from WordPress once we add the JavaScript code to your site. Let’s return to your dashboard and do that now.
The easiest way to include the snippet you saved is to add it in your theme’s header.php file. Make sure you’re using a child theme and go to Appearance > Editor. Once you’re in, look for the header.php file on the right side of the screen and click on that option:
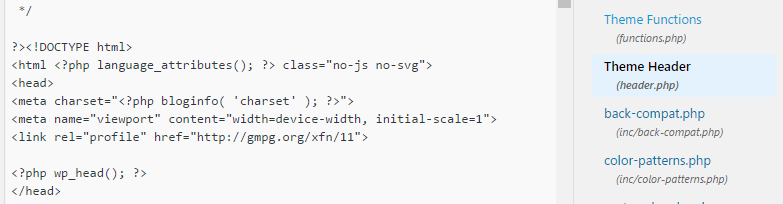
All that’s left now is to copy and paste the JavaScript code you saved earlier between the <head> tags of the header.php file. Then click on Update File right below the editor, and you’ll be good to go.
At this point, you’ll be able to access any fonts in your kit by customizing your theme’s style.css file. It’s a bit more work than using Google Fonts, but it’s worth it if you’re a fan of Adobe Typekit.
Conclusion
Adding custom fonts to your WordPress website is one of the easiest and most effective ways to customize your themes. Plus, it enables you to add some flair to your designs and set your site apart from other WordPress websites that stick to default fonts only.
There are plenty of font repositories online, but here are two of our favorites and what makes them such good choices:
- Google Fonts: One of the best open-source font repositories available.
- Adobe Typekit: The perfect option if you’re looking for both free and premium fonts.
Image credit: Pixabay.
