- Jan 14, 2019
 0
0- by A2 Marketing Team
Cascading Style Sheets (CSS) is a simple design language that helps to determine how a web page looks. What’s more, it’s used by most website-building platforms. So if you want to make custom tweaks to your site, it pays to learn about this particular language.
While HyperText Markup Language (HTML) focuses on creating pages and their content, CSS enables you to edit the way a document is actually displayed. With it, you can change the format of text, customize background images, add link effects, and more. Plus, it’s easier to use than you might expect.
In this article, we’ll cover the basics of CSS, and talk you through how to implement it on popular Content Management Systems (CMSs) such as WordPress, Joomla, and Drupal. Let’s get started!
The Fundamentals of CSS
HTML is a language that’s often considered the backbone of the internet. It was created to describe the actual content of a website. However, it was never intended to be used for page formatting and styling.
That’s where CSS comes in to the picture. CSS is a language used to describe the way HTML elements will be displayed on the screen, and it vastly simplifies the design process.
But what does CSS actually mean? In this context, ‘cascading’ refers to the way styles can carry over from one sheet to the next, enabling multiple style sheets to be used on one HTML document. Style sheets are files that specify the appearance of a document.
Browsers automatically apply style sheets to all documents on the web, giving them some default formatting (such as displaying links in blue). Adding custom CSS overrides the default style sheet, enabling you to alter the design of your website.
The Benefits of Using CSS to Customize Your Website
Even if you’re a technical novice, CSS is relatively easy to understand and start using. At the same time, it unlocks powerful control over the presentation of your web pages.
Aside from the customization potential it offers, implementing CSS provides a few other benefits to you and your website. One of the biggest advantages of CSS is the amount of time it saves, since you can write one snippet of code and use it across multiple HTML pages. This makes updating and maintaining your site much simpler.
CSS can also help to improve your site’s Search Engine Optimization (SEO), through the strategic use of headings and page organization. Its lightweight code can even give your pages speedier loading times. Plus, using CSS can help you create a much better user experience for your visitors.
A Quick Example of CSS
As we mentioned, CSS is pretty easy to pick up for most people. Let’s look at an example of some simple CSS code:

This particular snippet of CSS would make all the header text on your website red – but how does it work?
CSS code can be broken up into a number of sections. The “h1” at the start of the above example is the ‘CSS selector’. This lets the web browser know which section of the site the code should affect. In this case, that’s all H1-level headers.
Next, the word “color” is a property, while “red” is its value. A property and value work together to form a ‘declaration’ – which in other words is the design rule you want to apply. It’s also important to enclose your CSS in curly brackets, so it’s clear where the instruction begins and ends.
All of these combined elements are known as a ‘CSS rule’. Learning CSS is a matter of practicing adding these rules, and getting a feel for what selectors and other options are available.
How to Implement CSS on Your Website (Using 3 Platforms)
CSS code is universal, but the way you add in to your site will vary based on the platform you’re using. Let’s look at how to add CSS to three of the most popular Content Management Systems (CMSs).
1. WordPress
WordPress is one of the most popular CMSs on the market, known for its accessibility and its large library of user-created plugins and themes. What’s more, adding CSS to WordPress is relatively easy.
Begin by accessing your WordPress dashboard, and navigating to Themes > Customize. The WordPress theme customizer will launch, showing you a preview of your site with some design options in the side panel.
From there, select the Additional CSS tab. You’ll see an empty box, where you can enter whatever CSS you like:
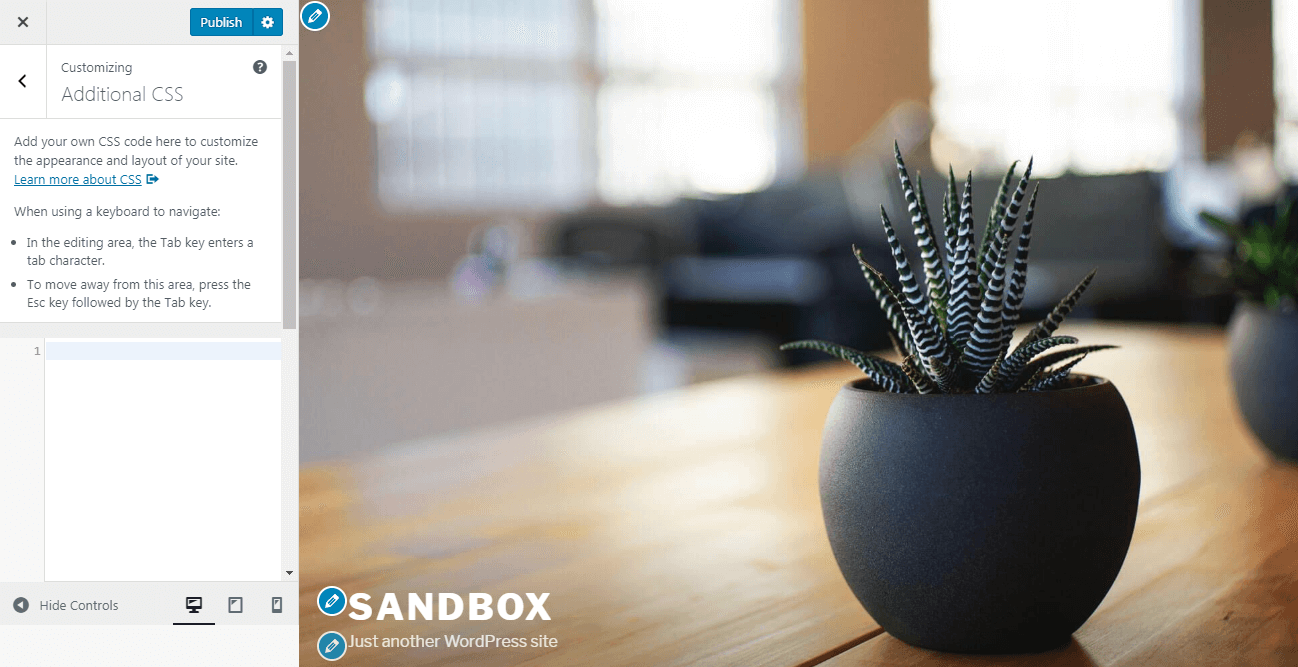
You’ll be able to see the results right away in the preview window. So feel free to experiment with different design features until you’re happy with the result.
2. Joomla
Joomla is also a fairly beginner-friendly CMS, with a wide variety of extensions and templates available to help you build your site. However, adding custom CSS isn’t quite as easy as it is with WordPress.
First, you’ll need to create a custom CSS file. You can do this using a simple text editor, such as Notepad or TextEdit. Enter your CSS code, and save it as a .css file.
Then you can upload the file to your site. You can save your CSS file in various places, but we’ve added it to templates/my-template/css/:

After that, you’ll want to download the Add Custom CSS extension from the Joomla extension directory, and install it on your site. Once the extension is set up, navigate to the Plugin manager from the Extensions menu, and open up System > Add Custom CSS:
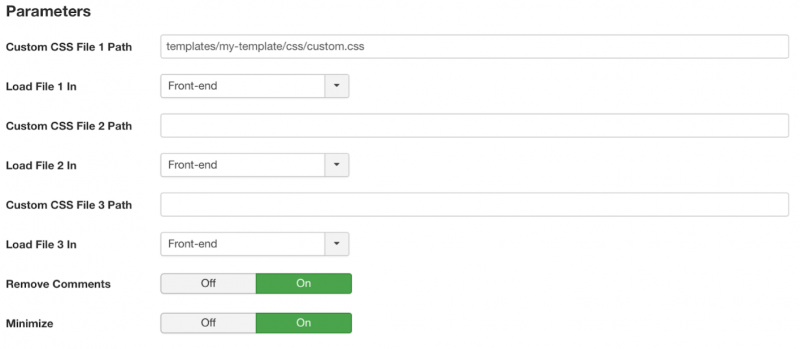
From there, you can add the path for the custom CSS file you created earlier to the field marked Custom CSS File Path 1. Finally, click on Save and Close. You can then refresh your site, and see that your CSS change has been implemented.
3. Drupal
Drupal is one of the more advanced CMSs out there, making it perfect for developers and marketers. There are a few ways to add custom CSS to your Drupal site, so let’s look at one of the possible methods.
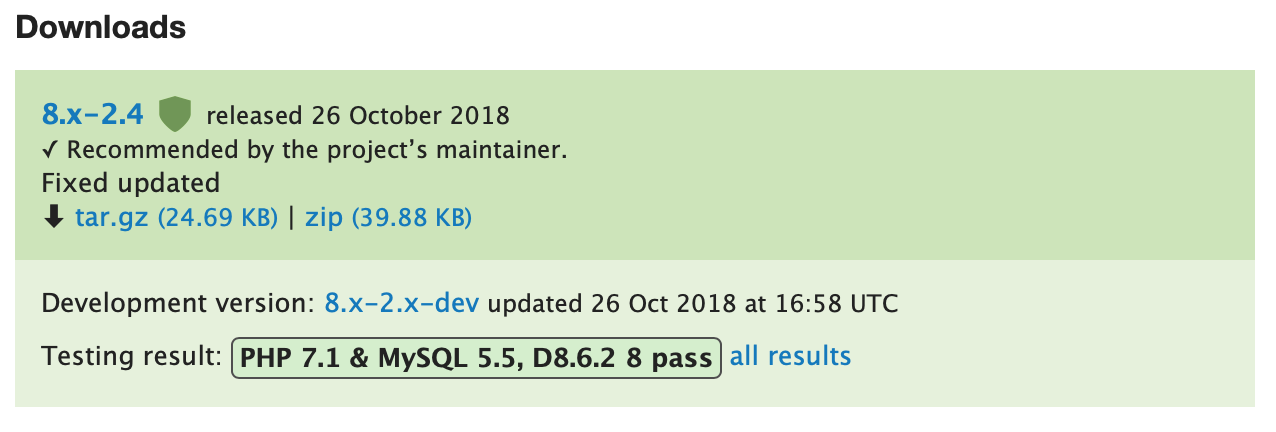
To begin, you’ll need to download the Asset Injector module:
Then in your Drupal dashboard, navigate to Extend. On the resulting screen, select Install New Module:
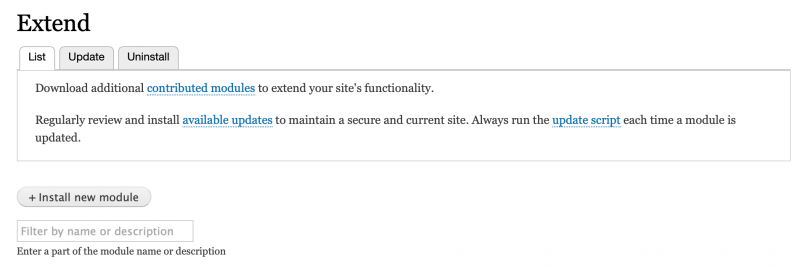
From here, you can upload the module file you just downloaded, and complete the installation process.
Next, you’ll need to navigate to the Configuration tab at the top of your Drupal dashboard, and scroll down until you see the Development section. You should see the new Asset Injector module there:
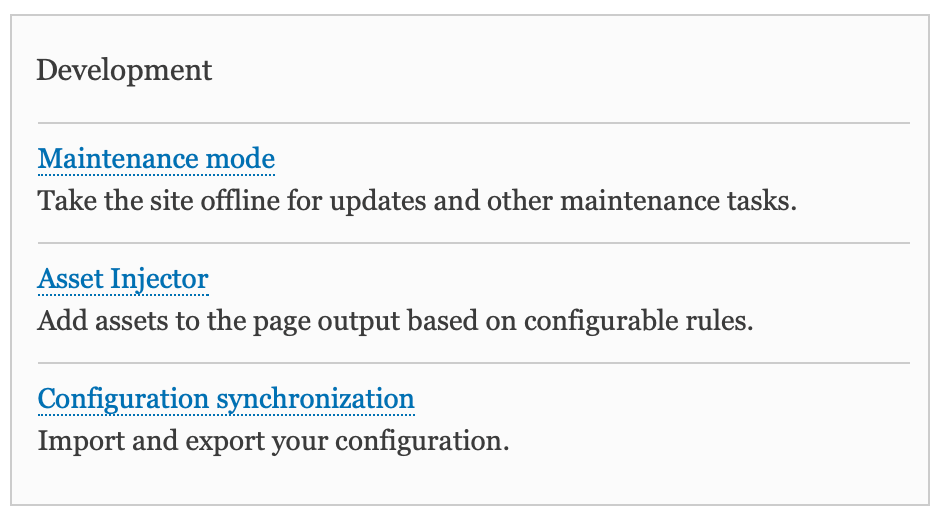
Select the module, and then choose CSS Injector > Add CSS Injector:
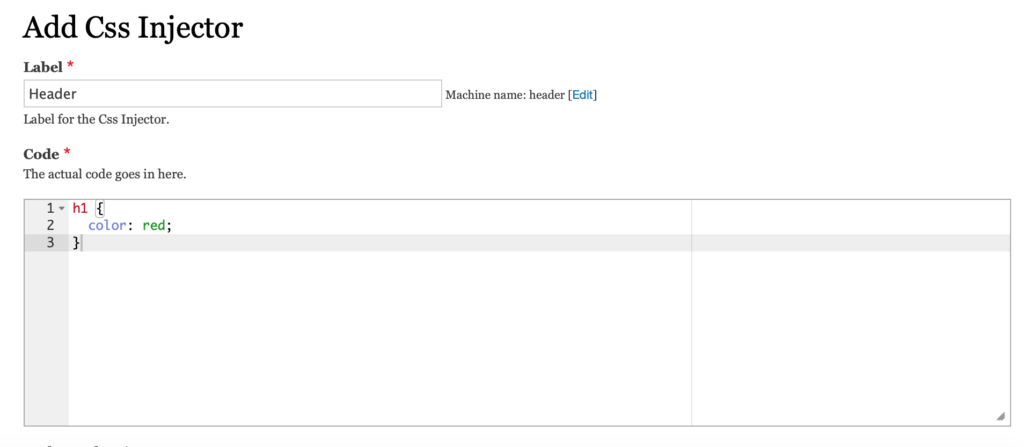
You can now go ahead and enter your custom CSS into the box marked Code, and give it a label. Further down the page, you should see a menu marked Conditions. There, you can enter which pages you’d like your custom CSS to apply to. Once you’ve saved your settings, you can check one of the relevant pages to see the changes.
Conclusion
Like any technical language, CSS can appear daunting at first. However, there’s no questioning the power it can give you over how your web pages look.
What’s more, you can implement CSS on nearly any kind of website. This includes:
- WordPress: Add CSS straight to the Additional CSS field in your site’s Theme Customizer.
- Joomla: Upload a CSS file to your site, and then use the Add Custom CSS extension to activate it.
- Drupal: Install the Asset Injector module, and use that to create and save your custom CSS.
Do you have any questions about using CSS to design your site? Let us know in the comments below!
Image credit: Max Pixel.
