- May 06, 2020
 0
0- by A2 Marketing Team
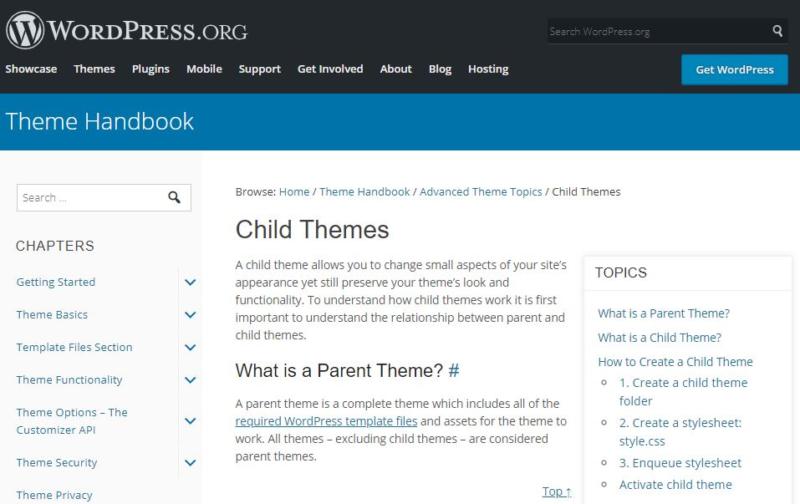
If you have a WordPress website, you can easily change the look and feel of your site via themes. Themes are essentially a set of code that styles and structures your site’s appearance. However, if you choose a popular theme, you may have noticed that your website ends up looking similar to many other sites.
Luckily, you can avoid this by customizing your site with a child theme. In a nutshell, a child theme is a way to edit a theme by creating a copy, so that you don’t risk destroying the original theme files. This can also allow you to preserve the changes you make when the parent theme is updated.
This article will discuss how you can get started with creating your own child theme to edit your site’s look. Let’s get moving!
Why You Should Consider Using a Child Theme
You might be wondering what advantages a child theme has over simply using a ready-made theme. It’s important to have a site with a unique look to help brand your business and stand apart from your competition. However, one theme may be in use by hundreds of sites.
A child theme is a way to edit a theme by creating a copy. A child theme allows for edits so that you don’t need to touch the original theme. Beginners should never manually edit a WordPress theme directly, as you risk destroying the original theme files.
Using a child theme also allows you to edit Cascading Style Sheets (CSS). There are other ways to edit your site’s CSS, such as by using the Additional CSS Editor. However, when you update or change a theme, anything you had in the Additional CSS Editor will get wiped out. Child themes allow you to save those changes.
In the next section we’ll explain the basic steps. We’ll assume that you already have some knowledge of CSS.
How to Design Your Own WordPress Child Theme: A Brief Guide
Now that we know why you might want to use a child theme, let’s review how to get started. We’ll explain how to set up a child theme and upload it to your site in 5 easy steps:
Step 1: Set Up Your Development Environment
First, you’ll need to set up a testing environment. This is a type of server that runs off of your computer, allowing you to test out website changes offline. This allows you to build your child theme in a safe space, without affecting your main site.
There are many options for desktop apps that allows you to build a testing environment for websites. In this guide, we’ll explain how to set up a development environment using MAMP.
The first step to set up MAMP is to download the version that matches your OS from their website and install the application on your computer.
Before setting up MAMP, you’ll need to download a copy of WordPress from wordpress.org and unarchive the .zip file. Next, set up a folder on your desktop called “Sites” or something similar and place the extracted contents into that folder.
Next, you’ll need to point MAMP to look at the “Sites” folder you just set up. Open MAMP > Preferences, then visit the “Web Server” tab. Choose “select” and browse to your directory folder. Hit OK.
Now, open up localhost on your browser and go through the WordPress installation steps. You’ll need to create an empty database in PHPMyAdmin to use for the install. You can find this in MAMP by opening the Webstart page and visiting Tools > PHPMyAdmin. Then, follow the steps in this guide.
Step 2. Install a Code Editor
To edit your child theme, you’ll need a code editor. This is a rich coding environment with tools such as an automatic syntax checker. On a Mac you may already have Sublime Text installed, but there are many free code editors available.
Step 3. Copy Your Theme Files
Now you’re ready to set up your child theme. On localhost in your browser, install the theme you want to edit on your test WordPress site.
Next, open your WordPress folder in your code editor by choosing File > Open and selecting the entire folder.
Open wp_content > themes. Create an empty folder in the themes folder by right-clicking and choosing “new folder.” Name it “themename_childtheme” and choose save.
You can copy the parent theme’s build by importing the CSS. Create a new file called style.css and save it in your child theme folder.
You can import the style sheet from the parent sheet by adding CSS as shown below (replacing “TwentySeventeen” with the name of the theme you’re using).
You should now see your new child theme as an option in your WordPress testing environment. Choose “Activate.”
Your test site should now look the same as it did before.
Step 4. Edit Your Child Theme’s CSS
Now that you have your child theme’s stylesheet set up, you can begin altering it. Any changes you make in your child theme’s CSS should appear on your test site. Simply find the style.css file in your code editor, make your changes, and hit save.
You can test this by changing your background color to red. On the Twenty Seventeen theme, we do this by adding a line of CSS “.site-content-contain {background-color:red;}.” (You may need to find the element to target using “Inspect Element” in Google Chrome.)
You can also edit the PHP template files if you know that language, but that’s a bit more complicated. However, you can make a great deal of change just by adjusting the CSS. For example, you can define unique header styles, or importing a Google Font.
Step 5. Import Your Child Theme to Your Live Site
The last step is to add your child theme to your live site. (Make sure to test your theme thoroughly in your test environment and back up your main site before you do this, as installing a faulty theme has the potential to wreck your site.)
In your computer’s file browser, navigate to the WordPress directory you added earlier and find your child theme folder. Compress the entire folder to a .zip file. On your live WordPress site, import your child theme file.
In Appearance > Themes, choose “Add New Theme.”
Then, choose “Upload Theme.”
Select your zipped child theme using the file browser and click “open,” then “install.”
Once the installation is finished, choose “activate.”
Your child theme should now appear on your live site.
WordPress Child Theme Conclusion
Now that you know how to create a WordPress child theme, the options for adjusting your site’s appearance are limitless. Changes to CSS alone can help give your site a unique look. A child theme will enable you to edit your theme without any risk of harming your original theme files, which can be an excellent way to test out new ideas.
To create a child theme, follow these 5 easy steps:
- Set up a development environment on your computer, using a tool such as MAMP.
- Install a code editor if you don’t already have one.
- Copy your theme’s files into a new folder.
- Make any changes you want to the child theme’s style.css file and save them.
- Import your new child theme to your live WordPress site.
Image credit: Pexels.


