


- Jul 05, 2017
 0
0- by A2 Marketing Team
A local WordPress installation is one of the best tools you can have at your disposal for testing changes to your sites. For example, you can check if plugins play nice with each other, and even try new themes before switching yours. Their usefulness is undoubted – the only question is, how should you go about setting one up for yourself?
There are multiple methods available for creating local WordPress installations, and they can often be set up within minutes. Choosing the right tool from the get-go will save you time over the long run. Some are only available for specific operating systems (OSs), helping to narrow the choices, while others cater to multiple systems.
In this article, we’re going to talk more about what local environments are and why you should consider using one. Then, we’ll teach you about three different tools you can use to set one up and help you pick the right one for you. Let’s get started!
What a Local Environment Is (And Why You Might Want One)
A local environment setup is basically a collection of software that enables you to set up and run websites or applications on your own computer. In most cases, these sites will not be meant for public consumption, but rather as a way for you to carry out testing without having to pay for hosting.
On top of saving money, there are plenty of other benefits to using a local environment for your development process, such as:
- Carrying out tests in a secure environment. As you probably know, new features can often lead to errors when they go live. Using a testing setup enables you to troubleshoot issues behind the scenes, so your actual website isn’t affected.
- You can set up multiple environments. Some tools enable you to set up multiple local websites and configure them independently. That means you can have a wide array of options at hand for testing purposes.
- Local setups are fast. Since your local environments are hosted on your computer, they aren’t bottlenecked by server performance and other such factors. That means they’re usually blazing fast.
The benefits of using a local environment are evident, and if you’re a developer, the chances are that using one may help you become more productive. With that in mind, let’s talk about some of the top tools available to help you set up your own local WordPress environment.
3 Ways to Set Up WordPress Locally
There are dozens of ways to set up a local environment for WordPress, but for this article, we picked three that cover all the major OSs. Plus, they all happen to be free (although a couple of them do offer premium alternatives).
In this section, we’re going to guide you through the process of installing each tool and setting up WordPress within it. Keep in mind we’ll be using Windows to set up all three examples (for simplicity’s sake), even if they’re available for other platforms. With that out of the way, let’s jump in!
1. DesktopServer (Windows and macOS)
DesktopServer is a tool that enables you to create local WordPress websites in a matter of minutes. It features a simple utilitarian interface, and it doesn’t throw dozens of options at you. Once your sites are up, you can access them directly and forget all about DesktopServer unless you want to delete or copy them, or set up a new one.
That lack of options can be seen as a downside, but it’s actually one of DesktopServer’s biggest selling points. If all you’re looking for is a way to set up multiple WordPress sites on Windows or macOS, this tool is the most straightforward option.
Let’s check out how it works to illustrate that point. We’re going to cover the process in two steps – installing DesktopServer and creating a WordPress site with it.
Step #1: Install DesktopServer
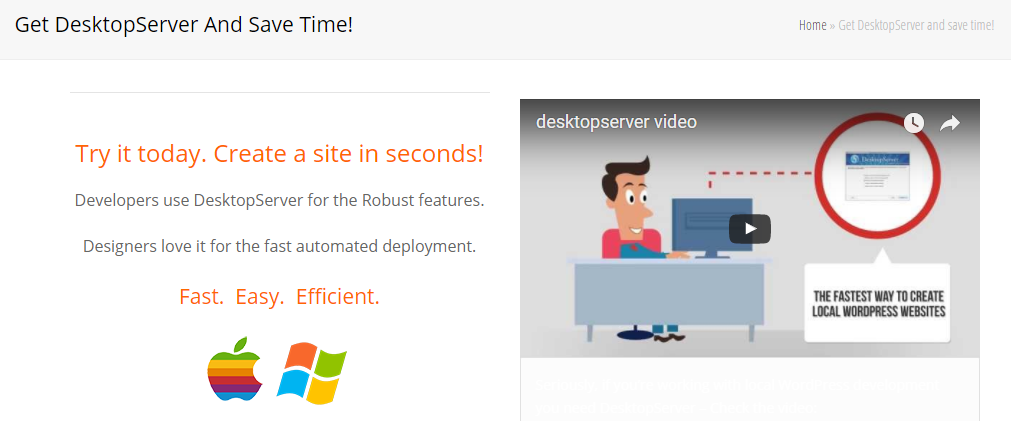
Before being able to download DesktopServer, you’ll need to sign up for a free account. To do this, you’ll need to go to the tool’s pricing page and click on the option that says Free – Add to Cart:

As you can see, the free version of the software only supports up to three WordPress sites, but that should be more than enough to get you started. Moving on, the next screen will require you to enter some of your personal information, which will be used to set up an account on the tool’s website:
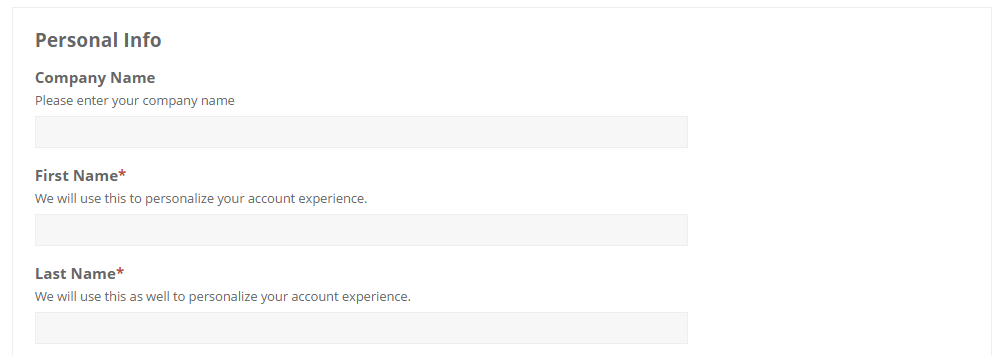
Fill out the necessary fields, then click on Purchase. Don’t worry, you won’t be charged a thing, as the site doesn’t ask for payment info. Now, you’ll be sent to a page including multiple links to all the available DesktopServer versions:
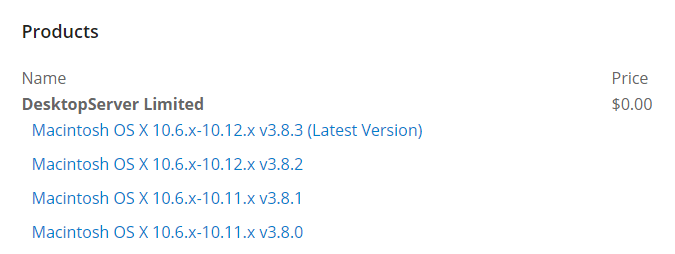
Unless you’re looking for a particular version, we recommend that you pick the latest one for whichever OS you’re using. Download it, and when the file is ready set it up as you would any other executable. The installer doesn’t include any complex settings, so all you have to do is keep clicking on Next.
Step #2: Create a Local WordPress Website with DesktopServer
Once DesktopServer is ready to go, open the application and it’ll ask you to restart it with administrative privileges:
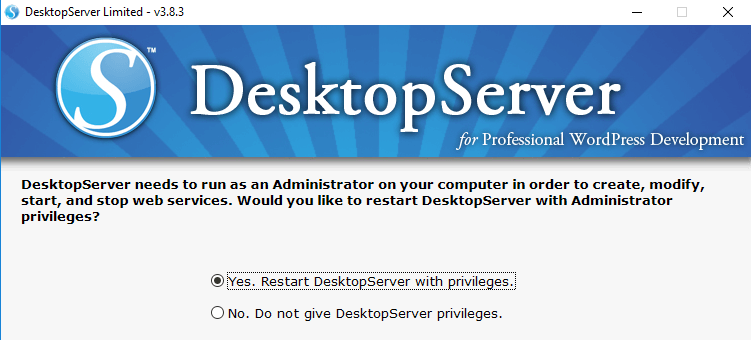
Do so now, and click on Yes when Windows asks you whether the app should be given those privileges. Now DesktopServer will start up again and prompt you to start the Apache and MySQL services, which control your web server and databases respectively:
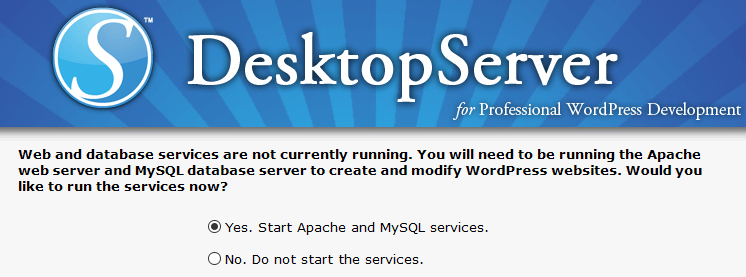
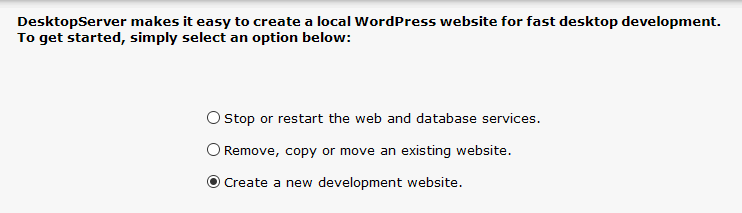
Click on Next to initialize both services, and give the app a second to do so. When it’s ready, you’ll see a success message, and you’ll need to click on Next once more. On the following screen, look for the option that reads Create a new development website, select it, and click on Next again:
At this stage, you’ll need to choose a URL for your site, select which WordPress version you want to install, and a specify a local directory to store it in:
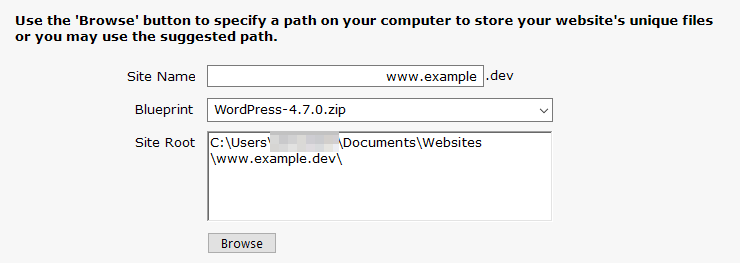
For this section, you can choose any URL you want since the .dev suffix should prevent it from conflicting with any live sites. The app will then update your HOSTS file so that this URL will work just like any other from your browser.
As for which version of WordPress to set up, you should always go with the latest unless you have a compelling reason to do otherwise. For example, if one of your sites is still running an old version (which it shouldn’t be), you can set that one up locally to have a similar testing environment.
When you’re ready, click on Create and let DesktopServer work its magic. Wait a minute until you see a success message, and click on Next one final time. The setup wizard will display a link that you can click on to initialize the WordPress installer now:
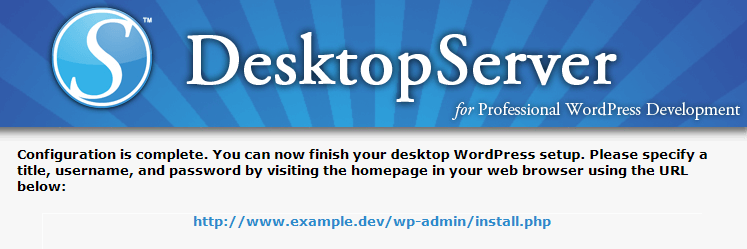
All that’s left to do now is to make your way through WordPress’ famous five-minute installer. Then, you’ll be able to access your site as you would any other, except that it’ll be available even if you’re not connected to the internet.
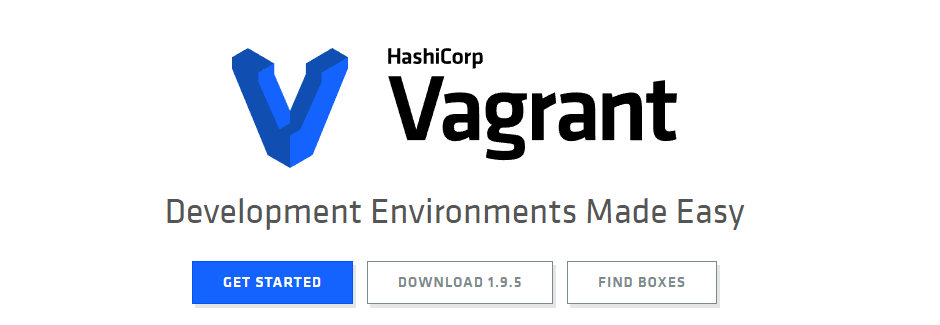
2. Vagrant (Windows, Linux, and macOS)
Vagrant enables you to set up any kind of website you want using virtual machines. The great thing about this tool is that these machines can be very lightweight, which means you can run several simultaneously. Of course, you’ll still need a decent computer to make the most out of Vagrant, but you won’t need a powerhouse, as you would with other virtual machine tools.
Moreover, using virtual machines enables you to create completely different setups for each one. You might, for example, choose to install Apache on one of your machines, and NGINX in another and you wouldn’t see any conflict. For all intents and purposes, you’d be using a single computer to host multiple servers.
Vagrant also enables you to get pre-configured environments or ‘boxes’ up and running quickly. Boxes are bundles including an OS and all the software you need to get started.
The only downside to using Vagrant is that it’s a command line tool. If you’re not comfortable setting up and managing virtual machines using commands, you may not enjoy using it. That said, we’re going to give you a primer on how to set up WordPress with it, and link to further resources including the commands you’ll need to use.
By the time we’re done, you’ll have all the information you need to decide if Vagrant is the right fit for you.
Step #1: Install Vagrant
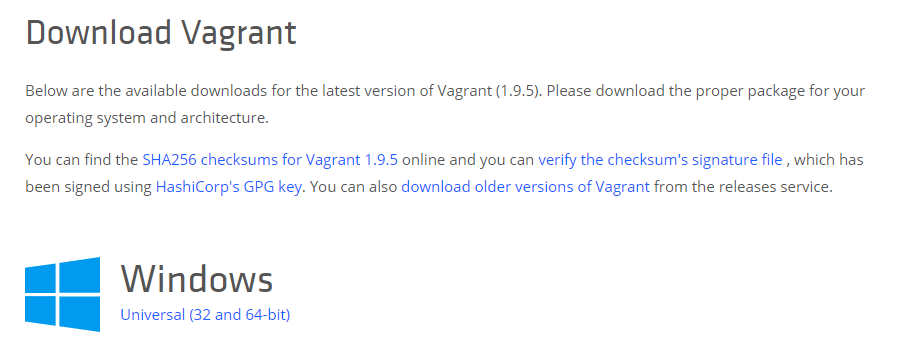
Unlike DesktopServer, you don’t need to sign up for an account to install Vagrant. All you have to do is head over to their Downloads page and look for the version of the software that matches your OS:
After the download is done, go ahead and start the setup wizard. You just need to click on Next a few times, and restart your computer when you’re done.
Now, you’ll also need to set up VirtualBox since Vagrant relies on this software to set up virtual machines. Head over to the VirtualBox site, click on the large blue Download 5.1 button, and choose the appropriate installer for your OS:

When the download is complete, run the installer and wait for it to be done. As with Vagrant, there aren’t any special instructions for going through the installer, since all you have to do is click on Next until it’s complete. Now you’re ready to get on with step number two.
Step #2: Create a Local WordPress Website with Vagrant
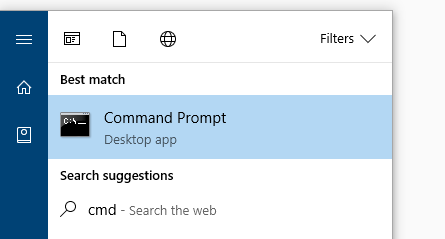
Open your start menu and type in cmd to bring up the Windows command line. Click on the Command Prompt result:
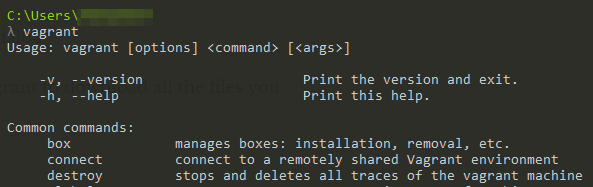
To access Vagrant from within the command line, you’ll need to use the vagrant command. If you enter it now, you’ll see a list of all the secondary commands you can use to create and interact with your virtual machines:
In case you’re wondering, we’re using a third-party Windows command line tool called cmder for this example, since it’s a bit easier on the eyes.
Moving on, the first thing we need to do is download a box to help us set up WordPress, since that’ll save us time over doing everything ourselves. In this case, we’re going to use the VCCW box which comes with all the tools we need, such as Ubuntu, WordPress, WP-CLI, PHP7, MySQL, and Apache.
To download this box, return to the command line and type in the following:
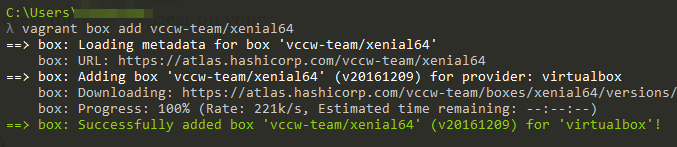
vagrant box add vccw-team/xenial64
That command will prompt Vagrant to download all the files you need within the command line:

Keep in mind, this process may take a while depending on your internet speed, so kick back and wait for it to be done. When the download is done, you’ll see a success message appear on your command line:
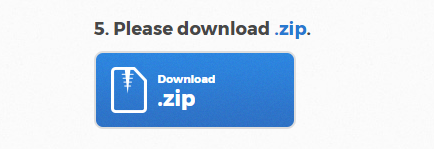
Now that you have all the components you need, you’ll also need to download some configuration files from outside the command line. To do that, you’ll need to go the VCCW homepage and download the zip file in Step 5 near the bottom of the page:
After saving the zip file to your computer, extract its contents to a directory of your choosing, and note the location of the vccw folder. Then, return to your command line and use the cd command to navigate to it. For example, we stored it under Documents/websites/vccw.
Once you’ve navigated to the vccw directory within your command line, you’ll need to enter the following:
vagrant up
If you’re in the right place, this command will enable Vagrant to start a new virtual machine using the VCCW configuration files, and it should display a few lines like this:

Give Vagrant some time now while it does its thing. Just remember to click Yes if Windows asks for any permissions related to VirtualBox during the process. Keep in mind, this usually takes a few minutes since the program is setting up an entire virtual machine and all the software that VCCW packs.
When the process is done, you’ll be able to access your new WordPress site by navigating to the address http://192.168.33.10/ on your browser. Your first order of business should probably be to update your HOSTS file to point that IP towards a specific URL that you can remember more easily.
Keep in mind that to access your site, you’ll need to start its associated virtual machine from the command line. Each machine consumes part of your computer’s resources while it’s up, so you don’t want to keep them on indefinitely.
To do this, you’ll have to navigate to your site’s directory (in this case Documents/websites/vccw) and use the vagrant up command once more. You can also suspend it by using the vagrant suspend command instead.
Using this process, you can set up as many virtual environments as you want and each of them is completely separate. If you intend to keep using Vagrant, you should probably check out all the app’s commands to get the most out of it.
3. MAMP (macOS and Windows)
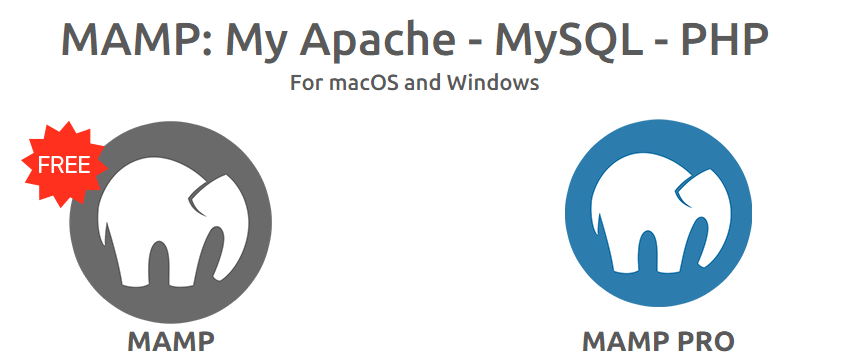
Unlike Vagrant, My Apache, MySQL, PHP (MAMP) is a full-fledged local development environment. That means it already comes with all the services you need to set up WordPress, and it provides you with an easy-to-use front end manager to control them.
In that regard, this tool is very similar to DesktopServer, except for the fact that it isn’t geared solely towards WordPress users. Once you’ve set up your local development environment, you’re free to use it for whatever purpose you want.
MAMP also packs a lot of services that you don’t usually see with this type of tool, including support for NGINX, Python, and Perl. In short, if you’re looking for a setup that supports both WordPress and other types of applications, this is probably the right choice for you.
Now that you know what MAMP is and what it does, let’s talk about how to set up WordPress with it.
Step #1: Install MAMP
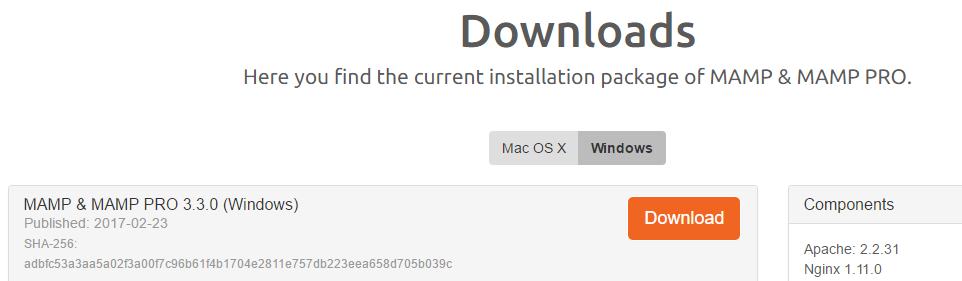
This step is relatively straightforward. Just head to the Downloads section of the MAMP homepage and download the version that matches your OS:
As soon as you start the installer, it will ask you if you want to set up MAMP PRO on top of your regular MAMP installation. Keep in mind, MAMP PRO is a premium upgrade that you’ll eventually have to pay for to keep using. For this guide, we’ll be sticking with the free version of MAMP, but you can also sign up for the trial of the pro version if you want.
The rest of the installer is simple; just keep clicking Next until it’s done, then move on to step number two.
Step #2: Create a Local WordPress Website with MAMP
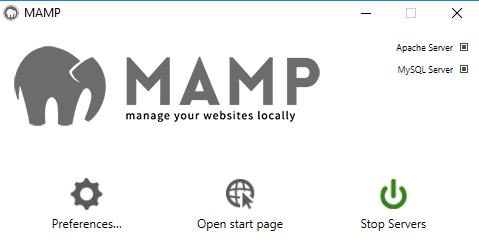
After installing MAMP, you’ll need to find its executable, either on your desktop or on your start menu, and click on it. This will launch the MAMP app, and the first time you do so, it’ll ask you to grant it access to run the Apache and MySQL services on your private network:
Before proceeding, you’ll need to download the latest version of WordPress to your computer from the official homepage. Then, move the zip file containing WordPress to a directory of your choice. This will act as the home for your new local site. For this example, we went with Documents > Websites > local-wordpress-site.
Once the file is there, extract its contents directly to the directory you created:
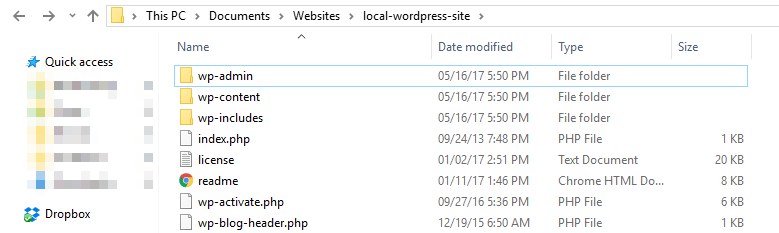
Remember this directory’s location, because we’ll need it in a minute. For now, return to MAMP and click on the button that reads Open Start Page. This will open the localhost/MAMP page on your default browser, which includes information about your setup:

Right now, all you need to do is click on the phpMyAdmin link right below the MySQL subheading. That will open the phpMyAdmin app, and once you’re in, you’ll need to look for the Databases tab at the top of the screen:
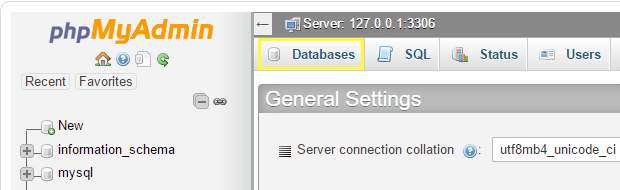
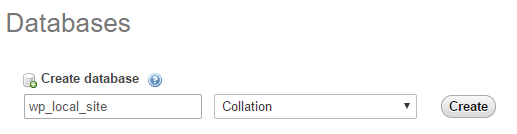
On the next screen, find the option that says Create database and enter a name for yours under it. This will be your WordPress database, so you’ll want to use a name that you can identify later. Next, click on Create:
Feel free to close the phpMyAdmin tab now and return to the MAMP app. Now all that’s left to do is to point it towards the directory where you extracted your WordPress files. To do that, click on Preferences and go to the Web Server tab:
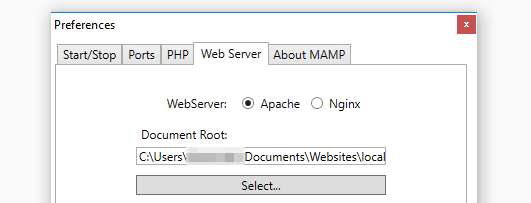
Keep the Apache option ticked, and click on the Select button under Document Root. Then, point the application towards the folder where your WordPress files are, which in our case is Documents > Websites > local-wordpress-site, and save your changes.
Now, go to your browser and type in localhost:80. In this case, 80 is the default port assigned to your Apache web server, and that address should lead you to the famous WordPress installer:
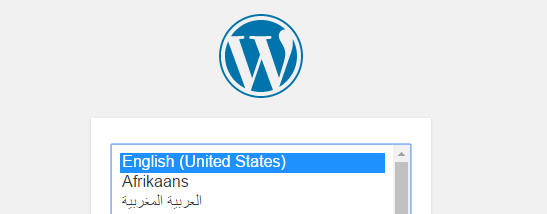
Unlike DesktopServer, MAMP requires you to enter your database settings manually. First choose a language, and then move on to the next step. On the next screen, you’ll want to type in the name of the database you created a minute ago and use root as both your username and password.
Keep in mind that using a default combination such as this is always a terrible idea for a live environment. However, since your test site isn’t publicly accessible, we’re OK. Now you can go through the rest of the installation process and start playing around with your local WordPress site.
Conclusion
If you’re a WordPress user, investing a little time in setting up a local installation can be one of the best decisions you’ll ever make. It provides you with a safe way to test new configurations before implementing them on your site. Plus, you can set up as many installations as you want, and using them isn’t difficult at all.
Let’s recap three of the best tools you can use to set up WordPress locally and what makes them unique:
- DesktopServer: One of the simplest tools available for setting up local WordPress sites.
- Vagrant: With this service, you can create multiple local sites using virtual computers.
- MAMP: A great option for setting up any type of local site you want, including a WordPress installation.
Image credit: Pixabay.
