How to Migrate a WordPress Website to a New Host
While it may not seem as though you’ll need to, migrating your WordPress site much more common than you think. The good news is that if you’re comfortable with the whole process, it should only take you a few hours to complete at most. What’s more, with the right tool, moving a website is downright simple.
There are plenty of ways to migrate a WordPress website, with several tools available to help you along the way. Since our preferred platform is WordPress, we recommend plugins as the most efficient way to get the job done. That way, you can move your website without having to manually copy every single file.
In this article, we’re going to talk about why you may want to migrate your WordPress site to a new web host. Then, we’ll teach you how to do it using the All-In-One WP Migration plugin in three steps. Let’s get started!
Why You Might Need to Migrate Your WordPress Website to a New Host
Migrating a site essentially involves moving all its related files from one server to another. In most cases, that new server will belong to a different web hosting provider, and here’s how that can benefit you:
- A different web host may provide you with better performance. Not all hosting providers are made equal, and performance tends to vary a lot depending on your pick.
- Access to a better support system. Just like performance, some providers will give you better support than others.
- A better fit for your budget. In some cases, you may want to move to a cheaper provider or opt for a more expensive option, if your website requires better performance.
- Access to WordPress-specific features. Considering the platform’s popularity, some web hosts offer WordPress-specific features to their clients. A2 Hosting, for example, is known for its optimized setups, which can make WordPress websites load incredibly fast.
There are plenty of solid reasons to move from one web host to another. If you feel you’re not getting your money’s worth with your current provider, moving to a different one is easier than you might imagine. In fact, some hosts (including us) will even migrate your site for free when you sign up to one of their plans.
How to Migrate Your WordPress Website With All-In-One WP Migration (In 3 Steps)

As we mentioned, carrying out a site migration yourself is best done with a suitable WordPress plugin. While there are plenty of options available, All-in-One WP Migration is one of the easiest to use, in our experience.
Before we get started, install and activate the plugin on the site you want to move (website A). Then, get WordPress set up and ready on your new web host (website B). We’re looking for a clean installation here, so once you get the platform ready, you can leave it be for a while.
Step #1: Export Your Original WordPress Website
The first thing we need to do is export site A. To do that, open your WordPress dashboard and go to the All-In-One WP Migration tab. Once you’re in, click on the Advanced options link:

Here, you can choose which parts of website A you don’t want to move over to your new web host. In most cases, you’ll want to leave all options unchecked, since we want an exact replica of the original website. However, you have the option to leave out comments, images, and more.
For now, click on the Export To button and choose the File option:

The plugin will create a single file for you to download, which may take a few minutes depending on the size of your website. When it’s done, you’ll be able to download it to your computer:

You can also upload your backup file directly to multiple cloud storage services using the Export To option. While we find manual downloads to be much more straightforward, the option is there if you need it.
Finally, if you need to re-download your backup file you can find a copy of it under All-In-One WP Migration > Backups. For now, let’s move on to step number two.
Step #2: Import Your Original Site’s Files to Your New Web Host
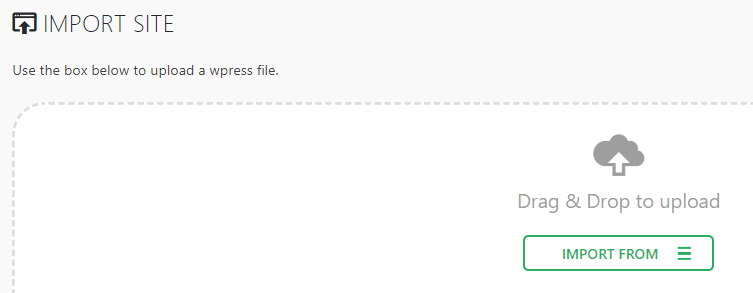
At this point, you’ll want to access website B and install the All-In-One WP Migration plugin as previously. Next, head to the All-In-One WP Migration > Import tab. You’ll find an option to upload a wpress file to your website:

Click on that option and choose the file you downloaded earlier. The upload process might take a while depending on your internet connection, so sit back and give it a few minutes.

When complete, the plugin will warn you that importing the file will override any current content on your website (which is why you should use a fresh installation). Click on continue to keep things moving:

When the import process is complete, the plugin will prompt you to go to Settings > Permalinks and click on the Save button twice. This will update website B’s permalink structure to match that of site A. You’ll then have an exact copy of website A on your new host.
Step #3: Update Your Domain’s Nameservers
At this stage, you’ve already migrated your website from one host to another. However, your domain name is probably still pointing towards site A’s hosting provider. You need to change that if you want visitors to find you at your new home.
This process will vary depending on the registrar you used when purchasing your domain name. The basic process is to access your domain management settings and look for an option to update its nameservers:

Next, you’ll need to replace your existing values with your new web host’s nameservers. If you’re not sure what they are, look through their documentation or ask their support team.
After updating your nameservers, you’ll need to wait for the changes to propagate through the web – it could take as much as two days, so be patient! As for your old website, you can feel free to delete or repurpose it for a new project. It’s up to you!
Conclusion
Moving from one web host to another is a complicated decision. You may have been a long-term customer of your current host; however, there are times when changing web hosts is the right decision. For example, it might be that your current provider doesn’t give you the performance you need, or they lack a good support team. If that’s the case, moving on can be the best decision for you and your website.
Here’s how you can migrate your WordPress site on your own using the All-In-One WP Migration plugin:
- Export your original WordPress website.
- Import your original site’s files into your new web host.
- Update your domain’s nameservers.
Image credit: Pixabay.


