How to Secure Your Website’s Virtual Private Server (7 Ways)
Security is a huge concern for most website owners. However, you don’t just need to worry about someone breaking into your site’s dashboard – it’s also vital that you protect the Virtual Private Server (VPS) where your website is hosted.
Fortunately, there are steps you can take to secure your VPS against malicious third parties. By modifying your standard security checklist, you can ensure that your virtual server is every bit as safeguarded as your website’s login page.
In this article, we’ll discuss what a VPS is and why it’s different from other hosting solutions. Then we’ll share seven strategies that can keep your virtual setup safe from hackers, malware, and other digital threats. Let’s get started!
An Introduction to VPS Hosting
A server is a computer that stores all the data and files that make up your website. Whenever someone types your URL into their web browser, the server displays your website to that person.
When creating a website, you can choose the kind of server to host it. There are several options, but shared hosting is a popular solution and consists of sharing key resources with other people.
Since the provider can host multiple sites on the same server, it can keep its operating costs low. This often makes shared hosting a more affordable option compared to other hosting solutions.
The opposite of shared hosting is dedicated hosting, where your site lives on a server that’s reserved for your use only. This ensures that you have access to 100 percent of the server’s resources.
Dedicated hosting is ideal if you have complex technical needs or your website requires more resources, such as an e-commerce store that attracts large traffic volumes. However, it is typically more expensive than shared hosting.
VPS hosting sits squarely between shared and dedicated hosting. With a VPS, your provider installs a virtual layer on top of the server’s Operating System (OS) using powerful virtualization technology.
The hosting provider can then partition each account on the server at the OS level. Although you’re sharing the same server hardware with other sites, you’re separated by virtual walls known as hypervisors.
In this way, a VPS simulates a dedicated server’s experience by providing guaranteed access to a portion of its resources. This includes the Central Processing Unit (CPU), Random-Access Memory (RAM), bandwidth, and dedicated storage.
How a VPS Compares to Shared Hosting
Shared hosting is a good fit for anyone who wants to build a website using popular Content Management Systems (CMSs) such as WordPress. However, it isn’t ideal if you want to install custom software or use a specific server configuration.
With VPS hosting, you’re separated from other users, so you’re free to install your own OS and software. This is excellent news for anyone with complex or unique technical needs.
With shared hosting, there’s also a chance you may wind up sharing a server with bad neighbors who consume an unfair portion of resources or experience an upsurge in traffic. While this is great for them, it can put your site at risk of downtime.
Since you’re sharing resources, you may also struggle to remain online if you suddenly require more firepower. Getting heavy traffic is every website owner’s dream. However, this dream can quickly turn into a nightmare if your shared server cannot provide the resources you need to process all of the extra requests. With VPS hosting, you’ll have exclusive access to a set of resources, putting you in a stronger position to survive spikes in traffic.
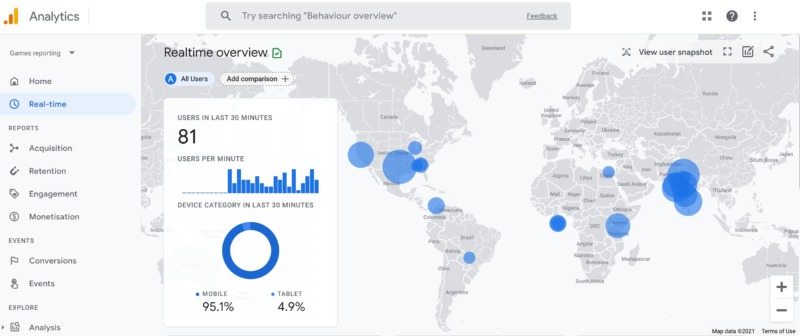
If you’re considering moving from shared hosting to a VPS plan, we recommend monitoring your traffic levels. If it is consistently growing, switching to a VPS may help you avoid a drop in performance or even downtime in the future:
It’s also a smart idea to monitor your site’s performance. As you add more content, you may see a steady decline in your website’s page loading times.
Shared hosting is not intended for sites that use large amounts of RAM. By switching to a VPS plan, you can continue to scale your website without damaging its performance.
How a VPS Compares to Dedicated Hosting
Dedicated and VPS hosting both provide you with exclusive, guaranteed access to a set of resources. However, there is one area where VPS hosting typically has the edge over dedicated hosting – pricing.
With VPS hosting, providers can place multiple people on the same servers, resulting in lower running costs. Hosts can then pass this benefit on to the customers, and offer VPS solutions at more affordable pricing.
This cost reduction makes a VPS a solid choice if you need full access to a set of resources but don’t necessarily have the budget to invest in a dedicated server. Therefore, VPS hosting is a popular choice among freelancers, startups, and small businesses, as they typically work to tighter budgets. It can also appeal to any organization that’s actively looking for ways to minimize costs.
However, it’s worth noting that if you have two servers with the same specifications, a dedicated server will have a performance advantage over an equivalent VPS server. Dedicated hosting also gives you near-total control over your server’s configuration.
This may even include enabling you to modify the server’s core software and hardware. Most websites won’t require this level of control, but it is an area where dedicated hosting has a leg up over a VPS setup.
How to Secure Your VPS (7 Ways)
If you opt for a virtual server, it’s important to secure your VPS from attack. Following general security best practices is a great start.
However, there are some unique ways to protect a virtual server against malicious third parties. Let’s look at seven methods for setting up a secure VPS.
1. Choose a Hosting Provider That Prioritizes Security
The most important way to set up a secure VPS is to choose the right hosting provider. Your provider should offer built-in security features, tools, and settings. If you have any questions or concerns regarding security, it also helps to have access to 24/7 customer support.
At A2 Hosting, we take security seriously, which is why all of our secure VPS hosting packages include HostGuard Management. This means our 24/7/365 Guru Crew Support team will be on-hand to manage your account’s network, hardware, software, and general security.
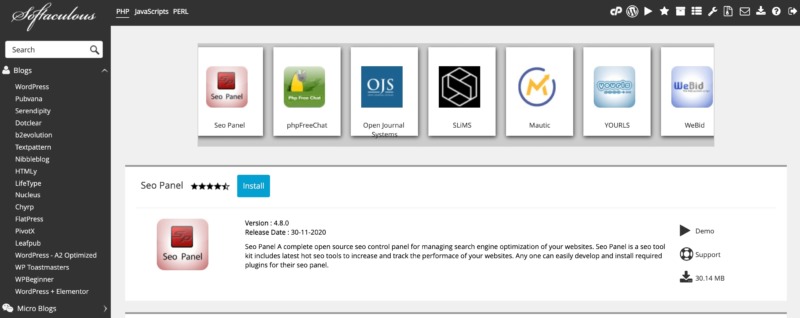
We also understand that every website’s needs are unique. That’s why we provide easy access to additional software and configuration settings. All of our VPS packages come with the popular cPanel control panel, which gives you full reign over your server’s setup. You can also use cPanel to access the Softaculous installer.
This popular installer provides access to a wide range of add-ons, tools, and software, including solutions that can help you build a more robust hosting environment:
Running outdated software can make your server more vulnerable to attack. If you choose to install additional software via Softaculous, we’ll send you an email every time a new release becomes available, to ensure that you don’t miss any critical security updates or bug fixes that can help keep your server safe.
2. Change Your Default Secure Shell (SSH) Login
Many VPS users connect to their servers using Secure Shell (SSH). This is a network protocol that enables you to communicate with a computer remotely over an unsecured network.
SSH is an important tool for managing your server. However, hackers may try to force their way into your SSH by bombarding it with common passwords in the form of a brute-force attack.
To ensure that you’re accessing SSH safely, we recommend using a strong password. For best results, it should feature a mix of upper and lower case letters, plus numbers and symbols.
We recommend using a minimum of eight characters, because longer passwords are more difficult to guess. It’s also wise to avoid common phrases and words, particularly ones that you can be associated with, such as your street name.
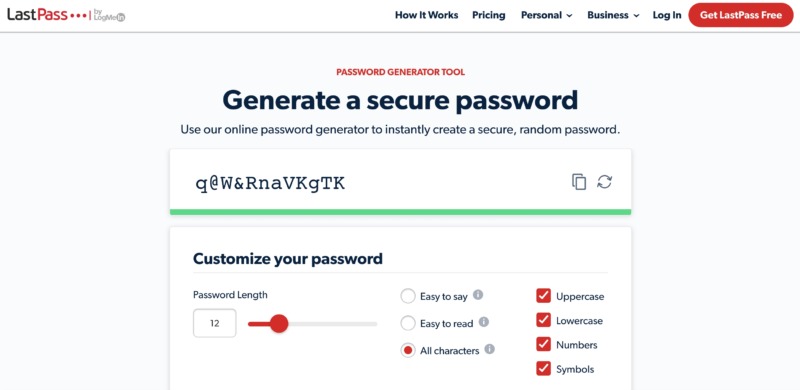
When choosing a password, it may help to use a password generator. Some popular choices include Secure Password Generator and the LastPass tool:
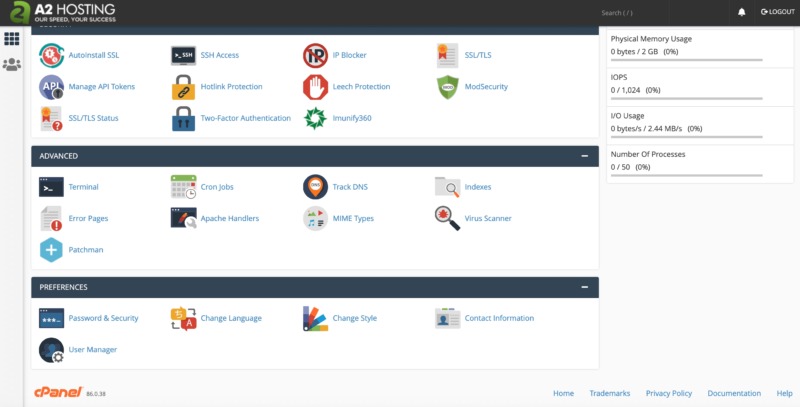
The steps for changing your SSH login will vary depending on your hosting provider and how your VPS is configured. A2 Hosting customers can change their SSH passwords by logging into the cPanel dashboard.
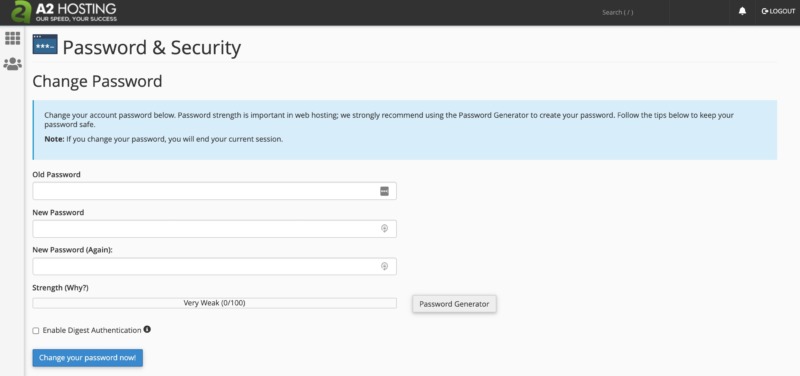
From there, navigate to Preferences > Password & Security:
You can now change your login details using the provided form. Alternatively, you can create a password using our generator tool:
If you’ve forgotten your SSH password, you can recover this information at any point by logging into your A2 Hosting Client Area. Then select Services > My Services:
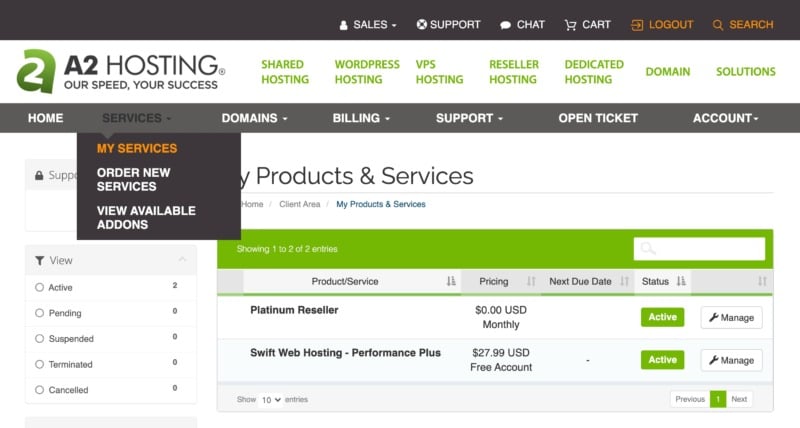
Now, browse to the account where you want to obtain your SSH login details and click on Manage. On that screen, you’ll find lots of information about your hosting account, including your SSH password.
3. Monitor Your VPS Server Logs
By monitoring your server logs, you can develop an understanding of what’s normal for your server. This puts you in a strong position to identify any suspicious behavior and stop a potential attack.
At A2 Hosting, we provide our customers with a choice of logging programs, including the Analog weblog analysis utility. You can use this utility to measure important metrics, including the number of requests your server receives, the medium response time, and the response status code distribution:

We also provide the AWStats log analyzer, which generates server statistics graphically. In particular, AWStats provides a graphical representation of your visitors’ countries. This can help you establish where your traffic typically originates from. If you notice lots of traffic coming from unusual or unexpected locations, it may indicate that your server is under attack.
These graphs can also display information about your most frequently visited pages. Malicious third parties often target vulnerable parts of a website, such as your login page.
If AWStats shows increased traffic to these pages, it could signal that your server is experiencing a brute-force attack:
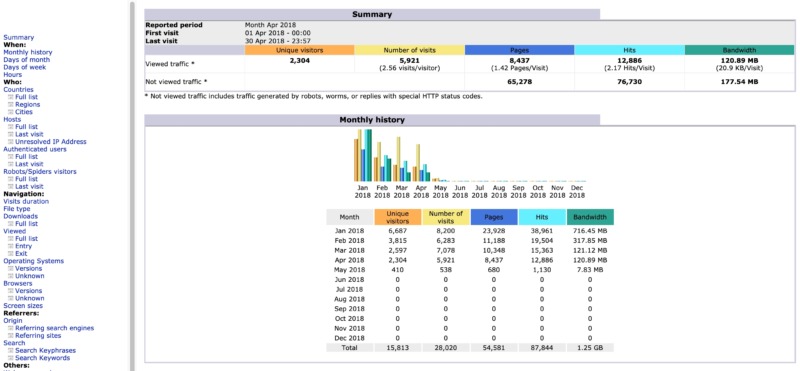
We also provide the Webalizer web server log analysis program. Webalizer produces detailed reports in Hypertext Markup Language (HTML) format that you can view directly in your web browser. This ensures that you always have access to detailed server log files.
4. Set Up a Firewall Using IP Tables
A firewall can prevent unwanted connections to your server, while still allowing legitimate visitors. At A2 Hosting, we support firewalls based on IP tables. This enables you to grant or deny access to specific services and IP addresses, giving you full control over your server’s traffic.
As a secure VPS user, you should have access to the iptables program, which is included in most Linux distributions. To start, open your console and verify that you don’t have any rules set by default:
iptables -L
This will return sets of rules or chains for your incoming, outgoing, and forwarding packets. If you want to add a new rule to this chain, you can use the following command:
iptables -A INPUT -p tcp -m tcp --dport 7822 -j ACCEPT
This example enables incoming Transmission Control Protocol (TCP) connections through port 7822, which SSH commonly uses. As an example, let’s add another rule which will enable incoming TCP connections through port 80 (HTTP).
This is the port that servers commonly use to transfer information:
iptables -I INPUT -p tcp -m tcp --dport 80 -j ACCEPT
If you’ve set up a Secure Sockets Layer (SSL) certificate, you’ll also typically want to enable access through port 443, which is the default for HTTPS. To do so, use the following:
iptables -I INPUT -p tcp -m tcp --dport 443 -j ACCEPT
You can also use iptables to block an IP address, such as if you’ve identified suspicious behavior originating from a particular source. You can create this rule using the following command:
iptables -I INPUT rulenum -s 'IP address goes here' -j DROP
The iptables program is a huge topic. For more information about how to use iptables, we recommend checking out our knowledge base.
5. Protect Your VPS Against Malware
It’s smart to monitor your server for malware using a tool such as the cPanel virus scanner. This cPanel program scans your server for all the threats recorded in Clam AntiVirus and the R-FX Networks virus definitions database.
To get started with this tool, simply log in to the A2 Hosting Customer Portal and open a support ticket. Our team will get to work installing this software on your secure VPS.
Once this process is complete, you can check your server for malware by logging into cPanel and navigating to Advanced > Virus Scanner:
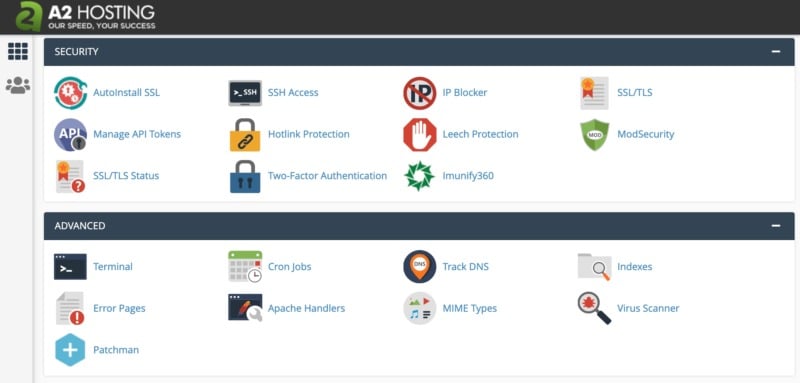
Then you can choose which directory to scan. If you select Scan Mail, cPanel will search for viruses in your incoming and outgoing messages. Meanwhile, Scan Public Web Space searches your public_html directory for infected files:
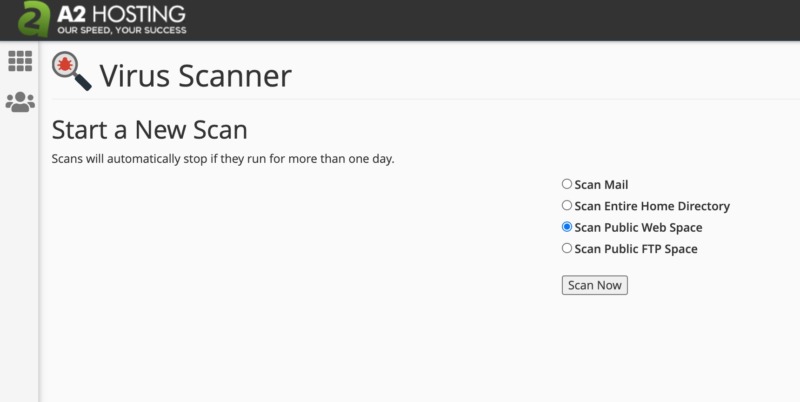
If you want to restrict the scan to your public_ftp directory, you can click on Scan Public FTP Space. Alternatively, you can search all the files in your account by selecting Scan Entire Home Directory.
Once you’ve made your decision, click on Scan Now. If cPanel’s virus scanner detects any infected files, you can either delete them or move them to your quarantine directory.
6. Use a Content Delivery Network (CDN)
A brute-force attack is when a malicious third party attempts to break into your server by trying many different password and username combinations. You can make your server much less susceptible to brute-force attacks by following password best practices.
However, some hackers use automated scripts and bots to bombard servers with thousands of login credentials in rapid succession. This means that a long, complex password may not always be enough to ensure a secure VPS.
To help you withstand brute-force attacks, we offer Cloudflare to all our customers. Cloudflare is a Content Delivery Network (CDN) that can identify and block malicious requests before they reach your server, making it significantly more difficult for nefarious agents to bombard it with passwords:
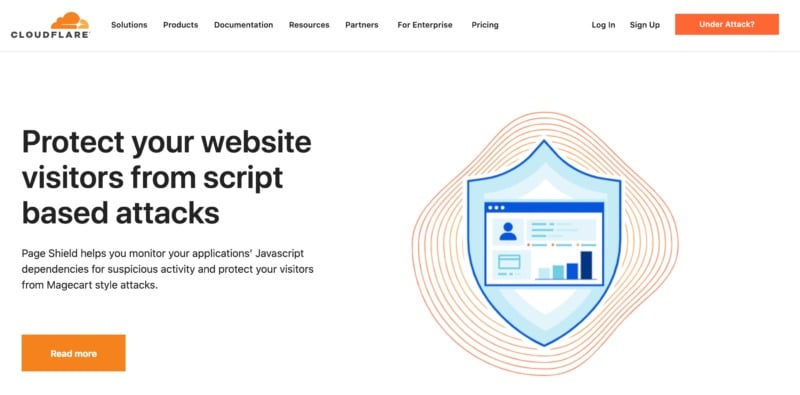
To configure Cloudflare, log into your cPanel dashboard and navigate to Software > Cloudflare. You can then either log into your account or create a new one. Once you’re successfully logged in, cPanel will guide you through the process of configuring Cloudflare for your VPS.
Cloudflare can also help protect your server against many other common attacks. This includes Distributed Denial-of-Services (DDoS) attacks in which a third party deliberately tries to overload your server to take your website offline.
7. Consider Disabling SSH Logins for the Root Account
The ‘root’ is an administrator-level account. If someone manages to gain access to it, they could perform practically any action on your VPS, including revoking access permissions to other legitimate users.
Since root represents ultimate control over your VPS, you’ll want to protect this highly-privileged account. You may want to consider disabling the root user and allowing another to assume its permissions. At this point, an additional username and password will be required to access root user privileges.
If you decide to disable logins for this account, it’s vital that you first create a normal user account. If you don’t perform this step, you’ll be unable to access your server when you disable the root account. The steps for creating a user account and granting it administrative privileges will vary depending on whether your server is running CentOS or Fedora, or Debian or Ubuntu.
Once you’ve created a normal user account, connect to your secure VPS as root. Then you can open the /etc/ssh/sshd_config file and locate this line:
PermitRootLogin yes
Change it to the following:
PermitRootLogin no
Next, add the below line, being sure to replace “username” with the normal user account you created in the previous step:
AllowUsers username
You can then save your changes and restart the SSH service using the appropriate command for your Linux distribution. For CentOS and Fedora, this command is:
service sshd restart
If you’re using Debian and Ubuntu, you can enter:
service ssh restart
Next, while you’re still logged in as root, verify that you can log into your new account using SSH. If this fails, check your settings. To avoid getting locked out of your server, it’s important that you don’t exit your root session until you’ve logged into the normal user account.
Conclusion
A VPS can be an affordable alternative to dedicated hosting, but it can also be a target for hackers. If you’re going to keep your virtual server safe, it’s important to take the necessary security precautions.
We recommend paying careful attention to your VPS security logs. Once you learn what’s normal for your particular server, you’ll be in a better position to identify suspicious behavior and take action before it escalates into a security breach. You can also strengthen your server against brute-force attacks by using a CDN and following password best practices.
The most effective way to protect your VPS against attack is to opt for a hosting provider that prioritizes security. At A2 Hosting, all our VPS hosting packages include HostGuard Management and 24/7/365 Guru Crew Support. We also ensure you have access to additional security tools, by providing cPanel and Softaculous as standard features.
Image credit: Pexels.
