- Dec 12, 2019
 0
0- by A2 Marketing Team
WordPress powers a sizable slice of the web. That means this Content Management System (CMS) gets plenty of updates, many of which are critical. Generally speaking, not updating WordPress to its latest version is a bad idea.
By updating WordPress, you ensure that your website remains secure, and you get access to new features as soon as they roll out. Moreover, updating WordPress usually only takes a few minutes.
If you want to make sure your update goes smoothly, however, there are a few preparatory steps you’ll need to take. In this article, we’ll go over three things to do before you update WordPress, so let’s jump right in!
1. Back Up Your Website
If there’s one thing you should never skip before you update WordPress, it’s backing up your website. Sometimes, major WordPress updates can temporarily break your website due to compatibility issues.
Having a recent backup means that even if that happens, it’s not a big issue, because you can simply restore your site. What’s more, backing up your site is easy, and there are a lot of ways you can go about it.
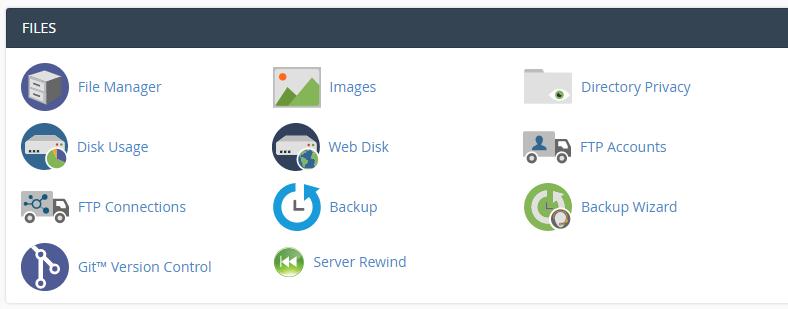
If you’re an A2 Hosting customer, you have access to cPanel. This hosting control panel enables you back up all your server files manually whenever you want. To do this, access your cPanel and navigate to the Files > Backup Wizard section:
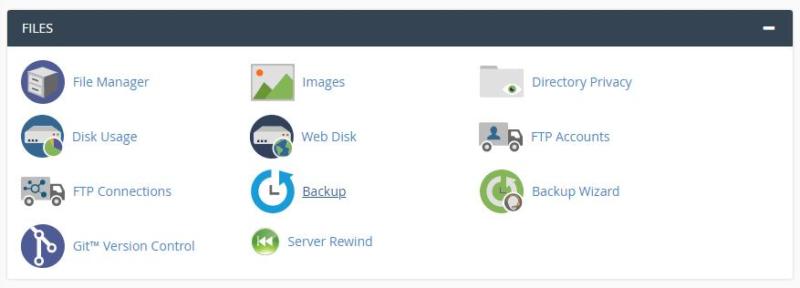
The backup wizard can help you generate full copies of your website’s files, including your home directory, databases, and email configuration.
To do so, simply click on the Back Up button:
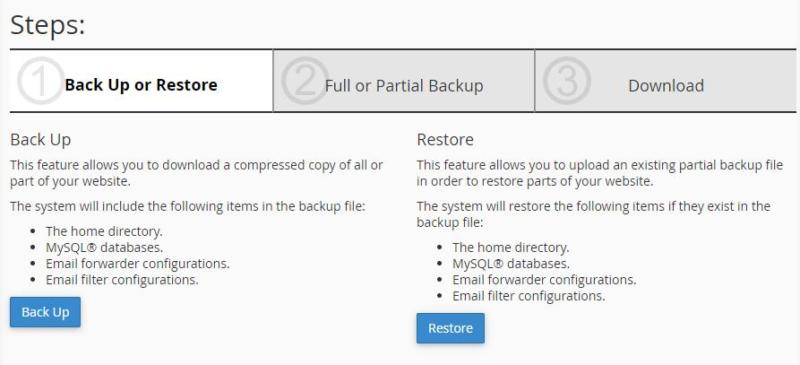
On the next screen, you can choose whether to generate a full or a partial backup. We recommend that you go with the full version, since it includes everything you might need:
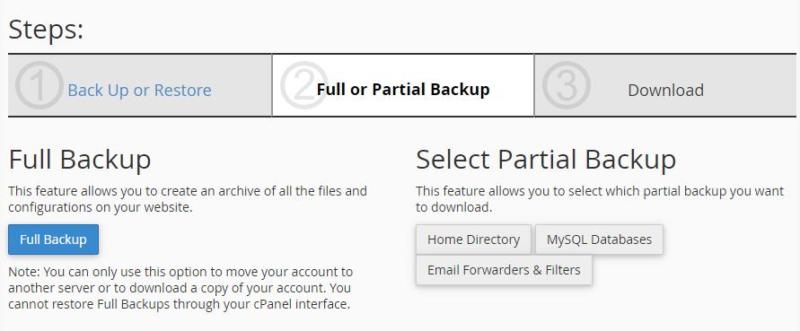
Then, select where you want the backup wizard to store the file it generates for you. By default, the file will be located in your home directory:
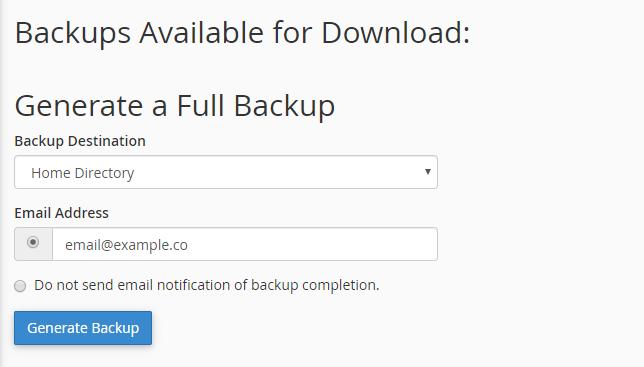
Depending on the size of your website, this process might take a while. Once your backup file is ready, remember to download it to your computer. To find it, you can use cPanel’s File Manager:
The file manager opens right to your home directory, so you should be able to spot your backup file right away:

Right-click on the file to download it, and you’re good to go.
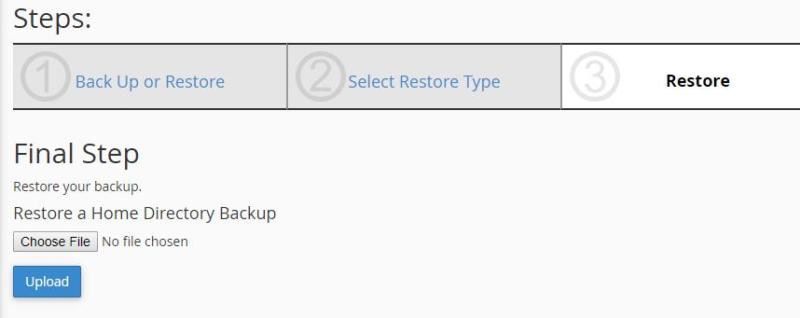
If you need to restore the backup because something went wrong during the update process, you can do so using the Backup Wizard. The wizard will ask you to upload the file from your computer, and it will take care of everything else:
You can also use plugins to create backups for your WordPress website if you prefer that approach.
2. Update Your Themes and Plugins
Before you update WordPress, you’ll want to make sure any plugins and themes you’re using are also on their latest versions. Usually, popular themes and plugins get updates whenever a new version of WordPress ships. Those updates work to ensure that everything remains compatible, and users run into as few errors as possible.
As a rule of thumb, you might want to wait a few days after an update rolls out, in order to make sure there aren’t any major bugs with it. That window also gives plugin and theme developers time to ship updates of their own.
Once you’re ready to update everything, the process is very straightforward. Navigate to the Plugins tab within your dashboard, and look for plugins with available updates:

Click on the update now option for any plugin displaying that message, and let WordPress do its thing.
When you’ve updated all of your plugins, you can head over to the Appearance > Themes tab and repeat the process:

Unlike with plugins, you only need to worry about updating whichever theme is active. Just as before, let WordPress run the update in the background. When it’s done, give your website a brief once-over to make sure everything is working as usual.
3. Turn Off Any Caching Plugins
Caching plugins can make your website feel faster, by storing copies of its content in your visitors’ browsers. This means that on subsequent visits, users won’t have to load all of your site’s files from scratch, improving its performance.
There’s one problem, though – caching plugins can cause conflicts when you update WordPress. You might not be able to load the new version of your site, and your users may experience the same problem.
The easiest way to solve this issue is to temporarily turn off any caching plugins before you run the update. To do that, return to the Plugins tab and look for any plugins related to caching:

Select the Deactivate button below the plugin you want to turn off. Just don’t forget to reactivate it once you’re done updating your site.
Updating WordPress to Its Latest Version
At this point, you’ve already done all the hard work. All that’s left now is to click on the WordPress update notice that should show up at the top of your dashboard:

If there are any plugins you haven’t updated yet, WordPress will warn you before you go any further:
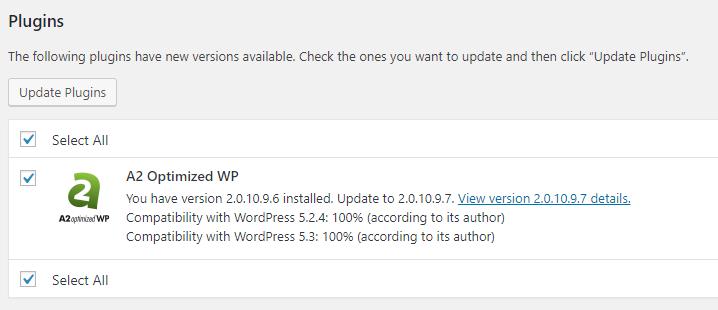
You took care of everything in advance, however, so hit the Update Now button and sit back while the CMS updates itself.
When the process is done, the first thing you should do is take a look around your website on the front and back ends. Check to see if your theme is displaying correctly, and if your plugins are working properly. If everything looks good, go ahead and re-enable your caching plugin, and your site has been safely updated.
Conclusion
Updating WordPress to its latest version is simple. The problem is that the larger your website becomes, the more running parts it will include. Some of those parts, such as themes and plugins, may not play nicely with new versions of WordPress.
To update your site safely, you need to prepare beforehand. Here’s what you’ll need to do to ensure that everything goes smoothly:
- Back up your website.
- Update your themes and plugins.
- Turn off any caching plugins.
Image credit: Pixabay.
