How to set up the Spike email client on Windows
This article demonstrates how to set up the Spike email client on Microsoft Windows to access an A2 Hosting e-mail account.
To configure Spike to work with your A2 Hosting e-mail account, follow these steps:
- Start Spike.
- In the Welcome to Spike dialog box, in the Add Email Address text box, type the e-mail address of the account you created in cPanel, and then click Continue:
 The user interface displayed in these images may differ slightly from the version you have installed.
 - In the Password text box, type the password for the e-mail account you created in cPanel.
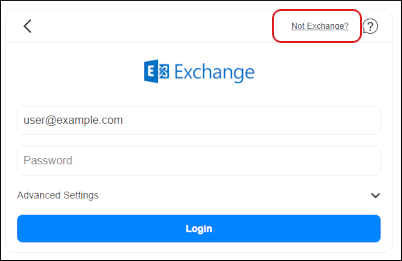
In the top right corner, click Not Exchange:
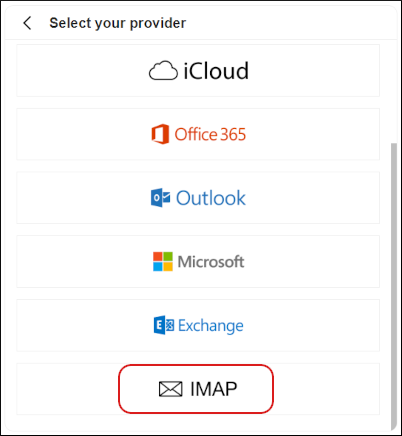
In the Select your provider dialog box, scroll down and click IMAP:
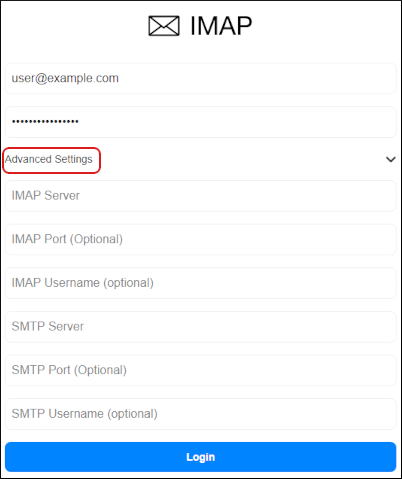
In the IMAP dialog box, click Advanced Settings:
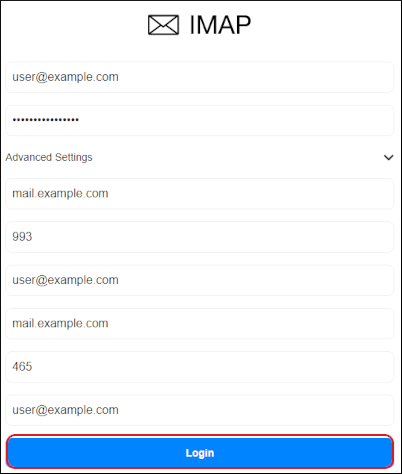
- In the IMAP Server text box, type mail.example.com, where example.com represents your domain name.
- In the IMAP Port text box, type 993.
- In the IMAP Username text box, type the e-mail address of the account you created in cPanel.
- In the SMTP Server text box, type mail.example.com, where example.com represents your domain name.
- In the SMTP Port text box, type 465.
- In the SMTP Username text box, type the e-mail address of the account you created in cPanel.
Click Login:
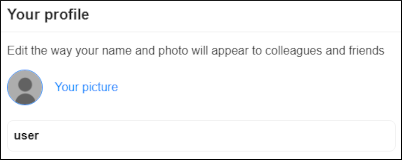
Spike tests the configuration settings, and then the Your profile dialog box appears. In the user text box, type the name you want to appear on messages you send from the account. You can also optionally add a picture:
In the bottom right corner, click the white check mark icon:

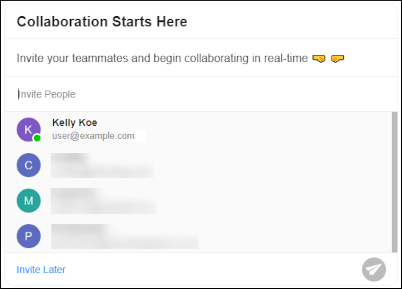
In the Collaboration Starts Here dialog box, select any contacts you want to add, or click Invite Later:
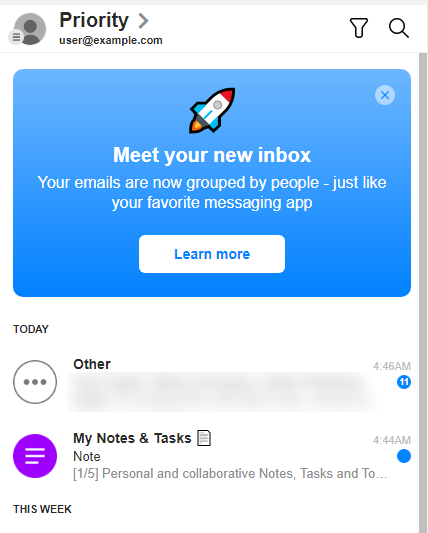
Spike downloads any messages in the account, and the inbox appears:
More Information
For more information about Spike, please visit https://www.spikenow.com/.
Article Details
- Product: All accounts
Grow Your Web Business
Subscribe to receive weekly cutting edge tips, strategies, and news you need to grow your web business.
No charge. Unsubscribe anytime.
Did you find this article helpful? Then you'll love our support. Experience the A2 Hosting difference today and get a pre-secured, pre-optimized website. Check out our web hosting plans today.