How to set up the Opera Mail client
This article demonstrates how to set up Opera Mail to access an A2 Hosting e-mail account and send messages.
To configure Opera Mail to work with your A2 Hosting e-mail account, follow these steps:
- Make sure you have already created at least one e-mail account for your domain. If you have not done this, please see this article to learn how to create an e-mail account using cPanel.
- Start Opera Mail.
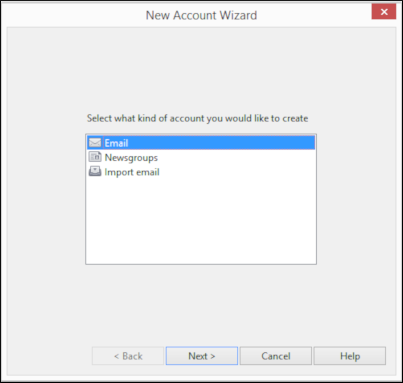
- If you are running Opera Mail for the first time, the New Account Wizard dialog box appears automatically. Otherwise, click Opera Mail in the top-left corner of the application window, click , and then click to start the New Account Wizard.
- Select Email, and then click :
In the Real name text box, type the name that you want to appear on messages you send:
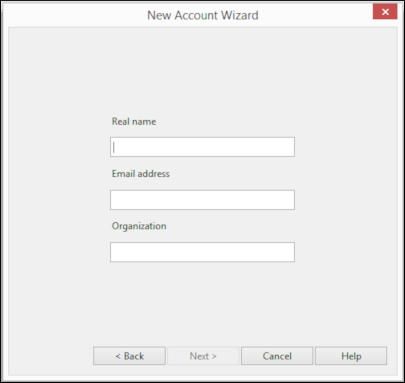
In the Email address text box, type the e-mail address of the account you created in cPanel, and then click .
You can optionally specify an organization in the Organization text box.In the Login name text box, type the e-mail address of the account you created in cPanel:
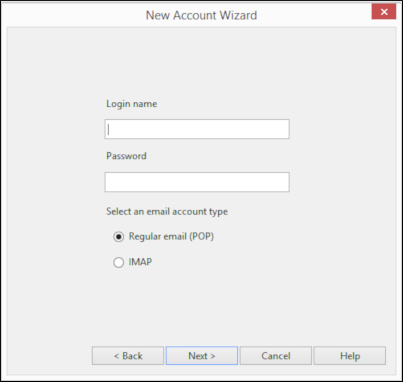
- In the Password text box, type the password for the e-mail account you created in cPanel.
Select the type of incoming mail server that you want to use:
- If you want to use POP, select Regular email (POP).
- If you want to use IMAP, select IMAP.
- Click .
In the Incoming server text box, type the A2 Hosting server name for your account, followed by one of the following:
- If you want to use POP, add :995 to the server name.
- If you want to use IMAP, add :993 to the server name.
For example, if your A2 Hosting server name is a2s87.a2hosting.com and you want to use IMAP, type a2s87.a2hosting.com:993.
For information about how to determine your account's server name, please see this article.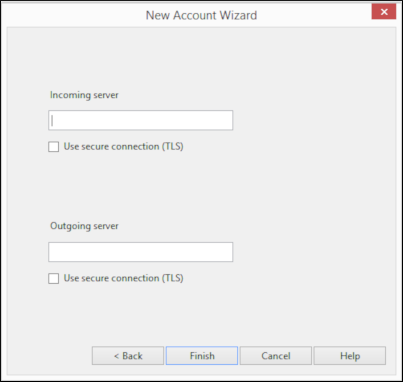
- Select the Use secure connection (TLS) check box.
In the Outgoing server text box, type the A2 Hosting server name for your account, followed by :465. For example, if your A2 Hosting server name is a2s87.a2hosting.com, type a2s87.a2hosting.com:465.
For information about how to determine your account's server name, please see this article.- Select the Use secure connection (TLS) check box.
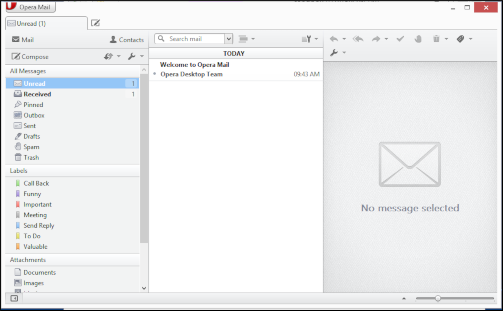
Click . Opera Mail displays the inbox and downloads any messages in the account:
Article Details
- Product: All accounts
- Level: Beginner
Grow Your Web Business
Subscribe to receive weekly cutting edge tips, strategies, and news you need to grow your web business.
No charge. Unsubscribe anytime.
Did you find this article helpful? Then you'll love our support. Experience the A2 Hosting difference today and get a pre-secured, pre-optimized website. Check out our web hosting plans today.