How to convert your WordPress site to a static site
This article describes how to create a static site from a traditional, dynamically generated WordPress site.
Table of Contents
Why create a static site?
Creating a site with static content offers several advantages over a dynamically generated WordPress site:
- Performance: Dynamically generated WordPress sites must pull information from a database, and parse and run PHP scripts. Static sites, however, only serve pre-generated HTML and CSS to browsers. This can result in significantly improved page load times and SEO rankings.
- Security: Security exploits on WordPress (or one of its many plugins) do happen. With a static site, however, no external data sources (like a database) are accessed, and PHP is not run. This greatly reduces a site's attack surface, and the need to constantly keep up-to-date with security patches.
However, there are some site usage scenarios where static content may not be appropriate:
- Ecommerce and forum sites: These types of sites rely heavily on dynamically generated content. WooCommerce, for example, does not work in a static environment.
- Dynamic content: Any dynamically generated content, such as AJAX-based widgets, may not function properly in a static environment.
Creating a static site
Before you create the static site content, you should set up a staging site. The staging site runs the original, dynamically generated WordPress site, while the primary site uses the static site content. Usually, you use a subdomain or addon domain for the staging site, and your primary domain name for the static site content.
For generating static site content from the staging site, there are several plugins available that do this. In this article, we use the Simply Static plugin. With this plugin, you can easily generate static content files from your existing WordPress site. To do this, follow these steps:
- Log in to your WordPress staging site as the administrator.
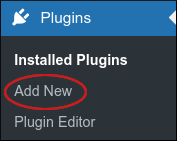
- On the Dashboard in the left sidebar, click Plugins, and then click Add New:
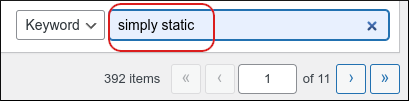
On the Add Plugins page, in the Search plugins text box, type simply static and then press Enter:
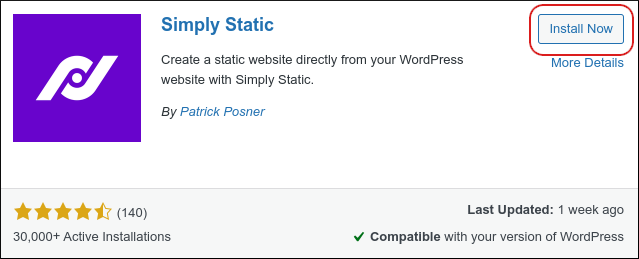
Locate the Simply Static section, and then click Install Now:
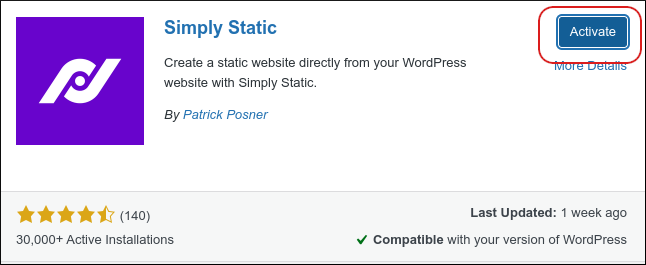
When installation is complete, click Activate:
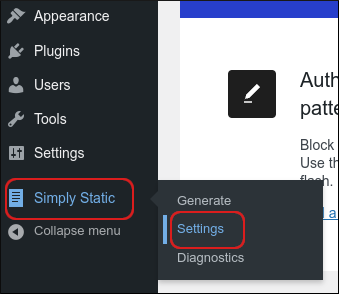
In the left sidebar, click Simply Static, and then click Settings:
The settings page appears. Configure the settings you want, and then click SAVE CHANGES.
There are many settings available for customizing how the static site is generated. For detailed information about these settings, please see the official Simply Static documentation at https://patrickposner.dev/docs/simply-static.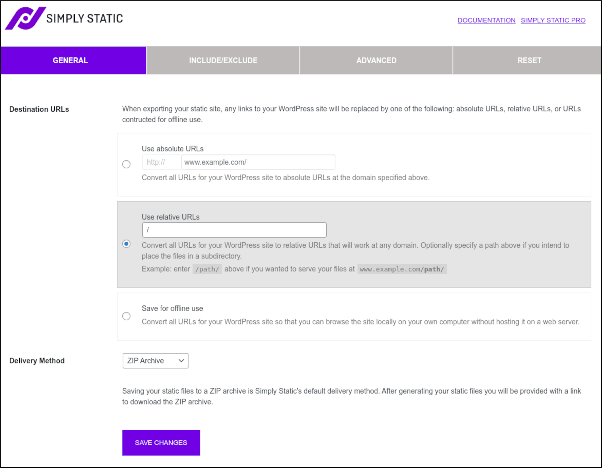
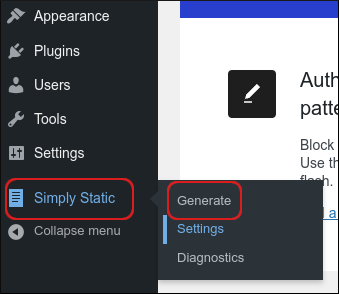
To generate the static site, in the left sidebar, click Simply Static, and then click Generate:
On the generate page, click GENERATE STATIC FILES:
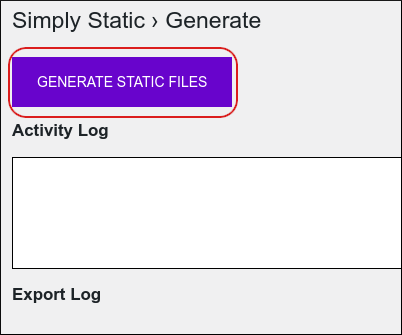 The Activity Log and Export Log sections show detailed updates about the site generation process.
- You are now ready to deploy the static files to your primary website.
More Information
For more information about the Simply Static plugin, please visit https://wordpress.org/plugins/simply-static.
Article Details
- Product: All accounts
Did you find this article helpful? Then you'll love our support. Experience the A2 Hosting difference today and get a pre-secured, pre-optimized website. Check out our web hosting plans today.