How to set up a WordPress cron job
This article describes how to configure a cron job for WordPress.
The virtual WordPress “cron job”
A cron job is a task scheduled to run automatically at specific intervals. For example, a cron job could automatically back up a file every six hours.
In its default configuration, WordPress does not use a real cron job for scheduling and other related tasks. Instead, whenever a page is loaded on a WordPress site, WordPress runs the wp-cron.php file. Although this “virtual” cron job is convenient, it has a few disadvantages:
- Running the wp-cron.php file every time WordPress loads a page is unnecessary, and can negatively affect server performance, particularly on sites that receive a lot of traffic.
- For a site that does not receive a lot of traffic on the other hand, it can be a significant amount of time before a visitor loads a page (and triggers the cron task). This can cause missed schedules for publishing posts and other unintended effects.
To resolve these issues, you can disable the default virtual WordPress cron job, and configure a real cron job. To do this, follow the procedures below.
Disabling the virtual WordPress cron job
To disable the default virtual WordPress cron job, follow these steps:
- Log in to your account using cPanel or SSH.
- Using the cPanel File Manager or the command line, open the wp-config.php file in a text editor.
The wp-config.php file is located in the directory where you installed WordPress. Usually, this is the public_html directory.
- Add the following line to the wp-config.php file:
define('DISABLE_WP_CRON', true);Make sure you add the previous line before the following line in the wp-config.php file:
/* That's all, stop editing! Happy publishing. */
- Save the changes to the wp-config.php file and then exit the text editor. The virtual WordPress cron job is now disabled.
Configuring a real cron job for WordPress
After you have disabled the default WordPress cron configuration in the wp-config.php file, you are ready to set up a real cron job that runs at fixed intervals regardless of site traffic.
If your account includes cPanel access, you can use it to configure the cron job. Alternatively, you can configure the cron job from the command line, or use the A2 Optimized plugin for WordPress.
Method #1: Use cPanel
To set up a WordPress cron job using cPanel, follow these steps:
- Log in to cPanel.
- In the Advanced section of the cPanel home screen, click Cron jobs.
- Under Cron Email, type the e-mail address that you want to receive notifications, and then click . Every time the cron job runs, the e-mail account will receive a message.
If you do not want to receive e-mail notifications for the cron job, you can append >/dev/null 2>&1 to the command, which redirects all output to /dev/null.
- Under Add New Cron Job, in the Common Settings list box, select Twice an hour.
You can run cron jobs a maximum of every 15 minutes on shared and reseller accounts. A 30-minute interval for the WordPress cron job should be more than sufficient.
- In the Command text box, type the following line:
cd ${HOME}/public_html; /usr/local/bin/php -q wp-cron.phpThis line assumes that you installed WordPress in the document root (public_html) directory. If you installed WordPress in another directory, modify the cd command to change to that directory instead. - Click . The new cron job settings take effect immediately.
Method #2: Use the command line
To set up a WordPress cron job using the command line, follow these steps:
- Log in to your account using SSH.
- At the command prompt, type the following command:
crontab -e
- Type o to enter editing mode and start a new line of text.
Type the following line, replacing username with your own A2 Hosting account username:
*/30 * * * * cd ${HOME}/public_html; /usr/local/bin/php -q wp-cron.php- This line sets the cron job to run every 30 minutes. If you are on an unmanaged platform you can run cron jobs as frequently as you want. On shared and reseller accounts, however, you can only run cron jobs a maximum of every 15 minutes. A 30-minute interval for the WordPress cron job should be more than sufficient.
- This line assumes that you installed WordPress in the document root (public_html) directory. If you installed WordPress in another directory, modify the cd command to change to that directory instead.
- Press Esc, type :wq and then press Enter. The new cron job settings take effect immediately.
Method #3: Use the A2 Optimized plugin
The A2 Optimized plugin enables you to quickly and easily disable the virtual WordPress cron and enable a system cron instead.
To enable a system cron job for WordPress using the A2 Optimized plugin, follow these steps:
- Log in to WordPress as the administrator.
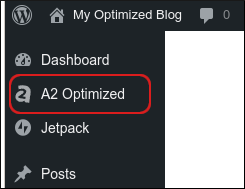
- Under Dashboard, click A2 Optimized:
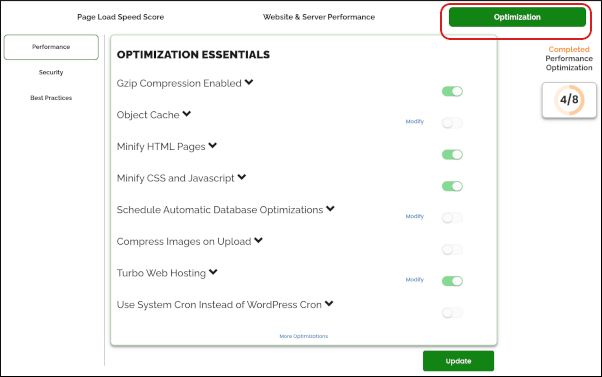
Click the Optimization tab:
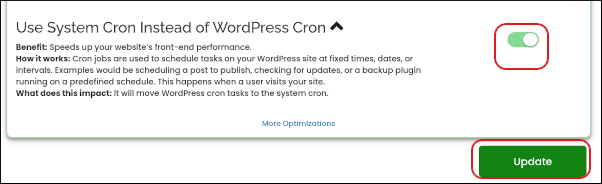
In the Use System Cron Instead of WordPress Cron section, click the slider to enable the option, and then click Update. A2 Optimized disables the WordPress virtual cron and creates a system cron job:
Article Details
- Level: Intermediate
Grow Your Web Business
Subscribe to receive weekly cutting edge tips, strategies, and news you need to grow your web business.
No charge. Unsubscribe anytime.
Did you find this article helpful? Then you'll love our support. Experience the A2 Hosting difference today and get a pre-secured, pre-optimized website. Check out our web hosting plans today.