How to boost WordPress performance with the A2 Optimized plugin
The A2 Optimized for WordPress plugin combines custom A2 Hosting settings and functionality from third-party plugins to provide speed and security optimizations for your WordPress site.
You can install the A2 Optimized for WordPress plugin using Softaculous. You can also install and configure the A2 Optimized for WordPress plugin manually if you already have an established WordPress site.
Here are just some of the optimizations and security features the A2 Optimized for WordPress plugin provides:
- Page caching.
- Database caching.
- Redis/memcached object caching.
- HTML/CSS/JavaScript minification.
- Image compression.
- Page compression with Gzip.
- CAPTCHAs on comment forms and login pages.
- Randomized login page URLs.
Installing the A2 Optimized for WordPress plugin using Softaculous
If you are installing a new WordPress site, you can easily install WordPress and the A2 Optimized for WordPress plugin at the same time using Softaculous. To do this, follow these steps:
- Log in to cPanel.If you do not know how to log in to your cPanel account, please see this article.
- Open Softaculous:
- If you are using the Jupiter theme, on the Tools page, in the Softaculous Apps Installer section, click Softaculous Apps Installer (or any of the icons under Scripts or Categories).
- If you are using the Paper Lantern theme, in the SOFTACULOUS APPS INSTALLER section of the cPanel home screen, click Softaculous Apps Installer (or any of the icons under Scripts or Categories).
- In the left sidebar, click Blogs, and then click Wordpress - A2 Optimized.
- Click Install. The installation page appears.
- In the Choose Protocol list box, select the protocol.If you have an SSL certificate installed on your site, select https:// or https://www. If you do not have an SSL certificate installed on your site, select http:// or http://www.
- In the Choose Domain list box, select the domain for installation, or accept the default value.
- In the In Directory text box, type the directory where you want to install the application, or accept the default value.If you want your domain name to go directly to the application, make sure the In Directory text box is blank.
- In the Database Name text box, type the name of the database to create for the application, or accept the default value.
- In the Table Prefix text box, type the database table prefix, or accept the default value.
- In the Site Name text box, type the site name. By default, the site name appears in the title bar of users' web browsers when they visit your site.
- In the Site Description text box, type the site description. By default, the site description also appears in the title bar of users' web browsers when they visit your site.
- In the Admin Username text box, type the administrator username.
- In the Admin Password text box, type the administrator password.Make sure that you choose a strong password! The Softaculous installer provides a ranking for your password's strength, and turns green when the password is strong. Alternatively, you can click the
 icon next to the Admin Password text box, and Softaculous generates a strong, random password for you.
 - In the Admin Email text box, type the site administrator e-mail address.
- In the Select Language list box, select the default language for the application.
- Click the
 icon to expand Advanced Options.
 - If you do not want to receive e-mail notifications when application updates are available, select the Disable Update Notifications Emails check box.
A2 Hosting strongly recommends that you receive e-mail notifications when application updates are available. Keeping your site updated helps prevent unauthorized access attempts and data loss.
- To receive site configuration information after the installation is complete, type an e-mail address in the Email installation details to text box.
The e-mail message includes important details about your installation, such as the administrative username, password, and login URL.
- Review the installation options and settings, and then click . When installation is complete, Softaculous provides information about the application's configuration. Softaculous installs WordPress and the A2 Optimized for WordPress plugin.
- Click the Administrative URL hyperlink, and then log in to WordPress using the username and password you specified in steps 12 and 13. Make sure that you also type the CAPTCHA correctly, or you will not be able to log in.
To enhance security, the A2 Optimized for WordPress plugin changes the default WordPress administrative login URL to a random four-character sequence. The default WordPress administrative URL (wp-admin) does not work! When the WordPress Dashboard appears, there is a message at the top that reminds you to bookmark the login page URL so you can easily log in again.
Installing the A2 Optimized for WordPress plugin manually
If you already have an existing WordPress site, you can install the A2 Optimized for WordPress plugin manually. To do this, follow these steps:
- Log in to WordPress as the administrator.
- Under Dashboard, click Plugins, and then click Add New.
- In the Search Plugins text box, type a2 optimized and then press Enter.
- Locate the A2 Optimized WP plugin, and then click Install Now. WordPress installs the plugin.
- After the plugin is installed, click Activate. You are now ready to configure the plugin.
When the A2 Optimized for WordPress plugin is activated, it prevents you from installing certain plugins that can cause compatibility problems. These plugins are:
- wp-super-cache
- wp-fastest-cache
- wp-file-cache
- better-wp-security
- wordfence
If you try to install one of these plugins while the A2 Optimized for WordPress plugin is activated, it will block installation and display the following message:
The Plugin you are trying to install has been flagged as incompatible with A2 Optimized.
Configuring the A2 Optimized for WordPress plugin
When you install the A2 Optimized for WordPress plugin using Softaculous, all of the optimizations are enabled by default. When you manually install the A2 Optimized for WordPress plugin on an established WordPress site, you can selectively enable optimizations.
To configure the plugin or view its current settings, follow these steps:
- Log in to WordPress as the administrator.
- Under Dashboard, click A2 Optimized:
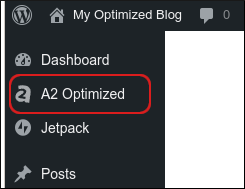
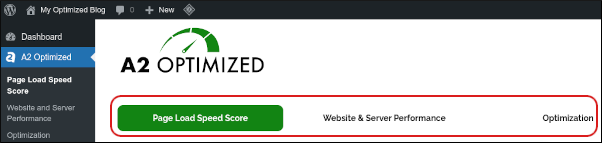
Three tabs appear on the A2 Optimized page:
- Page Load Speed Score
- Website & Server Performance
- Optimization
On the Page Load Speed Score tab, click Run check to update the scores for:
- Your site's performance on mobile and desktop.
- Optimization scores for performance, security, and best practices.
Click Go to Recommendations to see how you can improve your site's scores.

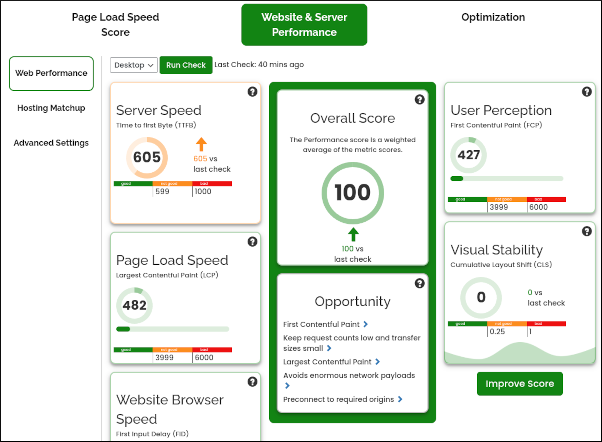
On the Website & Server Performance tab, you can view mobile and desktop scores for:
- Time to First Byte (TTFB).
- Largest Contentful Paint (LCP).
- First Input Delay (FID).
- First Contentful Paint (FCP).
- Cumulative Layout Shift (CLS).
- An overall performance score for your site.
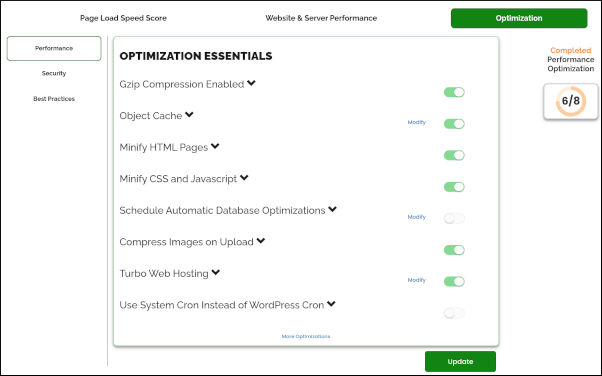
On the Optimization tab, you can enable and disable the following performance optimizations:
- Page compression with Gzip.
Gzip compression is enabled automatically. For more information about what Gzip compression and the mod_deflate module do, please see this article.
- Object caching: You can use Redis or memcached to help accelerate page load times. Redis and memcached work by caching in RAM frequently accessed data, such as the results of API calls, database queries, and more.
- HTML minification.
- CSS and JavaScript minification.
- Automatic database optimizations.
- Image compression on uploads.
- Turbo Web Hosting: A2 Hosting's Turbo Web Hosting uses several optimizations to give you account the performance boost it needs.
- Use the system cron instead of the WordPress “pseudo-cron”.
- Dequeue WooCommerce Cart Fragment AJAX calls.
Additionally, you can enable and disable the following security optimizations:
- Lock editing of plugins and themes from the WordPress administration interface.
When this optimization is enabled, you cannot modify plugin or theme files by using the WordPress administration interface. To modify these files, you can use a text editor from the command line, or one of the editors in the cPanel File Manager.
- Change the WordPress login URL.
- Use CAPTCHAs for reader comments and to log in to WordPress.
- Block unauthorized XML-RPC requests.
- Restrict direct access to configuration files and comment forms.
- Page compression with Gzip.
Updating the A2 Optimized for WordPress plugin
The A2 Optimized for WordPress plugin updates itself automatically. You do not need to do anything to keep the plugin running at the newest version.
Removing the A2 Optimized for WordPress plugin
If you want to remove the A2 Optimized for WordPress plugin for any reason, follow these steps:
- Log in to WordPress as the administrator.
- Under Dashboard, click Plugins, and then click Installed Plugins.
- Under A2 Optimized WP, click Deactivate. WordPress deactivates the plugin.
- Under A2 Optimized WP, click Delete.
- Click OK to confirm the deletion. WordPress removes the plugin.
Article Details
- Product: Shared Hosting
- Level: Beginner
Grow Your Web Business
Subscribe to receive weekly cutting edge tips, strategies, and news you need to grow your web business.
No charge. Unsubscribe anytime.
Did you find this article helpful? Then you'll love our support. Experience the A2 Hosting difference today and get a pre-secured, pre-optimized website. Check out our web hosting plans today.